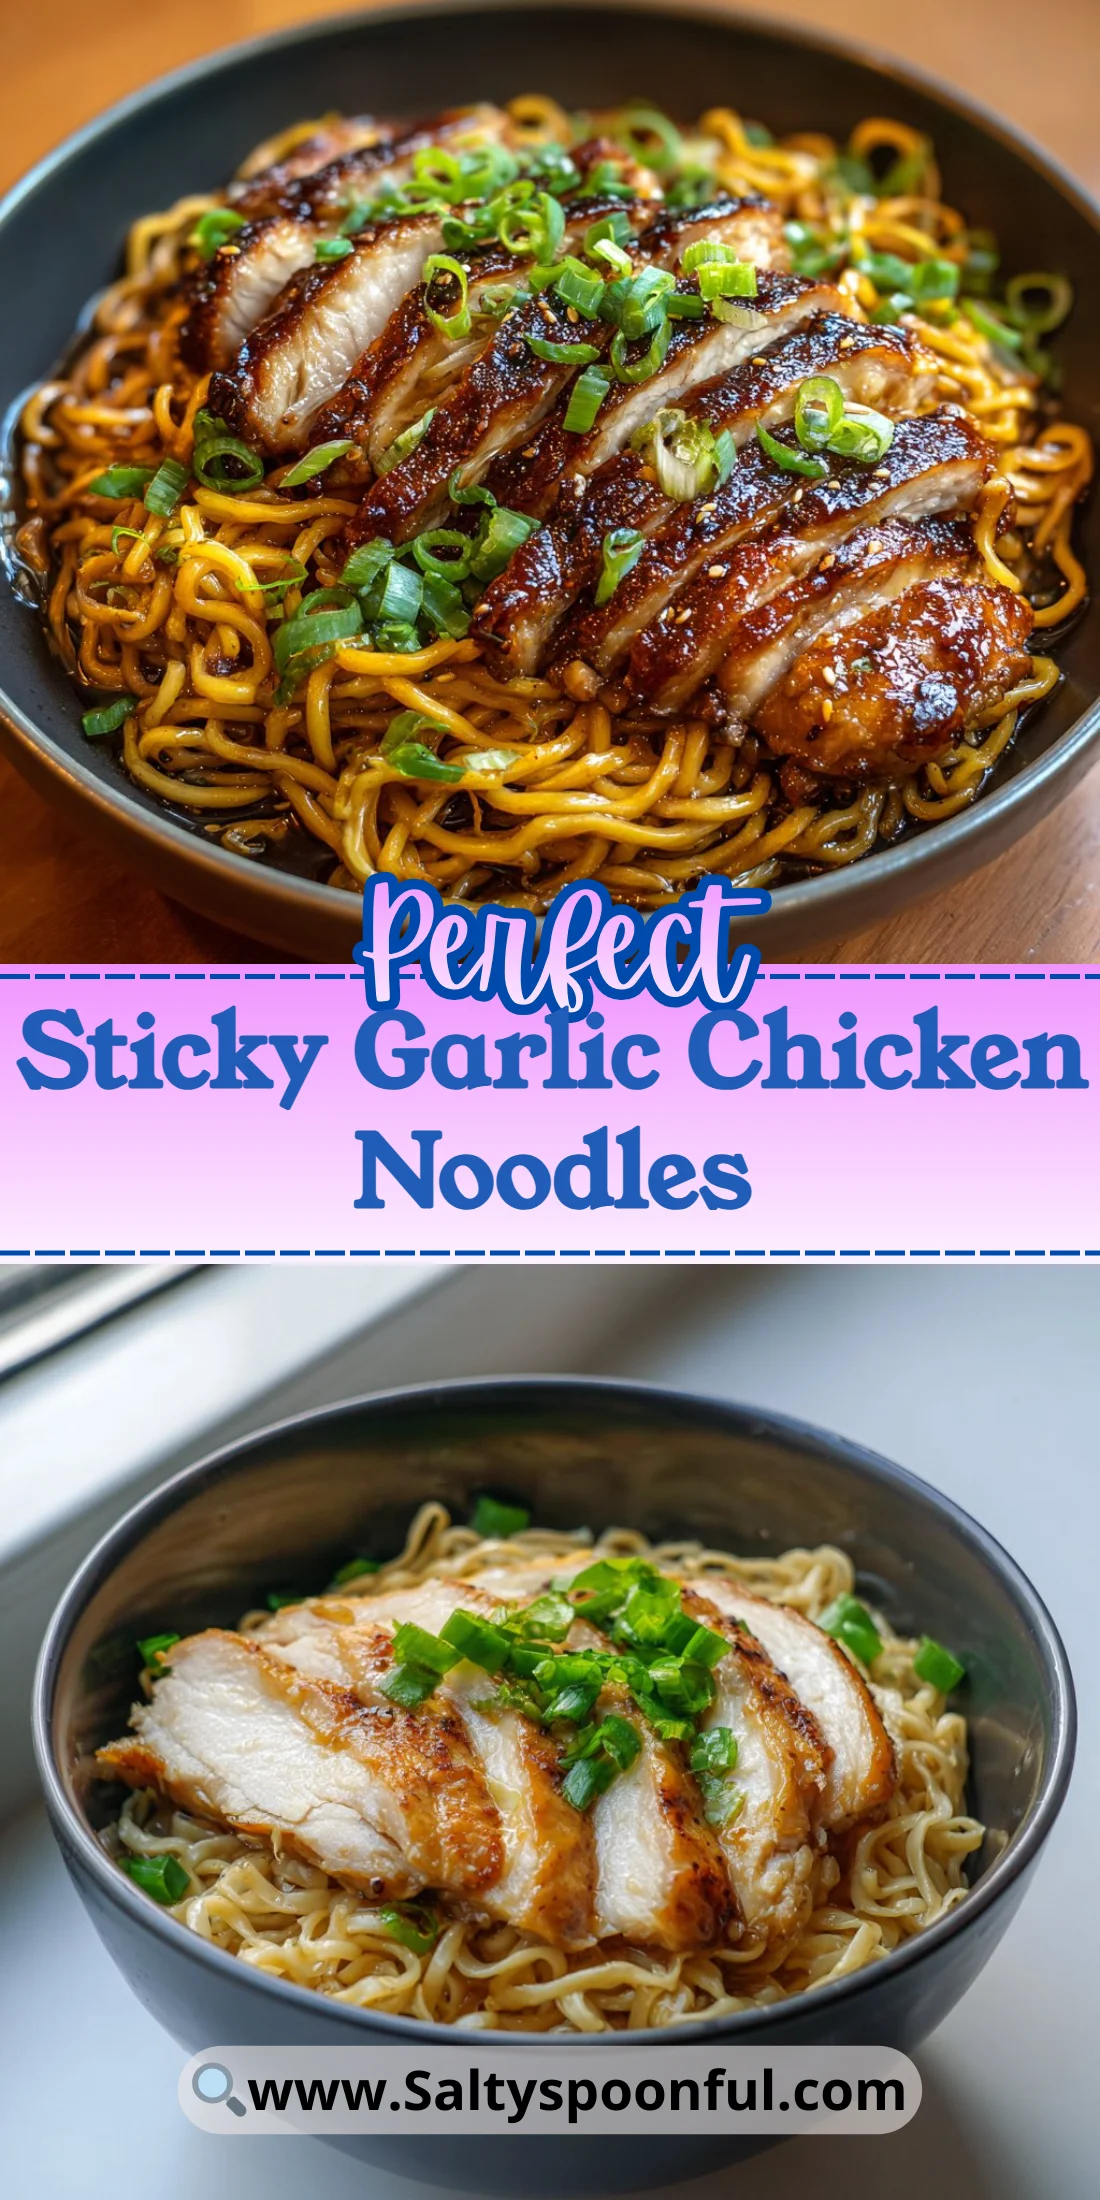
A quick, saucy noodle dinner that hits sweet, salty, and garlicky notes in under 30 minutes. This recipe turns simple pantry staples into a glossy, clingy sauce that coats every noodle strand.
It’s approachable for weeknights but has enough technique to feel like a chef’s meal. Feed two as a hearty dinner or stretch to four with sides.
If you like bold garlic flavor and sticky, glossy sauces, this is one to save and repeat. For an alternate method and extra tips, see the related recipe linked below.
Why You’ll Love This Sticky Garlic Chicken Noodles
– Fast family dinner in about 20–30 minutes.
– Uses pantry-friendly sauces for big flavor.
– Sticky, glossy sauce clings to noodles for maximum bite.
– Simple ingredients, easy substitutions.
– Great for meal prep and reheats well.
– Crowd-pleasing sweet-salty balance with bright vinegar lift.
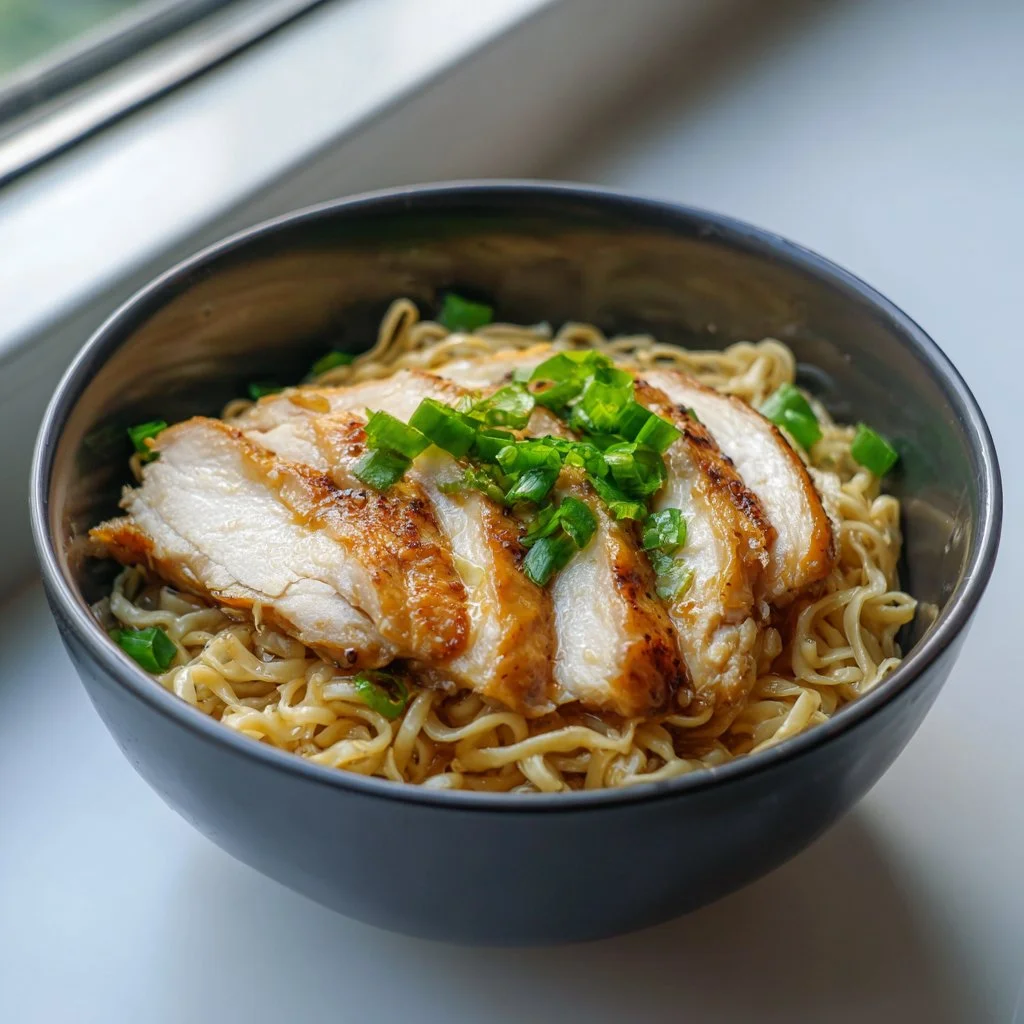
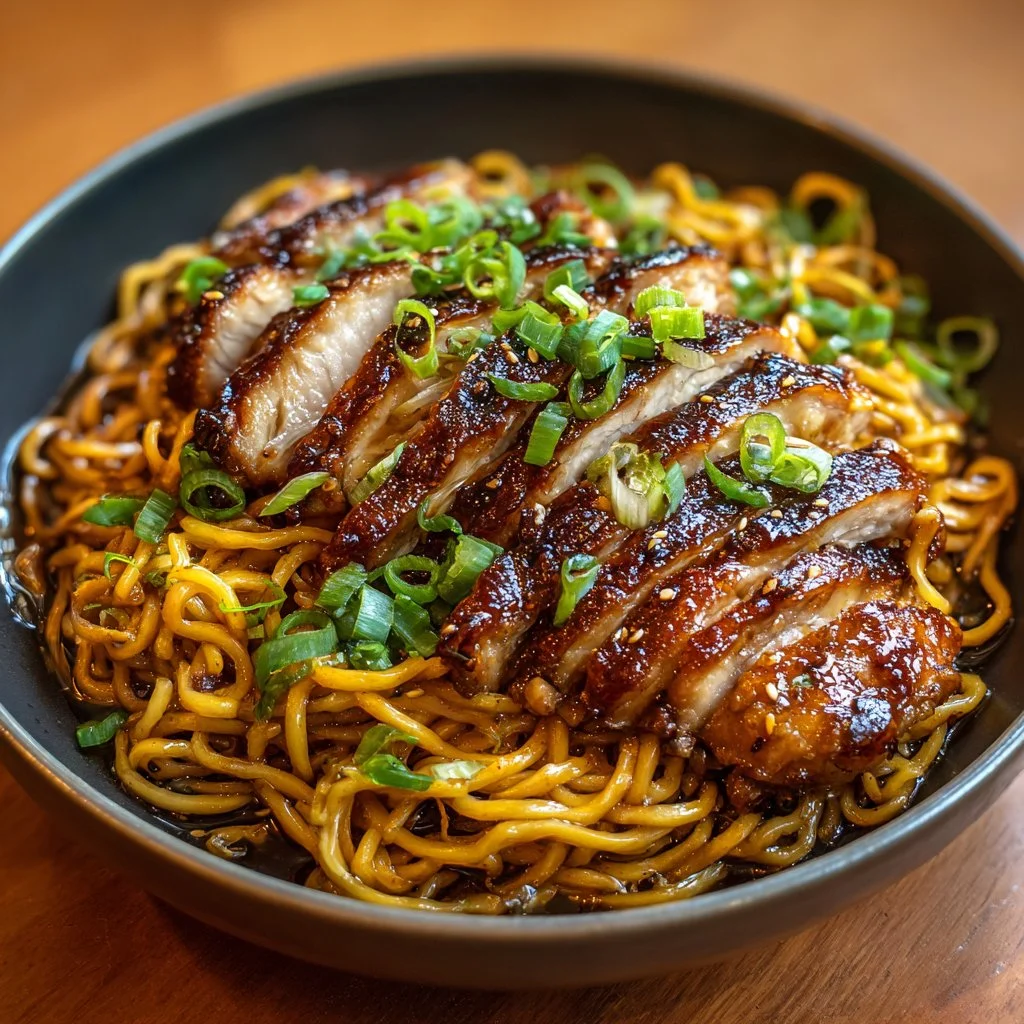
The taste is a balanced sweet-salty-garlic mix with a hint of tang from the vinegar. Texture-wise, expect tender, browned chicken pieces and chewy noodles wrapped in a glossy, slightly sticky sauce that grabs each strand.
"Five stars — this was restaurant-level at home. The sauce clung to the noodles perfectly and the garlic flavor was bold without burning. Quick, addictive, and easy to scale." — Emma R., home cook
Key Ingredients for Sticky Garlic Chicken Noodles
Garlic (4 cloves, minced)
Garlic is the aromatic backbone. Fresh minced garlic gives bright, pungent flavor and a natural sweetness when briefly cooked; avoid pre-minced jar garlic for the best fresh punch. If you must substitute, use garlic powder sparingly—start with 1/2 teaspoon and expect a milder, less complex profile.
Soy sauce (2 tablespoons)
Soy provides umami and salt, and its color helps the sauce look glossy. Buy a naturally brewed, lower-sodium soy sauce for depth without overpowering saltiness. Swapping for tamari keeps it gluten-free but will slightly change the flavor balance.
Oyster sauce (1 tablespoon)
Oyster sauce is the secret sticky agent and umami booster. It caramelizes slightly and gives a rounded, savory sweetness that helps the sauce cling. If unavailable, a mix of hoisin and a splash of soy works, but you’ll lose a little of the oceanic umami oyster sauce brings.
Sugar + Vinegar (1 tablespoon sugar, 1 tablespoon rice or apple cider vinegar)
Sugar balances soy and garlic and helps create that shiny glaze; vinegar brightens the whole dish and cuts through the richness. Use white, cane, or brown sugar; brown adds molasses notes. Replace rice vinegar with apple cider vinegar for a fruitier tang—both work, but adjust to taste.
Full Ingredient List for Sticky Garlic Chicken Noodles
– 200g chicken breast, sliced
– 200g noodles (egg noodles or rice noodles)
– 4 cloves garlic, minced
– 2 tablespoons soy sauce
– 1 tablespoon oyster sauce
– 1 tablespoon sugar
– 1 tablespoon vinegar (rice or apple cider)
– 2 tablespoons vegetable oil
– 2 green onions, chopped
– Salt and pepper to taste
For an alternate version and plating ideas, check this detailed variation of the recipe: Sticky Garlic Chicken Noodles — alternate method.
Step-by-Step Instructions for Sticky Garlic Chicken Noodles
Step 1: Cook the noodles according to package instructions, drain and set aside.
Pro Tip: Look for noodles that are al dente — slightly firm to the bite. They should feel springy and separate easily when you toss them.
Step 2: In a large pan or wok, heat the vegetable oil over medium-high heat.
Pro Tip: Oil should shimmer but not smoke. If it’s smoking, the pan is too hot — reduce heat before adding chicken.
Step 3: Add the sliced chicken and cook until browned and cooked through, about 5–7 minutes.
Pro Tip: Chicken should develop golden edges and feel firm when pressed. If pieces stick to the pan, they need a little more browning before flipping.
Step 4: Add the minced garlic and cook for another minute until fragrant.
Pro Tip: Garlic will become fragrant and slightly glossy; watch it closely to avoid browning, which turns it bitter.
Step 5: In a bowl, mix soy sauce, oyster sauce, sugar, vinegar, salt, and pepper. Pour this sauce over the chicken.
Pro Tip: The sauce should look thin and dark at this stage. Once added, it will start to thicken and glaze the chicken within 30–60 seconds.
Step 6: Add the cooked noodles to the pan, tossing everything together until well combined and heated through.
Pro Tip: Stir constantly for 1–2 minutes so noodles pick up glossy sauce. The finished dish should look shiny and every strand slightly coated.
Step 7: Serve hot, garnished with chopped green onions.
Pro Tip: Finished noodles should smell sweet-savory with a garlicky lift and have a sticky sheen. Garnish with green onions for freshness and contrast.
For a guided visual step-through and plating tips, see this related guide: Sticky Garlic Chicken Noodles — full recipe notes.
Expert Tips for Sticky Garlic Chicken Noodles
– Use medium-high heat for quick browning; too low and chicken stews instead of browns.
– Pat chicken dry before cooking to maximize browning and reduce steaming.
– If sauce is too thin, simmer 30–60 seconds until it reduces and becomes glossy.
– For sticky texture, a touch more sugar helps the glaze cling—add 1/2 teaspoon at a time.
– Avoid overcooking noodles; slightly undercook them if you’ll finish in the pan to prevent mush.
– A wok or wide sauté pan gives the best heat distribution and room to toss.
– Common mistake: burning garlic. Add garlic after chicken is mostly cooked and reduce heat if using a very hot pan.
– Use a metal spatula or tongs for tossing; wooden spoons can struggle to lift sticky noodles.
If you want a lower-calorie take or protein swap, the techniques above apply to lean proteins and plant-based alternatives; more on that below. For a creamy garlic-pasta twist, see this related recipe for inspiration: Healthy Garlic Parmesan Chicken Pasta.
Storage & Freezing for Sticky Garlic Chicken Noodles
Refrigerator: Store in an airtight container for up to 3–4 days. Use shallow containers to cool quickly; this keeps texture closer to fresh when reheated.
Freezer: For best quality, freeze in freezer-safe containers for up to 2 months. Noodles can become slightly softer after freezing; flash-freezing on a tray first helps maintain shape.
Thawing: Thaw overnight in the fridge or reheat from frozen directly in a skillet over medium heat with a splash of water to loosen sauce.
Reheating: Reheat in a covered skillet over medium-low heat, adding 1–2 tablespoons of water or broth and stirring to revive gloss and separate strands. Microwave reheating works; cover and stir halfway through for even warming.
For a make-ahead marinade and meal prep workflow, this slow-cooker idea shows how to adapt sticky flavors for batch cooking: Slow Cooker Honey Garlic Chicken — meal prep notes.
Variations & Substitutions for Sticky Garlic Chicken Noodles
Chicken thigh version: Swap breast for boneless skinless chicken thighs and cook slightly longer. Thighs add more fat and richness, resulting in a juicier finished dish with deeper flavor.
Vegetarian option: Replace chicken with firm tofu or seitan, pressed and pan-fried until crispy. The sauce adheres well to fried tofu; expect a firmer, chewier texture and slightly less savory meatiness.
Spicy garlic noodles: Add 1 teaspoon chili paste or 1/2 teaspoon crushed red pepper with the sauce. This yields a warming heat that complements the sweetness and adds complexity without overpowering garlic.
Peanut-garlic twist: Stir in 1 tablespoon smooth peanut butter with the sauce for a creamy, nutty glaze. The result is a richer, Thai-inspired variation that still keeps the sticky finish.
For a protein-forward wrap idea using similar flavors, consider components from this wrap recipe to build a new meal: Bacon Chicken Ranch Wraps — flavor pairing inspiration.
Frequently Asked Questions About Sticky Garlic Chicken Noodles
What noodles work best for Sticky Garlic Chicken Noodles?
Egg noodles and fresh lo mein-style noodles pick up sauce beautifully because their slightly porous surface holds glaze. Rice noodles work too, but cook them carefully to avoid over-softening; choose medium-width rice noodles for best texture.
How do I prevent the sauce from becoming thin and watery?
Use medium-high heat to reduce the sauce quickly after adding it; the sugar and oyster sauce will caramelize and thicken. If the sauce stays thin, simmer a minute longer uncovered or add a tiny slurry of cornstarch (1/2 teaspoon cornstarch mixed with 1 teaspoon water) and stir until glossy.
Can I make Sticky Garlic Chicken Noodles ahead for meal prep?
Yes. Store portions in airtight containers for up to 4 days in the fridge. When reheating, loosen with a splash of water or broth and reheat gently in a skillet to restore the glossy coating.
Is this recipe gluten-free or adaptable for dietary restrictions?
Traditional soy and oyster sauces contain gluten. Use tamari or coconut aminos and a gluten-free oyster sauce or a mushroom-based vegan oyster substitute to keep the flavor while making it gluten-free.
Why did my garlic taste burnt and bitter?
Burnt garlic happens when the pan is too hot or garlic cooks too long. Add garlic after the chicken has browned and reduce the heat slightly; cook just until fragrant, about 30–60 seconds, then add sauce to stop further browning.
Final Thoughts on Sticky Garlic Chicken Noodles
Sticky Garlic Chicken Noodles deliver bold garlic flavor and a glossy, clingy sauce that makes every bite satisfying. If you tried this version, please leave a star rating in the recipe card below and pin it to Pinterest for later.
For more inspiration and variations, check out these related recipes: Instant Pot Sticky Garlic Peanut Noodles with Chicken, 20 minute Crispy Garlic Chicken Noodles — Half Baked Harvest, and Sticky Ginger Soy Glazed Chicken Meal Prep — Budget Bytes.
Sticky Garlic Chicken Noodles
Ingredients
Method
- Cook the noodles according to package instructions, drain and set aside.
- In a large pan or wok, heat the vegetable oil over medium-high heat.
- Add the sliced chicken and cook until browned and cooked through, about 5–7 minutes.
- Add the minced garlic and cook for another minute until fragrant.
- In a bowl, mix soy sauce, oyster sauce, sugar, vinegar, salt, and pepper. Pour this sauce over the chicken.
- Add the cooked noodles to the pan, tossing everything together until well combined and heated through.
- Serve hot, garnished with chopped green onions.