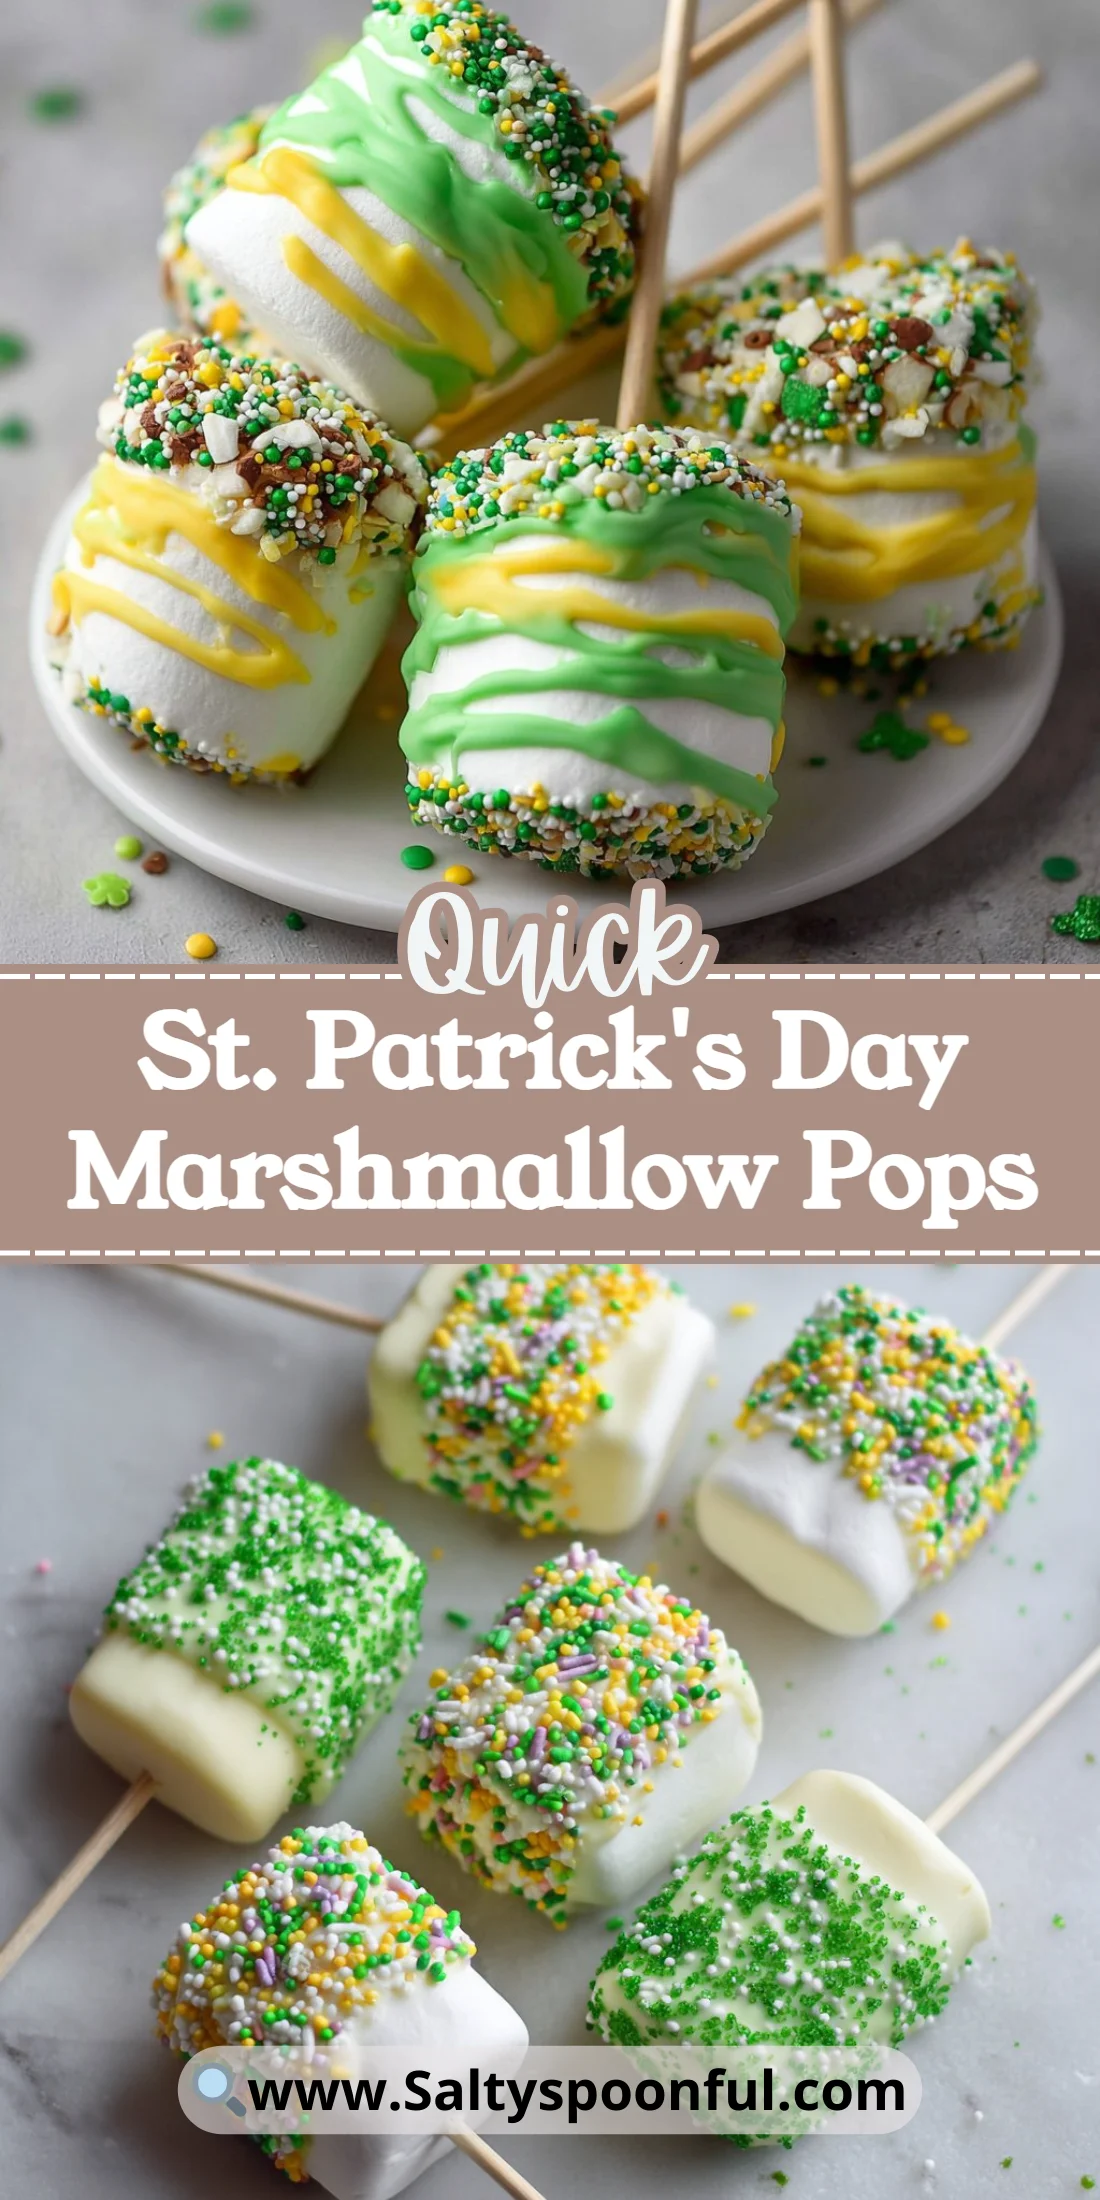
A quick, colorful treat transforms plain marshmallows into festive St. Patrick’s Day bites.
These pops come together fast and are great for parties, school treats, or last-minute celebrations.
They look impressive with minimal skill and are endlessly customizable.
Follow the simple steps below and use the tips to avoid common candy-coating problems.
Why You’ll Love This St. Patrick’s Day Marshmallow Pops
- Fast to make for a crowd.
- Minimal baking — no oven needed.
- Kid-friendly decorating and assembly.
- Bright, festive green-and-yellow drizzle.
- Mix-and-match sprinkles for personality.
- Portable party snack ideal for St. Patrick’s Day gatherings.
The taste is sweet and nostalgic: pillowy marshmallow with a thin, crisp candy shell. The coating adds a satisfying snap while the drizzle layers bring extra sweetness and a hint of buttery almond or vanilla depending on your melts. Texturally these are airy inside and subtly firm outside, creating contrast in every bite.
"Five stars — I made these with my kids and they were the hit of our classroom party. Easy, colorful, and held up perfectly in a treat bag." — Claire, home baker
Key Ingredients for St. Patrick’s Day Marshmallow Pops
White candy melts or vanilla flavored almond bark
These form the smooth base shell that seals the marshmallow and creates a canvas for drizzles and sprinkles. Choose melts or almond bark labeled for dipping — they melt evenly and set glossy. If you substitute regular white chocolate, expect slower melting and a grainier finish unless you temper it carefully.
Green candy melts
Green melts give the St. Patrick’s Day look instantly. Buy a brand with stable color that won’t bleed into the white base when set; grocery-store wafer melts are usually fine. If you swap in green-tinted white chocolate, the higher cocoa butter content can make the drizzle thinner and harder to control.
Treat sticks or bamboo skewers
Proper sticks make handling and dipping easy, and they keep the marshmallows from touching each other. Use food-grade lollipop sticks or sturdy bamboo skewers; wooden sticks can be trimmed to fit snack bags. If omitted, the pops become messy hand-held bites and won’t display as nicely.
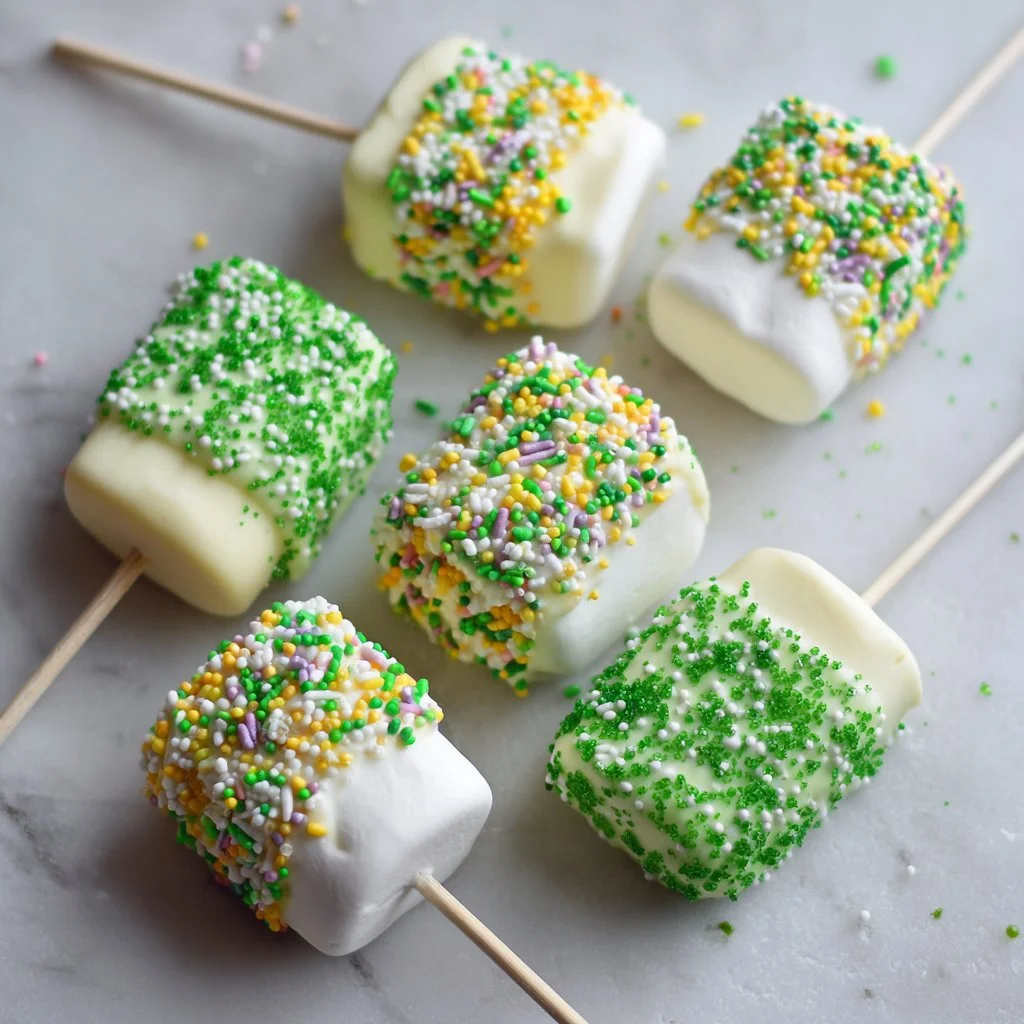
Rainbow and shamrock sprinkles
Sprinkles add festive texture and immediate visual appeal. Buy nonpareils or sugar confetti that are labeled “heat-resistant” to avoid dissolving when applied to warm candy. If you skip sprinkles, the pops will still taste great but lose the playful holiday look.
Full Ingredient List for St. Patrick’s Day Marshmallow Pops
- 24 regular size marshmallows
- White candy melts or vanilla flavored almond bark
- Green candy melts
- Yellow candy melts
- 1 tsp vegetable oil
- Rainbow sprinkles
- Shamrock sprinkles
- Piping bags
- Treat sticks or bamboo skewers
Step-by-Step Instructions for St. Patrick’s Day Marshmallow Pops
Step 1: Prepare your work surface and insert sticks
Line a cookie sheet with wax paper to protect the surface and make cleanup easy. Push treat sticks or bamboo skewers through the center of each marshmallow, spacing them evenly across the sheet so they don’t touch.
Pro Tip: Visual cue — sticks should be centered and marshmallows standing upright without wobble.
Step 2: Melt the white candy coating
Melt white candy melts or almond bark according to package directions. Stir frequently and add up to 1 teaspoon vegetable oil if the melted coating seems too thick; this thins it for a smoother pour.
Pro Tip: Visual cue — melted white coating should be glossy and pourable, like thick cream, with no lumps.
Step 3: Coat each marshmallow with the white candy
Hold each stick and either dip or spoon the melted white candy over each marshmallow until covered. Rotate the pop to ensure the coating is even and allow excess to drip back into the bowl.
Pro Tip: Visual cue — coating should form a smooth shell that covers the marshmallow seams; it will look wet and shiny immediately after coating.
Step 4: Melt green and yellow candy melts and prep piping bags
Melt the green and yellow candy melts separately per package directions. Transfer each color into small piping bags (or resealable plastic bags with a tiny corner snipped) for drizzling.
Pro Tip: Visual cue — drizzling melts should be fluid but not watery, resembling thick syrup that flows in a steady ribbon.
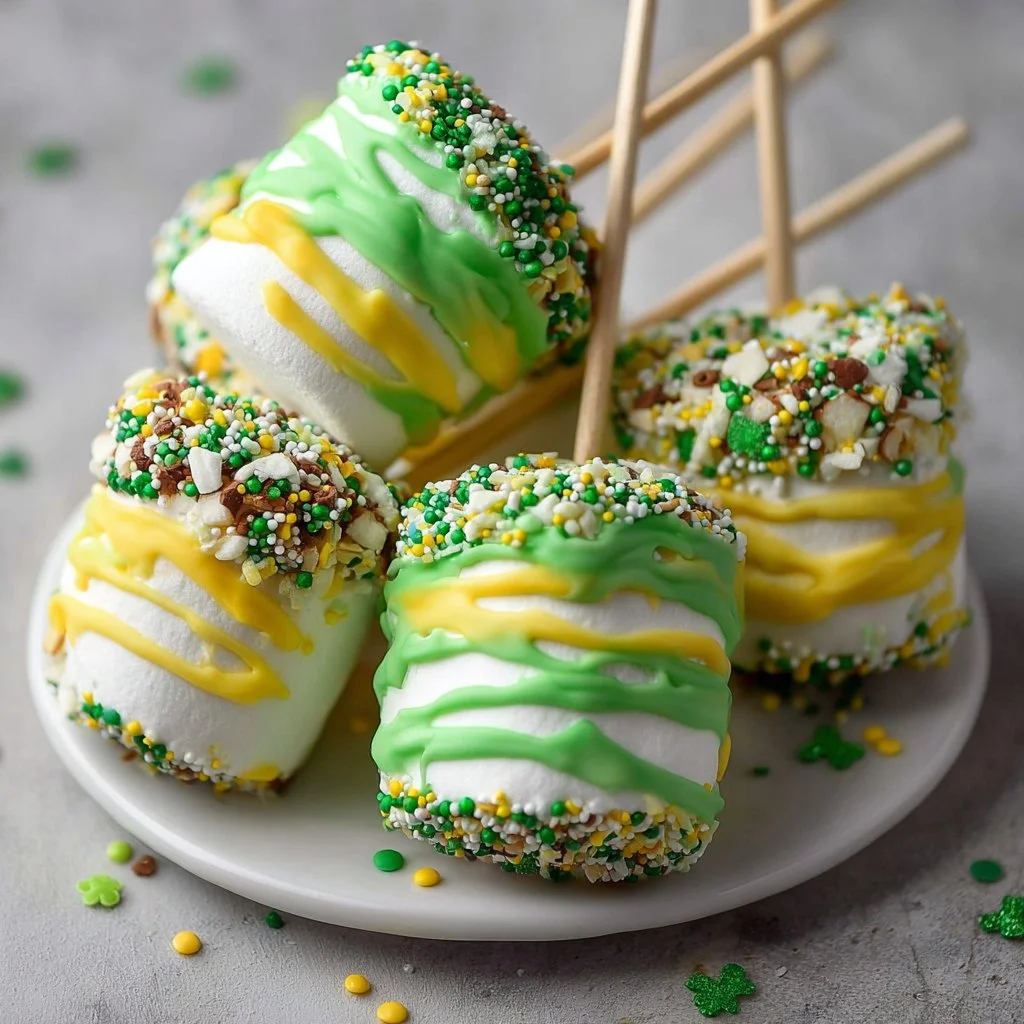
Step 5: Drizzle green and yellow candy over the coated pops
Drizzle alternating green and yellow melts over the white-coated pops to create stripes or abstract patterns. Work quickly while the base coating is still slightly tacky so the drizzle adheres.
Pro Tip: Visual cue — drizzle lines should sit on the surface and keep their shape without sinking into the base coat.
Step 6: Add sprinkles while the coating is warm
Sprinkle rainbow and shamrock decorations onto the still-warm drizzle so they stick. Apply sparingly to avoid weighing down the pop and to allow the pattern to show through.
Pro Tip: Visual cue — sprinkles should be firmly attached and slightly embedded; they won’t fall off when lightly tapped.
Step 7: Let the pops set and finish
Allow the coated marshmallows to set at room temperature until fully firm, usually 20–30 minutes. Trim any excess candy at the base of the stick for a neat look, then store in an airtight container.
Pro Tip: Visual cue — final pops should be dry to the touch, glossy, and with crisp edges where the candy set.
Expert Tips for St. Patrick’s Day Marshmallow Pops
- Keep melts warm but not hot; overheating breaks the emulsion and makes the coating grainy.
- Use 1 tsp vegetable oil only if the base melt is too thick; add dropwise and stir to avoid over-thinning.
- If your drizzle is too thick to pipe, microwave in 10-second bursts and stir between bursts.
- To avoid bloom (white streaks) on the candy shell, allow pops to set in a cool, dry place away from humidity.
- Use a silicone mat or parchment under the setting pops to prevent sticking and make cleanup easy.
- If the coating pulls away from the marshmallow, the interior may be too cold — dip quickly after assembly for best adhesion.
- Choose piping bag tips or snipped corner sizes that match the desired drizzle thickness; practice on parchment before decorating pops.
- Common mistake: applying sprinkles after the candy fully hardens; always add sprinkles while the surface is tacky so they adhere properly.
Storage & Freezing for St. Patrick’s Day Marshmallow Pops
For short-term storage, place pops in a single layer in an airtight container at room temperature. They keep well for 3–5 days; avoid refrigerating because humidity can soften the coating.
To freeze, arrange pops on a tray and flash-freeze until firm (about 30–60 minutes), then transfer to a freezer-safe airtight container or heavy-duty freezer bag. Use parchment between layers to prevent sticking. Properly stored, they keep up to 2 months.
To thaw, move pops to the refrigerator for 1–2 hours, then bring to room temperature for 15–30 minutes before serving to avoid condensation forming on the candy shell. Do not microwave frozen pops — sudden heat will melt the coating unevenly.
Variations & Substitutions for St. Patrick’s Day Marshmallow Pops
Chocolate-dipped St. Patrick’s Day Marshmallow Pops
Replace the white candy melts with milk or dark chocolate for a richer flavor and deeper color contrast. The result is less sweet and more decadent, with a smooth, chocolatey snap instead of the white vanilla base.
Rainbow-swirled St. Patrick’s Day Marshmallow Pops
Use multiple colored melts (including teal or pastel greens) and swirl them together in the piping bag for marbled drizzles. This creates a softer, blended appearance and a party-ready look without extra sprinkles.
Mint-flavored St. Patrick’s Day Marshmallow Pops
Add a drop or two of peppermint or natural mint extract to the green melts (taste cautiously). The pops will have a cool finish reminiscent of classic St. Patrick’s Day mint confections.
Nut-free allergy-friendly St. Patrick’s Day Marshmallow Pops
Use allergen-free candy melts labeled nut-free and check sprinkles for cross-contamination. This keeps the treat accessible for school parties where nut restrictions apply, with the same visual impact.
Frequently Asked Questions About St. Patrick’s Day Marshmallow Pops
Can I make St. Patrick’s Day Marshmallow Pops ahead of time?
Yes. You can make them up to 2 days in advance if stored in an airtight container at room temperature. For longer storage, freeze them as described above and thaw gently before serving.
Why did my candy coating become grainy or lumpy?
Graininess usually comes from overheating or moisture getting into the melts. Melt slowly in short bursts, stir constantly, and ensure utensils are dry. If grainy, you can try adding a small amount of vegetable oil and stirring until smooth, but replace melts if separation persists.
How do I prevent the drizzle from running into the base coating?
Work while the base coating is slightly tacky, not fully hardened. If the base is too wet, the drizzle will blend; if it’s too hard, the drizzle may not adhere. Timing is key — test one pop before decorating all.
What’s the best way to attach sprinkles so they don’t fall off?
Apply sprinkles immediately after drizzling while the candy is still warm and tacky. Press lightly so sprinkles sink just a bit into the surface. Fully hardened candy will not accept sprinkles without them shaking off.
Can I use homemade marshmallows for St. Patrick’s Day Marshmallow Pops?
Yes, homemade marshmallows can be used and taste wonderful, but they are softer and more porous. Dip gently and allow slightly longer setting time; consider dusting the homemade marshmallow lightly with powdered sugar to reduce stickiness before inserting sticks.
Conclusion for St. Patrick’s Day Marshmallow Pops
For more inspiration and variations similar to this idea, check out My Suburban Kitchen’s St. Patrick’s Day Marshmallow Pops for a visually similar take.
If you want kid-friendly tutorials and party photos, see the playful examples at Ruffles and Rain Boots’ St Patrick’s Day Marshmallow Pops to Please.
For additional recipe ideas and different finishing techniques, browse 365 Days of Baking and More’s St. Patrick’s Day Marshmallows.
Final Thoughts on St. Patrick’s Day Marshmallow Pops
These marshmallow pops are quick, festive, and customizable for any crowd. Please leave a star rating in the recipe card below and pin this to Pinterest if you loved it.
St. Patrick's Day Marshmallow Pops
Ingredients
Method
- Line a cookie sheet with wax paper and insert sticks through the center of each marshmallow.
- Melt the white candy coating according to package directions, stirring frequently.
- Dip or spoon the melted white candy over each marshmallow until covered and allow excess to drip back.
- Melt the green and yellow candy melts separately and transfer each color into piping bags.
- Drizzle the green and yellow candy over the coated pops while the coating is still slightly tacky.
- Add rainbow and shamrock sprinkles onto the warm drizzle.
- Allow the pops to set at room temperature until fully firm, usually 20-30 minutes.