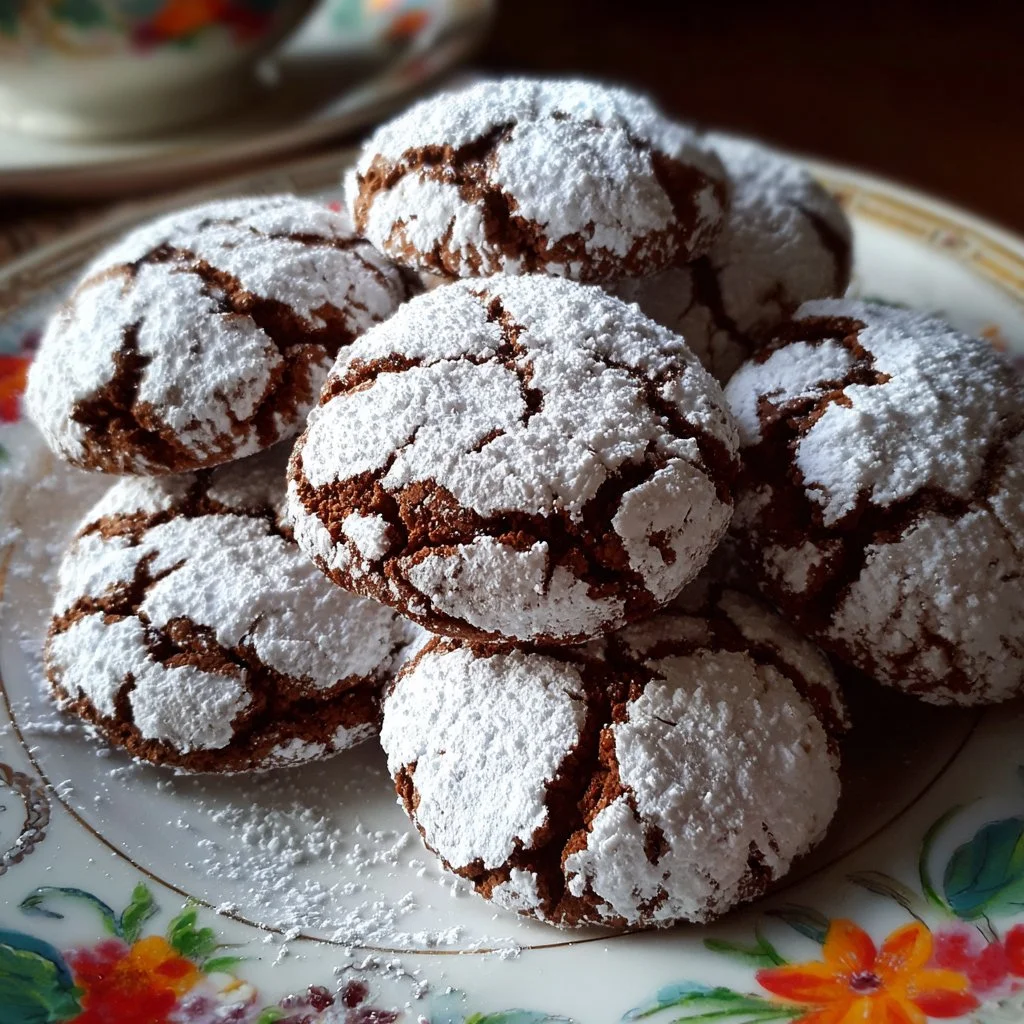
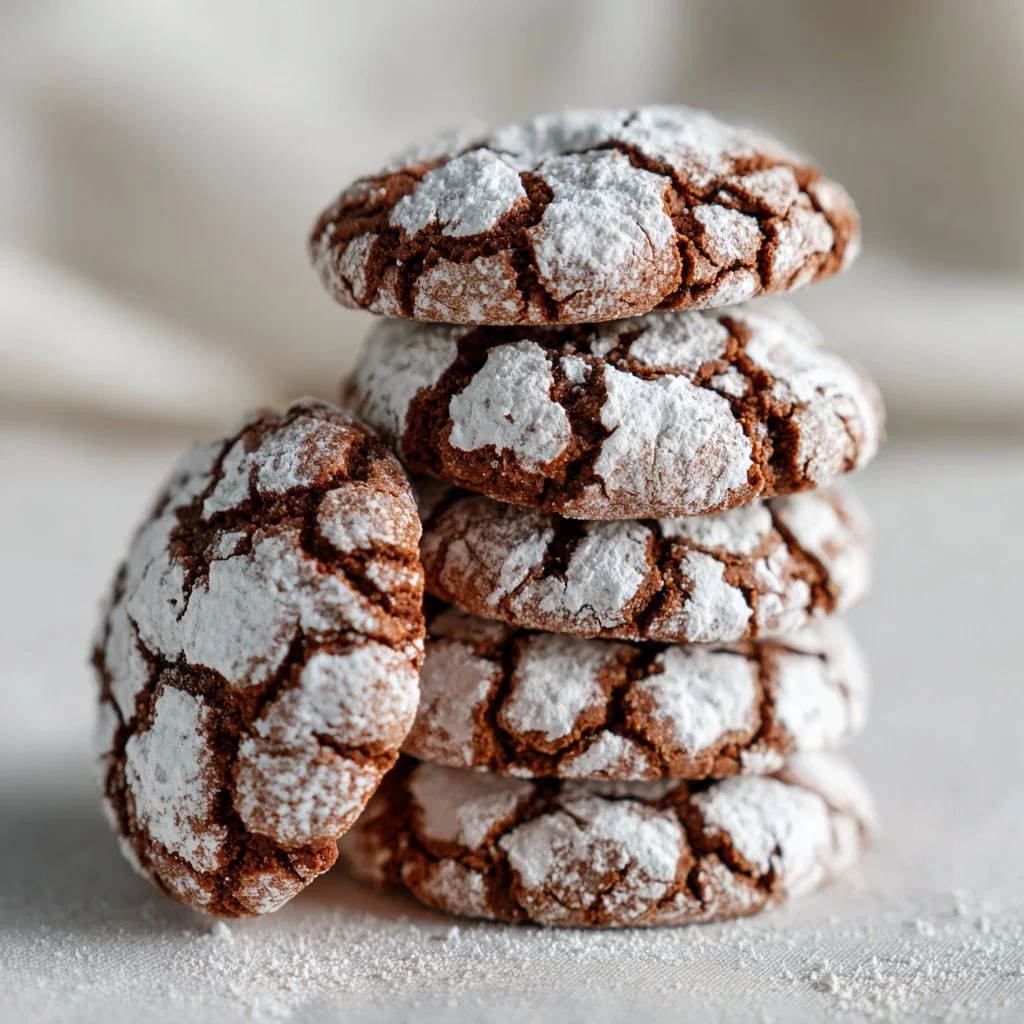
Bright, chocolatey, and impossibly crinkled — these cookies are a little spring celebration in every bite.
They bake fast, travel well, and make a showstopping platter for brunches or coffee hour.
No special equipment is needed, so even busy bakers can get them on the table in under an hour.
If you love mashups of chewy centers and crackled tops, this recipe will become a repeat favorite.
If you want a sturdier bar-style treat to serve alongside, try my take on Brookie Cookies for a similar chocolate-sugar comfort.
Why You’ll Love This Springtime Crinkle Cookies
– Quick to mix and easy to portion.
– No butter required — oil keeps them soft and shelf-stable.
– Classic crinkle appearance that looks professional with minimal effort.
– Balanced chocolate flavor without being overly rich.
– Kid-friendly rolling step makes them fun to assemble.
– Great make-ahead dough — chill now, bake later.
These cookies deliver a tender, cakey interior with a slightly crisp outer edge and a signature powdered-sugar-frosted crinkled top. Each bite melts softly, with cocoa-forward flavor rounded by sweet vanilla and brown sugar warmth.
★★★★★ “I made these for a spring bake sale and they vanished first. Easy dough, perfect crackles, and the powdered sugar makes them look bakery-fancy.” — Lena R.
Key Ingredients for Springtime Crinkle Cookies
Unsweetened cocoa powder
Cocoa is the backbone of the cookie’s chocolate flavor. Choose a Dutch-processed cocoa for deeper, darker notes or natural cocoa for a brighter, slightly tangy chocolate; either works but may react differently with leaveners. If you substitute with melted chocolate, reduce liquid elsewhere and expect a fudgier texture.
All-purpose flour
Flour provides structure and the crumb that holds the crinkles. Use a spoon-and-level measurement to avoid overpacking, which can make cookies dense. For a lighter cookie, you can swap up to 25% with cake flour, but too much will make them fragile.
Granulated sugar
Granulated sugar helps with spread and crisping, and it balances the cocoa. Fine sugar dissolves more readily for a smoother crumb. If you swap some or all for a sugar alternative, expect changes in browning, spread, and texture — and often a drier final bite.
Large eggs
Eggs bind and add moisture and lift from the proteins and water they contribute. Room-temperature eggs emulsify better, creating a uniform dough and even bake. Use an egg replacer only if needed; expect a less tender, less-risen cookie.
Full Ingredient List for Springtime Crinkle Cookies
– 2 cups all-purpose flour
– 1/2 cup unsweetened cocoa powder
– 2 teaspoons baking powder
– 1/4 teaspoon salt
– 1 cup granulated sugar
– 1/2 cup brown sugar
– 1/2 cup vegetable oil
– 2 large eggs
– 1 teaspoon vanilla extract
– Powdered sugar for dusting
Step-by-Step Instructions for Springtime Crinkle Cookies
Step 1: Preheat and prepare your pan
Preheat your oven to 350°F (175°C) and line a baking sheet with parchment paper. A light, even oven temperature helps cookies set without overbrowning.
Pro Tip: The oven should smell neutral and not hot-metallic; parchment should lie flat and look smooth.
Step 2: Whisk dry ingredients
In a bowl, whisk together the flour, cocoa powder, baking powder, and salt until evenly combined and free of lumps. This distributes the leavening so the cookies rise evenly.
Pro Tip: The dry mix should look homogenous, dark chocolate brown with no streaks of white flour.
Step 3: Combine sugars and oil
In a separate bowl, beat together the granulated sugar, brown sugar, and vegetable oil until smooth and slightly glossy. The oil-sugar base is what keeps these cookies tender without butter.
Pro Tip: The mixture will look cohesive and lightly shimmering; you should not see separate oil pools.
Step 4: Add eggs and vanilla
Add the eggs one at a time, mixing well after each addition. Stir in the vanilla extract until the batter is smooth and slightly thickened.
Pro Tip: After adding the second egg, the batter should look glossy and ribbon slightly when lifted.
Step 5: Combine wet and dry
Gradually add the dry ingredients to the wet ingredients, mixing until just combined. Avoid overmixing to keep the texture soft and cakey.
Pro Tip: The dough should be thick and scoopable, not runny or overly sticky.
Step 6: Chill the dough
Chill the dough in the refrigerator for about 30 minutes to firm it up; cold dough yields taller cookies with more defined crinkles. Chilling also prevents excessive spread on the baking sheet.
Pro Tip: The dough should be noticeably firmer and cool to the touch — scoopable but not gooey.
Step 7: Shape and coat
Scoop tablespoons of dough and roll them into balls, then roll each ball in powdered sugar until fully coated. The powdered sugar coating is key to the trademark crackled look.
Pro Tip: Balls should be smooth discs after rolling, evenly covered in a matte layer of powdered sugar.
Step 8: Place on sheet
Place the dough balls on the prepared baking sheet about 2 inches apart so they have space to expand without merging. Use multiple sheets if needed to avoid overcrowding.
Pro Tip: The dough balls should sit rounded and separate; the sheet should not look crowded.
Step 9: Bake until crinkled
Bake for 10–12 minutes, or until the edges are set and the tops are crinkled. Avoid overbaking — the center should still look soft when removed from the oven.
Pro Tip: Edges will look set and just slightly firmer; centers may still wobble a touch when nudged.
Step 10: Cool and finish
Allow to cool on the baking sheet for a few minutes before transferring to a wire rack to cool completely. Cooling on the rack prevents soggy bottoms and firms the crackled tops.
Pro Tip: Cookies should feel set at the edges and firm slightly as they cool; the centers will finish baking off the sheet.
Pro Tip: For related texture ideas and presentation inspiration, see this chocolate pairing in my hazelnut cookies with dark chocolate ganache post.
Expert Tips for Springtime Crinkle Cookies
– Temperature tip: Use room-temperature eggs for a smoother, more cohesive batter and even rise.
– Oven calibration: If your oven runs hot, lower to 325°F to avoid burned edges and thin cookies.
– Texture troubleshooting: If cookies come out dense, you likely overmeasured flour; try spooning then leveling the flour next time.
– Chilling advice: Don’t skip the chill — it concentrates flavors and protects shape during baking.
– Equipment tip: Use a medium cookie scoop for uniform size; a silicone baking mat yields even browning.
– Powdered sugar coating: Roll twice for a thicker crackle — one coat for delicate contrast, two for bold white ridges.
– Common mistake: Overbaking dries them out; remove when centers still look slightly underdone.
– Alt-flour tip: If swapping to a gluten-free all-purpose blend, choose one with xanthan gum for better structure.
Storage & Freezing for Springtime Crinkle Cookies
Room temperature storage: Store cooled cookies in an airtight container at room temperature for up to 4 days. Layer with parchment to prevent sticking and maintain the powdered-sugar finish.
Refrigerator storage: Place in an airtight container for up to 1 week if you prefer chilled cookies; bring to room temperature before serving for best texture.
Freezer storage: Freeze baked cookies in a single layer on a sheet for 1 hour, then transfer to a freezer-safe container or zip-top bag for up to 3 months. For dough, shape coated dough balls and freeze on a tray, then bag for up to 2 months.
Thawing & reheating: Thaw frozen baked cookies at room temperature for 30–60 minutes. For a freshly-baked feel, warm in a 300°F oven for 3–5 minutes. Reheating from frozen may take 6–8 minutes; watch closely to avoid browning.
Variations & Substitutions for Springtime Crinkle Cookies
Lemon crinkle variation: Replace cocoa with 2 tablespoons zest and 1/4 cup lemon juice; reduce flour slightly and roll in powdered sugar as directed for a zesty, bright cookie. The result is lighter in color with a tangy finish.
Mint-chocolate twist: Add 1/2 teaspoon peppermint extract and fold in 1/2 cup mini chocolate chips. Expect a cooling mint note and extra chocolate pockets in each bite.
Nutty cocoa version: Fold 1/2 cup chopped toasted hazelnuts or walnuts into the dough before chilling. This adds crunch and nutty aroma while keeping the crinkle appearance.
Gluten-free swap: Use a 1:1 gluten-free flour blend with xanthan gum and reduce chilling time by 10 minutes; texture will be slightly more tender but still crinkled.
Frequently Asked Questions About Springtime Crinkle Cookies
What causes crinkle cookies to spread too thin?
Thin spread usually comes from over-soft dough (too much oil), under-chilled dough, or a hot oven. Measure oil carefully, chill the dough a full 30 minutes, and confirm oven temperature with an oven thermometer. If spread persists, slightly reduce oil by 1 tablespoon next time.
How do I get the best crackle on top?
A heavy coating of powdered sugar and a chilled dough are the keys. Roll each ball thoroughly in powdered sugar and consider a second roll just before baking. The contrast between dark cocoa and white sugar emphasizes the crinkles.
Can I make the dough ahead of time?
Yes — dough can be chilled for up to 48 hours in the fridge or frozen shaped into sugar-coated balls for up to 2 months. Let refrigerated dough warm slightly for 10–15 minutes if too firm to scoop; frozen balls can go from freezer to oven with a minute or two added to bake time.
Why are my cookies cakey instead of chewy?
This recipe leans toward a tender, cakey texture thanks to the baking powder and oil ratio. For a chewier result, reduce baking powder to 1 teaspoon and replace 2 tablespoons of oil with melted butter, though the flavor and structure will shift.
How can I prevent powdered sugar from melting away?
Allow cookies to cool briefly on the baking sheet to set, then transfer to a rack. If your kitchen is very humid, store in a cool, dry place and add extra powdered sugar after cooling if needed.

Final Thoughts on Springtime Crinkle Cookies
If you enjoyed this recipe, please leave a star rating in the recipe card below and pin it to Pinterest to save for later. For more lemon-crinkle inspiration see Lemon Crinkle Cookies – Two Sisters, a bright variation, or try an Easy Lemon Crinkle Cookies – Whisking Up Yum for a delicate citrus twist. If you prefer a shortcut, this Cake Mix Lemon Crinkle Cookies (5 ingredient recipe) is a simple alternative.