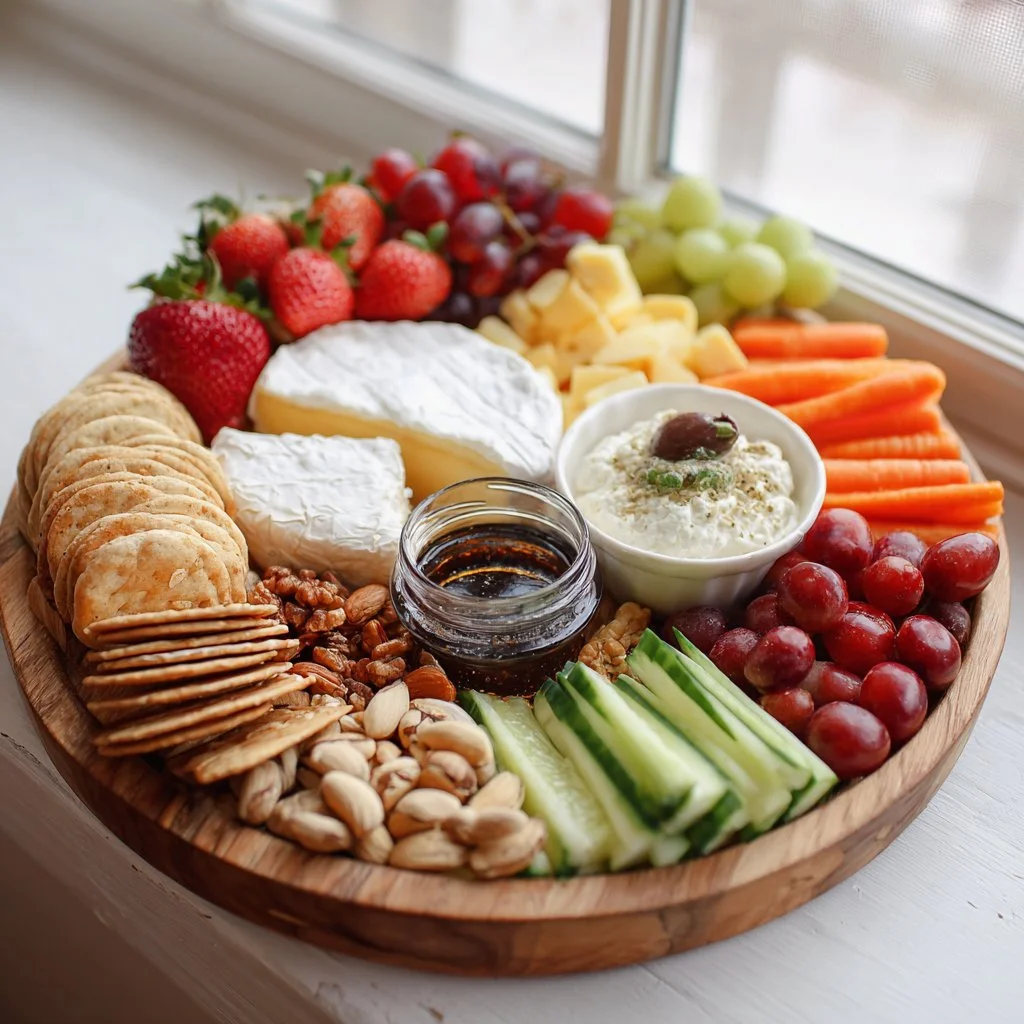
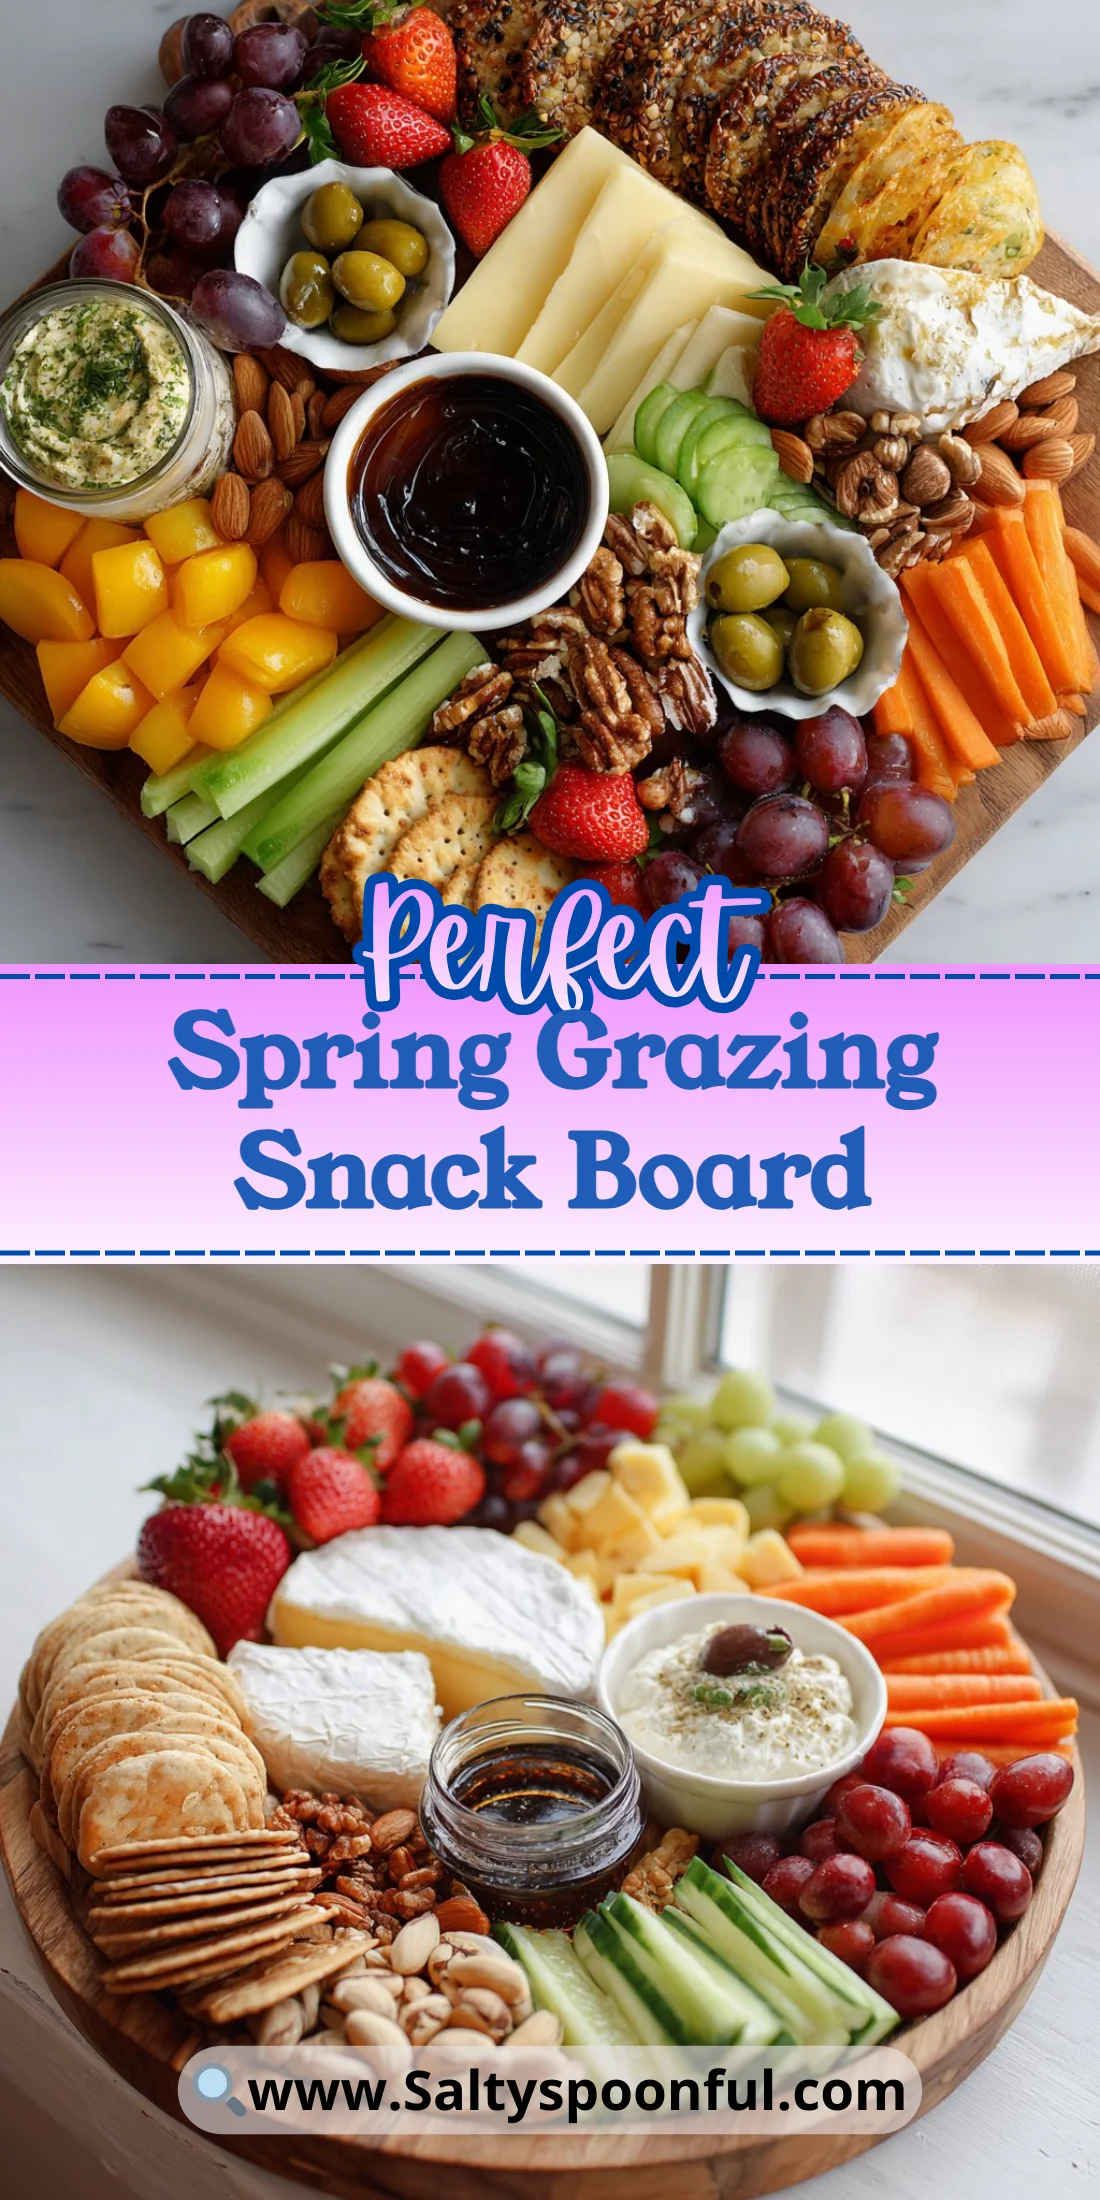
Bright, colorful, and impossibly easy to pull together, this Spring Grazing Snack Board is the kind of party starter that looks like you spent hours assembling it. It’s perfect for picnics, last-minute guests, or a laid-back brunch where grazing is the main event.
Short prep and simple tools make it approachable for cooks of every level. Focus on texture contrasts and small clusters of flavor rather than perfect symmetry.
If you want inspiration for themed snack boards, I also refer to creative layouts from other seasonal spreads to kickstart your design ideas: St. Patrick’s Day snack board idea.
Why You’ll Love This Spring Grazing Snack Board
- Fast to assemble for last-minute entertaining.
- Incredible variety of textures: creamy, crunchy, juicy, and crisp.
- Scales easily for two or twenty without extra fuss.
- Kid-friendly and crowd-pleasing with healthy fruit and veggies.
- Mix-and-match components let you personalize flavors.
- Perfect for outdoor spring weather—bright and refreshing.
- Minimal cleanup and no reheating required.
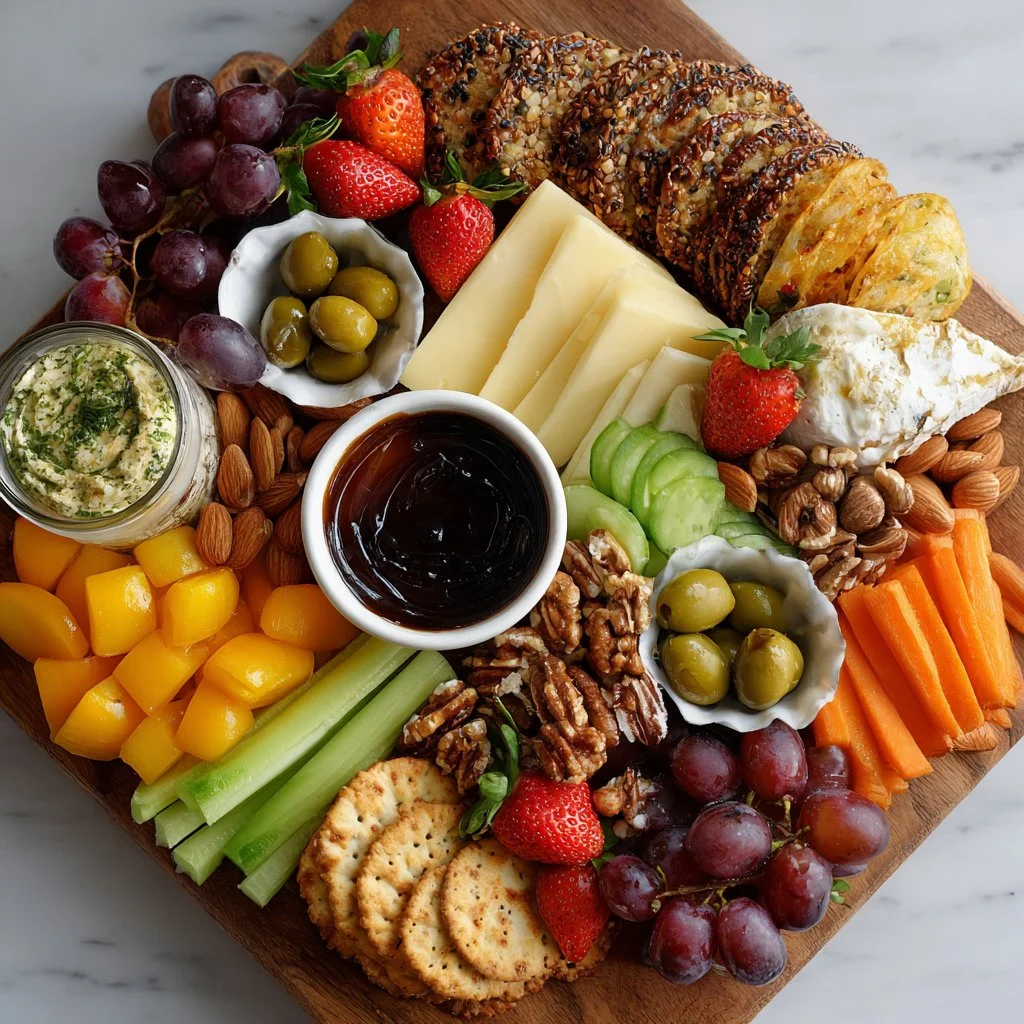
This board delivers a balanced taste profile: creamy Brie and goat cheese bring plush richness while cheddar adds a savory snap. Sweet fruits like strawberries, grapes, and melon refresh the palate; crunchy nuts and crackers add satisfying bite. Fresh vegetables and hummus provide a lighter counterpoint so the whole composition remains bright and springlike.
"★★★★★ I pulled this together in twenty minutes and everyone kept going back for more. The mix of cheeses and fruit tasted upscale but it was ridiculously simple to make." — A happy reader
Key Ingredients for Spring Grazing Snack Board
Brie cheese: Choose a small wheel with a thin, snowy rind and a slightly wobbly center when at room temperature. A runnier Brie melts on the tongue and pairs exceptionally with honey and fruit. If you substitute with Camembert you’ll get a funkier aroma; use a firmer Brie replacement if you need a longer shelf life on hot days.
Strawberries: Pick firm, glossy berries with fresh green caps and no bruises. They add bright acidity and a fragrant sweetness that counters rich cheeses. If you swap for raspberries, expect more fragile fruit and plan to serve them in a shallow bowl to avoid pulping.
Grapes: Use small, seedless grapes on the stem when possible for easy grabbing. Their burst of juice and subtle tannin-like bite act like a mini palate cleanser. If you choose dried grapes (raisins), you’ll lose the hydrating crunch but gain concentrated sweetness—use sparingly.
Hummus: A creamy, savory dip anchors the vegetable section and provides a neutral savory base for snacking. Buy a thick hummus or drain excess oil so it won’t pool on the board; sprinkle with paprika or olive oil to make it look finished. Substituting with tzatziki shifts the flavor to cucumber-y tang and pairs well with dill-forward herbs.
Full Ingredient List for Spring Grazing Snack Board
- Brie cheese
- Strawberries
- Grapes
- Melon (cantaloupe or honeydew)
- Carrots (baby or sliced)
- Cucumbers (sliced)
- Cherry tomatoes
- Almonds
- Walnuts
- Cheddar cheese
- Goat cheese
- Hummus
- Pesto
- Yogurt dip
- Crackers or breadsticks
- Olives
- Honey or chocolate (for drizzling)
Step-by-Step Instructions for Spring Grazing Snack Board
Step 1: Collect ingredients, tools and lay out a large board or platter
Gather cheeses, fruit, vegetables, nuts, dips, and serving tools. Choose a board or platter large enough to space items without overcrowding. Rinse and dry all produce thoroughly so nothing looks wet or diluted.
Pro Tip: The board should feel balanced; you should be able to see wood or platter around clusters, not buried under food.
Step 2: Cut and place the cheeses first to create focal points on the board
Place Brie, cheddar, and goat cheese at roughly triangular points across the board. Pre-slice a bit of the cheddar and leave the Brie wheel whole with a small knife so guests can cut; crumble or spoon the goat cheese for textural contrast.
Pro Tip: Each cheese area should look inviting — Brie with a small pool of honey, cheddar with a fan of slices, goat cheese sprinkled with herbs.
Step 3: Arrange the fruits in clusters to enhance visual appeal
Group strawberries, grapes, and melon in small bunches near the cheeses they complement. Keep like colors together for visual impact and vary sizes to create depth. Drizzle honey or melted chocolate over selected fruit clusters for shine.
Pro Tip: Clusters should look abundant but not crowded — think small islands of color with space between.
Step 4: Prepare the vegetables and arrange them near the dips
Slice cucumbers and tomatoes, and place carrots in neat stacks. Set hummus, pesto, and yogurt dip in small bowls and situate vegetables around them for easy dipping.
Pro Tip: Bowls of dips should have a clean top and a spoon or spreader; dips should not be smeared on the board.
Step 5: Distribute small bowls of dips and scatter nuts across the board
Intermix almonds and walnuts around the board, filling gaps and adding crunchy contrast. Scatter a few crackers or breadsticks near cheeses, but reserve most crackers until last to keep them crisp.
Pro Tip: Nuts should look casually strewn, not perfectly lined up — that gives a relaxed, inviting feel.
Step 6: Finalize with olives and drizzle honey or chocolate over the fruits, positioning crackers last for freshness
Add olives in a small pile and use a spoon to drizzle honey over Brie and fruit or chocolate over berries. Place crackers and breadsticks at the final step so they remain crunchy and appealing.
Pro Tip: The finished board should smell fresh and layered; fruit juices should be contained and not pooling on the board.
Expert Tips for Spring Grazing Snack Board
- Temperature tips: Pull soft cheeses like Brie and goat cheese from the fridge 20–30 minutes before serving so their flavors bloom.
- Texture troubleshooting: If crackers get soggy, serve them in a separate basket and replenish on request.
- Equipment tips: Use small ramekins for dips and sticky items to keep the board tidy.
- Common mistakes: Avoid placing wet fruit directly on wood—use small bowls or a parchment barrier to prevent staining.
- Placement strategy: Build in thirds—start with cheeses, then fruit clusters, then fill gaps with nuts and crackers.
- Portion guidance: Plan roughly 2–3 ounces of cheese per person when the board is the main food focus.
- Visual cues: Use height—stack a few crackers or prop grapes on stems to create dimension.
- Flavor pairing tip: Pair honey with Brie and balsamic or pesto with cheddar for complementary contrasts.
Storage & Freezing for Spring Grazing Snack Board
For fridge storage, wrap each cheese tightly in wax paper and then plastic wrap to prevent cross-flavors. Keep cut fruit in airtight containers lined with paper towels to absorb excess moisture. Use glass or BPA-free plastic containers with tight lids for 3–4 days.
Freezer storage is limited: most fruits and vegetables become mushy after thawing. Only freeze components that tolerate it, such as certain nuts (in a sealed freezer bag) and hummus in an airtight container. Freeze nuts up to 6 months; hummus up to 3 months.
Thawing: Move frozen hummus or nuts to the fridge overnight to thaw slowly. Bring cheeses to serving temperature after thawing by sitting them at room temperature for 30–60 minutes.
Reheating: This board is mostly served cold. If you want warm Brie, place the wheel in a small oven-safe dish and bake at 350°F (175°C) for 10–12 minutes until just gooey. Do not reheat fruit or crackers.
Variations & Substitutions for Spring Grazing Snack Board
Mediterranean Variation: Swap cheddar and walnuts for manchego and marcona almonds, replace hummus with tzatziki, and add marinated artichokes. The board becomes herb-forward and savory with bright lemon notes.
Kids’ Friendly Variation: Use mild cheddar and seedless grapes, add apple slices and peanut butter in a small bowl. This produces a simpler, sweeter board that’s easy for small hands.
Vegan Variation: Replace dairy cheeses with nut-based or tofu cheeses, use maple or agave for drizzling, and include roasted chickpeas for crunch. The overall texture stays varied, and flavors skew toward savory-sweet without dairy.
Dessert Grazing Variation: Swap cheddar for dark chocolate chunks and replace hummus with mascarpone or dulce de leche. Use cookies instead of crackers and drizzle extra chocolate over berries for a sweet-ending board.
Frequently Asked Questions About Spring Grazing Snack Board
Q: How long can a grazing board sit out at a party?
A: Per food safety guidelines, perishable items should not sit out more than two hours at room temperature. In warm outdoor settings (above 90°F/32°C), reduce that to one hour. Keep cold ingredients on chilled platters or replace them periodically.
Q: How do I scale this board for a crowd?
A: Multiply ingredient quantities proportionally and use multiple boards or large trays to keep flow. Aim for 2–3 ounces of cheese per guest and add extra fruit and crackers to maintain variety. For very large crowds, set up a refill station to replenish items as they run low.
Q: Can I prepare the board ahead of time?
A: Yes—prepare and chop fruits and vegetables up to a day ahead and store them in separate airtight containers. Assemble the board no more than an hour before serving to preserve textures. Keep crackers and drizzles until the final five minutes.
Q: What are the best dips to include and how much should I provide?
A: Include a mix of creamy and herby dips like hummus, pesto, and a yogurt dip. For a small board serving 6–8 people, plan for three 1/2-cup dips. Place dips in shallow bowls to make dipping easy and visually tidy.
Q: How can I make the board look more professional?
A: Use odd numbers of focal items (three cheeses), vary height with small bowls and stacked crackers, and leave negative space to highlight clusters. Add a few sprigs of fresh herbs and a deliberate drizzle of honey or chocolate for a finished look.
Final Thoughts on Spring Grazing Snack Board
This Spring Grazing Snack Board is an easy, flexible centerpiece that reads like a celebration of spring with minimal effort. Try it for your next gathering and adjust components to suit your crowd.
Please leave a star rating in the recipe card below and pin this board to Pinterest if you loved it.
Conclusion for Spring Grazing Snack Board
If you want additional styling ideas for spring grazing spreads, this roundup from a popular food blog offers beautiful plating inspiration: The Ultimate Spring Grazing Board – The Original Dish.
For tips on scaling a grazing board for a crowd and layout options, check this helpful guide on oversized boards: Giant Spring Grazing Board for a Crowd – Gathered Living.
If you prefer a simpler, step-by-step spring charcuterie approach, this easy tutorial is a great visual reference: Easy Spring Charcuterie Board – Reluctant Entertainer.
Spring Grazing Snack Board
Ingredients
Method
- Collect ingredients, tools, and lay out a large board or platter. Rinse and dry all produce thoroughly.
- Cut and place the cheeses first to create focal points on the board.
- Arrange the fruits in clusters to enhance visual appeal.
- Prepare the vegetables and arrange them near the dips.
- Distribute small bowls of dips and scatter nuts across the board.
- Finalize with olives and drizzle honey or chocolate over the fruits.