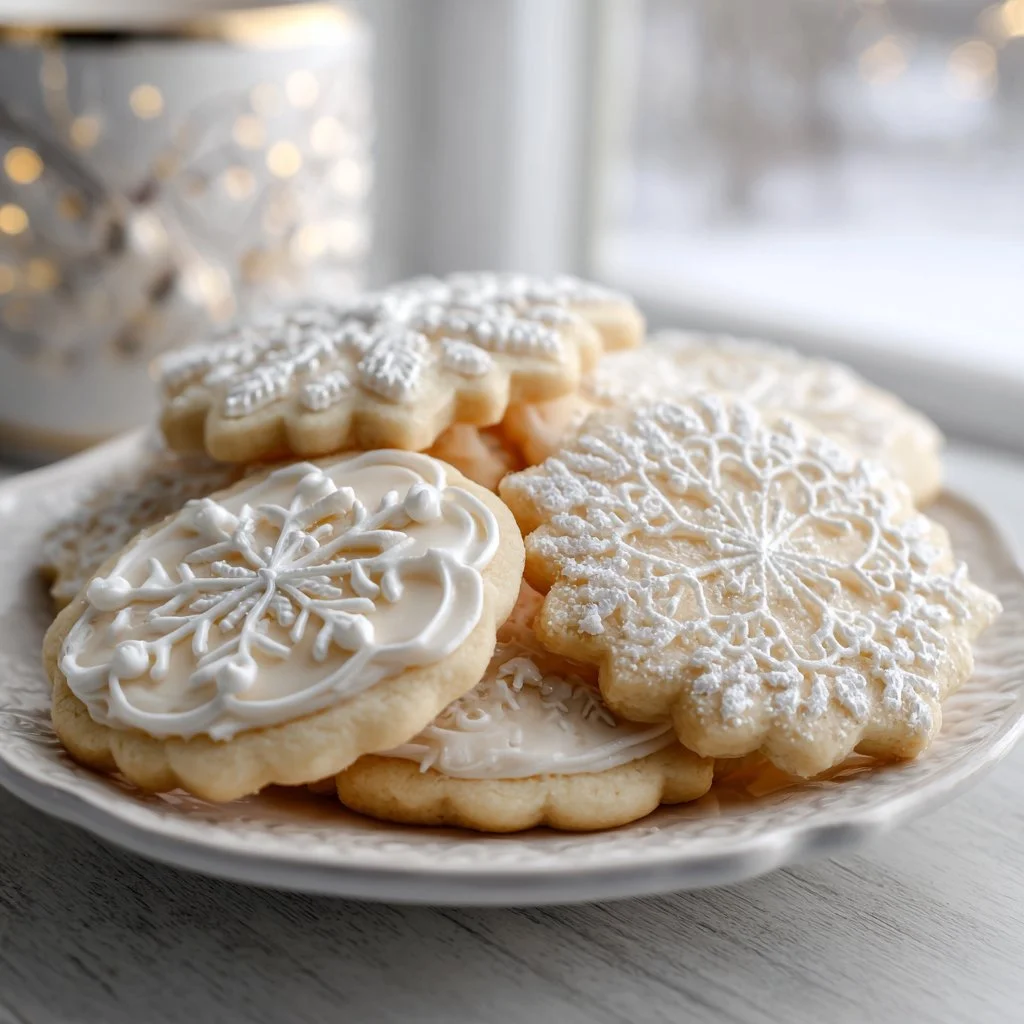
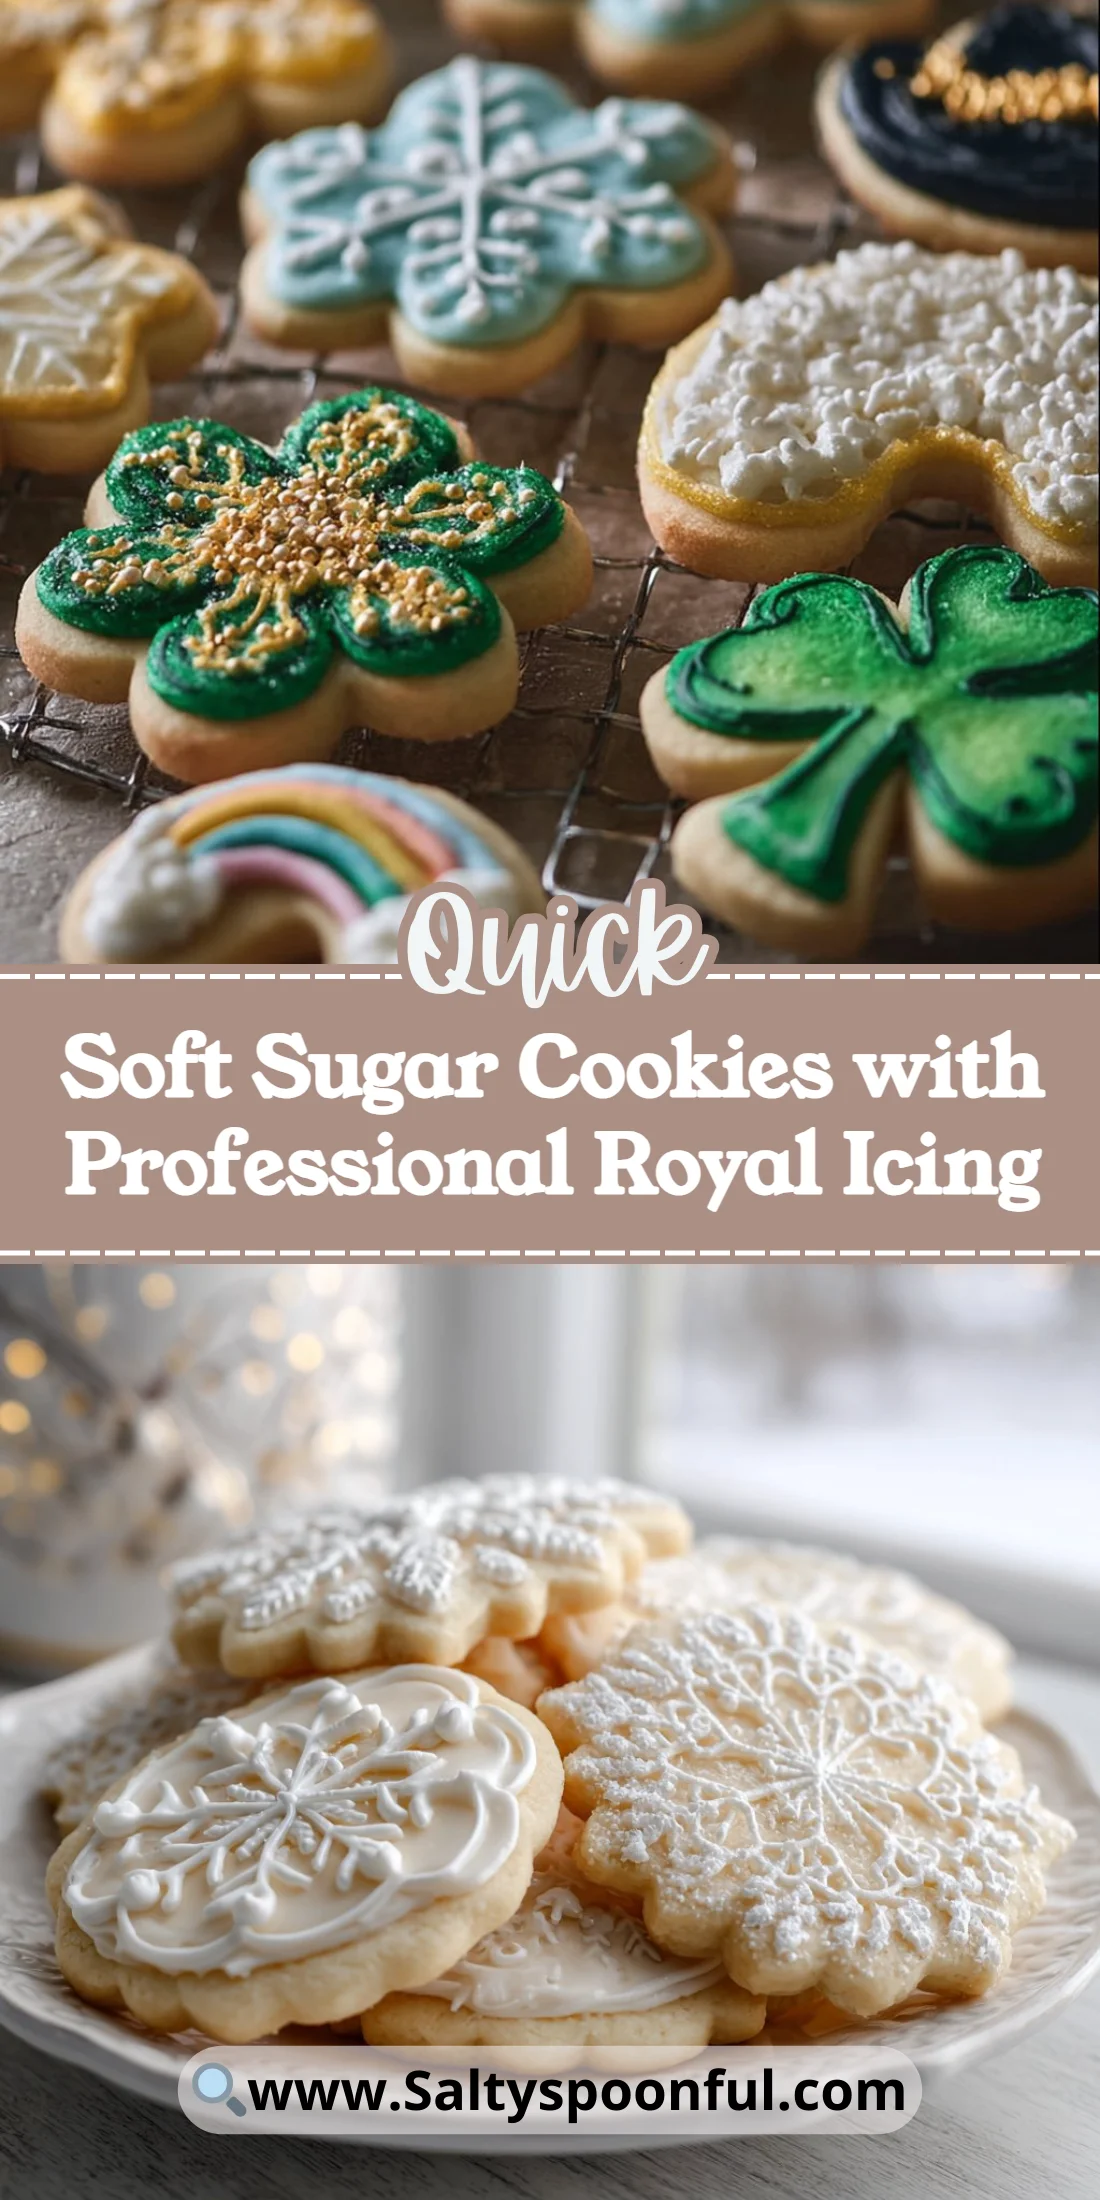
Soft, buttery sugar cookies topped with smooth, glossy royal icing are a classic for a reason. These cookies stay tender while holding detailed icing work, so you can cut precise shapes and decorate like a pro.
They’re forgiving for first-time decorators and scalable for parties or gift tins. Short fridge time and a forgiving bake make them perfect for busy bakers.
Pair them with a bright drink or bake them alongside another favorite for a cookie swap. For a fun pairing idea, try a cold, sweet beverage like brown sugar boba iced coffee.
Why You’ll Love This Soft Sugar Cookies with Professional Royal Icing
– Soft, tender crumb that doesn’t spread and holds shape.
– Royal icing that dries hard for stacking and shipping.
– Straightforward steps with predictable results.
– Minimal, pantry-friendly ingredients.
– Great canvas for holiday, wedding, or everyday decorating.
– Scales easily for batches large and small.
The taste is a clean, buttery vanilla cookie with a tender bite and fine crumb. The royal icing adds a slightly sweet, meringue-like shell that dries smooth and glossy, creating a perfect contrast of soft cookie and crisp decorative finish.
"I made a batch for a holiday cookie swap and everyone asked for the recipe — texture was spot on and the icing held up in transit. Five stars!" — A delighted reader
Key Ingredients for Soft Sugar Cookies with Professional Royal Icing
Unsalted butter, softened (65-67ºF) — 3/4 cup
Butter is the backbone of flavor and mouthfeel. Use real unsalted butter for clean taste; adjust salt if using salted butter. If you substitute margarine or a low-fat option, cookies will lose richness and spread differently.
Granulated sugar — 1 cup
Sugar not only sweetens but influences texture and spread; granulated sugar creates slight chew while keeping edges tidy. For a finer moldable dough, you can pulse sugar briefly in a blender, but swapping for brown sugar will add moisture and change color and chew.
All-purpose flour — 2 1/3 cups
Flour provides structure; use a reliable all-purpose flour and spoon-and-level for accuracy. Substituting cake flour yields a more tender cookie but may make shapes less defined; bread flour will make a tougher result.
Powdered sugar (icing) — 4 cups
Powdered sugar is essential for smooth, lump-free royal icing. Sift before measuring to avoid clumps. Replacing it with granulated sugar won’t work — the icing will be grainy and won’t set correctly.
Full Ingredient List for Soft Sugar Cookies with Professional Royal Icing
– Unsalted butter, softened (65-67ºF) — 3/4 cup
– Granulated sugar — 1 cup
– Large egg, room temperature — 1
– Vanilla extract — 1/2 teaspoon
– All-purpose flour — 2 1/3 cups
– Baking powder — 1 teaspoon
– Kosher salt — 1/2 teaspoon
– Powdered sugar (icing) — 4 cups
– Meringue powder (icing) — 3 tablespoons
– Warm water (100-110°F) — 9 tablespoons
– Vanilla extract (icing) — 1/2 teaspoon
Step-by-Step Instructions for Soft Sugar Cookies with Professional Royal Icing
Step 1: Cream the butter and sugar
Place softened unsalted butter and granulated sugar in a stand mixer fitted with the paddle or use a hand mixer. Cream on medium-low for 2 minutes until the mixture is pale and slightly airy, scraping the bowl once.
Pro Tip: The mixture should look lighter in color and feel slightly fluffy to the touch; no large butter lumps visible.
Step 2: Add the egg and vanilla
Add the room-temperature egg and 1/2 teaspoon vanilla extract. Increase speed to medium-high and mix for 20–30 seconds until incorporated, but don’t overbeat.
Pro Tip: The batter should look glossy and homogenous with no streaks of egg white; it will smell faintly of vanilla.
Step 3: Combine dry ingredients and form the dough
Sift together 2 1/3 cups all-purpose flour, 1 teaspoon baking powder, and 1/2 teaspoon kosher salt. Add to the mixer and pulse just until the dough comes together; avoid overmixing to keep cookies tender.
Pro Tip: The dough should hold together when pressed but not be sticky; it will feel slightly firm and pliable.
Step 4: Chill the dough
Divide the dough into two portions, wrap each in plastic wrap, and refrigerate for 1–3 hours until firm enough to roll.
Pro Tip: The dough should be cool and firm but still pliable — if rock-hard, let sit 10 minutes before rolling.
Step 5: Preheat and prepare baking sheets
Preheat the oven to 350ºF. Line baking sheets with parchment paper or a silicone mat.
Pro Tip: The oven should be fully preheated; parchment should lie flat with no wrinkles that could distort cookies.
Step 6: Roll and cut the cookies
On a lightly floured surface, roll dough to 1/4″ thickness. Cut shapes with cookie cutters and transfer to baking sheets, spacing cookies about 1″ apart.
Pro Tip: Each cookie should have clean edges from the cutter; if the dough warms while rolling, chill for 5–10 minutes.
Step 7: Bake until set
Bake for 10–11 minutes for 3″ cookies, or until the surface looks dry and edges are barely set. Avoid browning.
Pro Tip: Cookies should not brown; the surface will look matte and slightly dry when done.
Step 8: Cool the cookies
Let cookies cool on the sheet for 5 minutes, then transfer to a wire rack to cool completely before icing.
Pro Tip: They should feel set when handled and not warm; hot cookies will melt icing.
Step 9: Make the royal icing
In a mixing bowl, whisk 4 cups powdered sugar, 3 tablespoons meringue powder, warm water (100–110°F) — start with 9 tablespoons — and 1/2 teaspoon vanilla extract on low for 7 minutes, then on medium-low for an additional 2–3 minutes until glossy peaks form.
Pro Tip: The icing will look glossy and ribbon off the whisk slowly; stiff peaks mean less water is needed.
Step 10: Adjust icing consistency
Divide icing for border and flood. For borders, keep thicker to hold shape; for flooding, thin with a few drops of water until it flows smoothly off a spoon and levels in 10–15 seconds.
Pro Tip: Flood icing should settle flat within a few seconds; border icing should hold a ridge.
Step 11: Decorate and dry
Outline each cookie with border icing, then fill with flood icing. Use a toothpick to nudge icing into corners. Allow iced cookies to dry fully for 6–8 hours before stacking or packaging.
Pro Tip: Finished cookies should have a smooth, slightly hard shell and no tackiness before stacking.
Expert Tips for Soft Sugar Cookies with Professional Royal Icing
– Temperature tips: Keep butter at 65–67ºF and egg at room temperature to ensure proper emulsion and texture. If butter is too warm, dough will spread; if too cold, it won’t cream properly.
– Texture troubleshooting: If cookies come out cakey, you likely over-measured flour or under-creamed; weigh flour for precise results. If they spread too much, chill the dough longer and confirm baking powder is fresh.
– Icing stability: Use meringue powder instead of raw egg whites for food-safe, consistent royal icing that dries hard. If icing is grainy, re-sift powdered sugar before mixing.
– Equipment tips: Use a stand mixer with a paddle for consistent creaming and a silicone spatula to scrape the bowl. A small offset spatula and squeeze bottles speed up icing work.
– Common mistakes: Don’t overbake — brown edges equal dry cookies. Don’t add too much water to icing at once; add tiny amounts and test.
– Visual cues: For perfect borders, watch how the border icing holds its ridge; for floods, look for a uniform sheen once leveled.
– Scaling tip: Double or triple the recipe, but keep mixing times short and chill larger dough batches longer for even texture.
– Pairing and timing: Decorate on the same day you bake, then let cookies cure overnight. For a party pairing, try a cool beverage like brown sugar boba iced coffee to cut the sweetness.
Storage & Freezing for Soft Sugar Cookies with Professional Royal Icing
Fridge storage: Store uneaten iced cookies in an airtight container in the fridge for up to 5 days. Place parchment between layers to prevent sticking.
Freezer storage: Freeze undecorated baked cookies in a single layer on a tray for 1 hour, then transfer to a freezer-safe container or bag for up to 3 months. For iced cookies, freeze flat in a single layer for up to 2 months; protect with parchment and an airtight container.
Thawing: Thaw frozen cookies in the fridge overnight, then bring to room temperature before unwrapping to avoid condensation. Avoid microwaving; gentle room-temperature thaw preserves texture.
Reheating: Warm the cookies 5–10 minutes at 200ºF in an oven if you want them slightly soft, but skip if icing is present — heat can cause condensation and tackiness.
Variations & Substitutions for Soft Sugar Cookies with Professional Royal Icing
Lemon sugar cookies: Replace 1 teaspoon vanilla with 1 tablespoon finely grated lemon zest and 1/2 teaspoon lemon extract. The result is a bright, tangy cookie that pairs beautifully with white royal icing.
Almond sugar cookies: Swap 1/2 teaspoon vanilla for 1/2 teaspoon almond extract and consider adding 1/4 cup finely ground almonds for a nutty depth. The texture will be slightly denser and richer.
Chocolate-dipped cookies: Omit changes to the base cookie; once cookies are iced and set, dip half in tempered dark chocolate. This adds a crisp chocolate shell and a contrasting bitter note.
Spiced sugar cookies: Add 1/2 teaspoon ground cinnamon and a pinch of nutmeg to the dry ingredients. Expect a warm, cozy flavor ideal for fall; texture remains soft with subtle spice undertones.
Frequently Asked Questions About Soft Sugar Cookies with Professional Royal Icing
Q: How do I keep sugar cookies soft after baking?
A: Prevent overbaking and measure flour accurately (spoon and level or weigh). Cool cookies on a rack only until set, then store in an airtight container with a slice of bread to maintain moisture for 2–3 days. For longer storage, freeze as directed and thaw gently.
Q: Can I use pasteurized egg whites instead of meringue powder for royal icing?
A: Yes, pasteurized liquid egg whites can be used, but meringue powder is recommended for safety, shelf-stability, and consistent drying. If using egg whites, ensure they’re pasteurized and whip until glossy peaks form, then monitor consistency closely.
Q: Why did my royal icing crack after drying?
A: Cracking often results from icing that was too thick or cooled too quickly in a dry, cold environment. Thin slightly with water for a more elastic finish, or let icing dry at room temperature away from drafts. Avoid rapid temperature swings.
Q: How long does royal icing take to harden completely?
A: Surface drying occurs in 1–2 hours for thin floods, but complete hardening for stacking and shipping typically takes 6–8 hours and sometimes up to 24 hours for thicker sections. Humidity can extend drying time.
Q: Can I make the cookie dough ahead of time?
A: Yes — dough can be refrigerated for up to 48 hours before rolling. For longer storage, wrap dough tightly and freeze for up to 2 months; thaw overnight in the fridge before rolling. Chilled dough is easier to roll and cuts cleaner shapes.
Final Thoughts on Soft Sugar Cookies with Professional Royal Icing
These Soft Sugar Cookies with Professional Royal Icing give a reliable, tender base and a glossy, professional icing finish that’s great for gifting or parties. If you enjoyed this recipe, please leave a star rating in the recipe card below and pin it to Pinterest for later.
For a deeper dive into technique and a video walkthrough, check out this comprehensive guide from Sally’s Baking Addiction best sugar cookies.
If you want an alternate easy sugar cookie recipe with icing tips, I recommend this SugarSpun Run easy sugar cookie recipe for comparison.
For another royal icing-focused tutorial and decoration ideas, see Cup of Ambition sugar cookies with royal icing.
Soft Sugar Cookies with Professional Royal Icing
Ingredients
Method
- Cream the softened butter and granulated sugar together until pale and slightly airy.
- Add the egg and vanilla, mixing until just incorporated.
- Sift together flour, baking powder, and salt. Add to the mixture and pulse just until combined.
- Divide the dough, wrap in plastic, and chill for 1 to 3 hours.
- Preheat the oven to 350ºF and line baking sheets with parchment.
- Roll the chilled dough to 1/4 inch thickness, cut shapes, and transfer to baking sheets.
- Bake for 10-11 minutes until set, avoiding browning.
- Cool cookies on the baking sheet for 5 minutes before moving to a wire rack.
- In a mixing bowl, whisk together powdered sugar, meringue powder, warm water, and vanilla until glossy peaks form.
- Adjust icing consistency for borders and flooding as needed.
- Outline cookies with border icing and fill with flood icing, using a toothpick to spread.
- Allow iced cookies to dry fully for 6-8 hours before stacking or packaging.