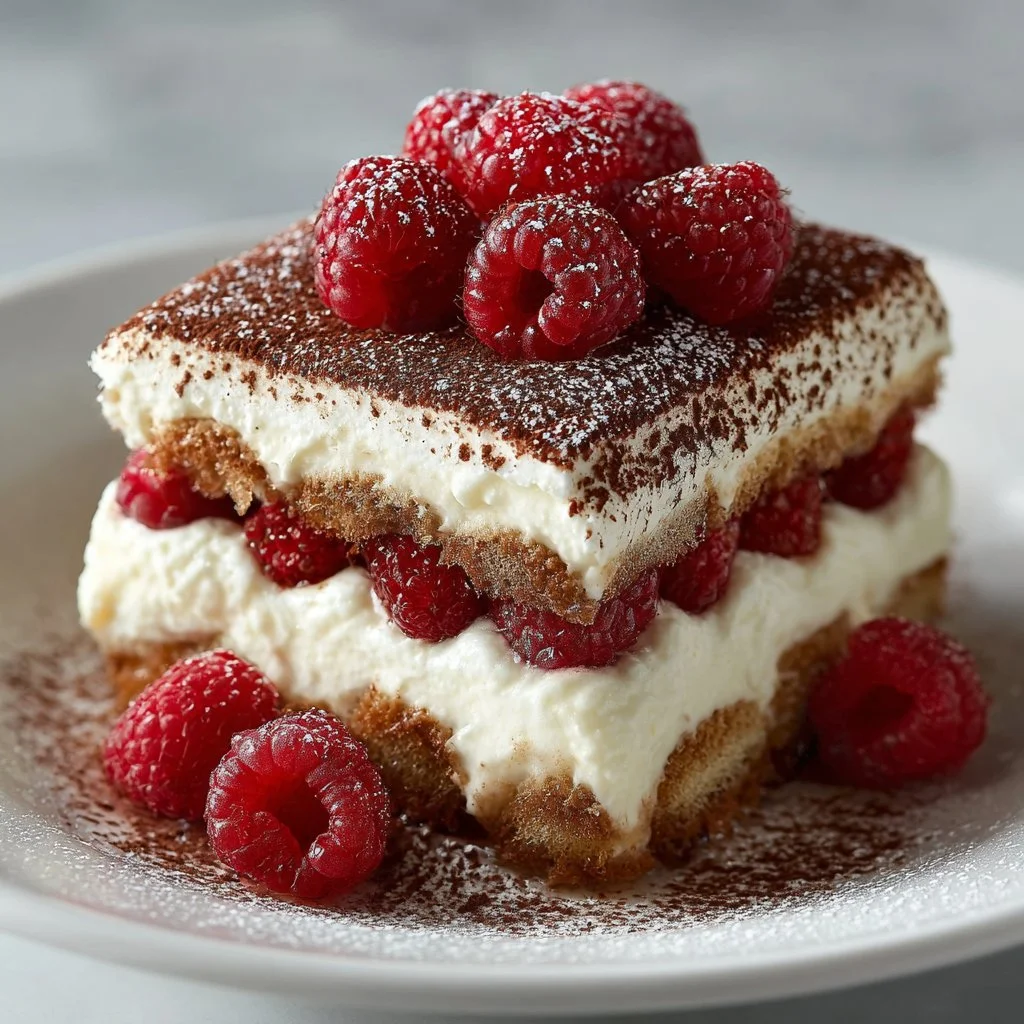
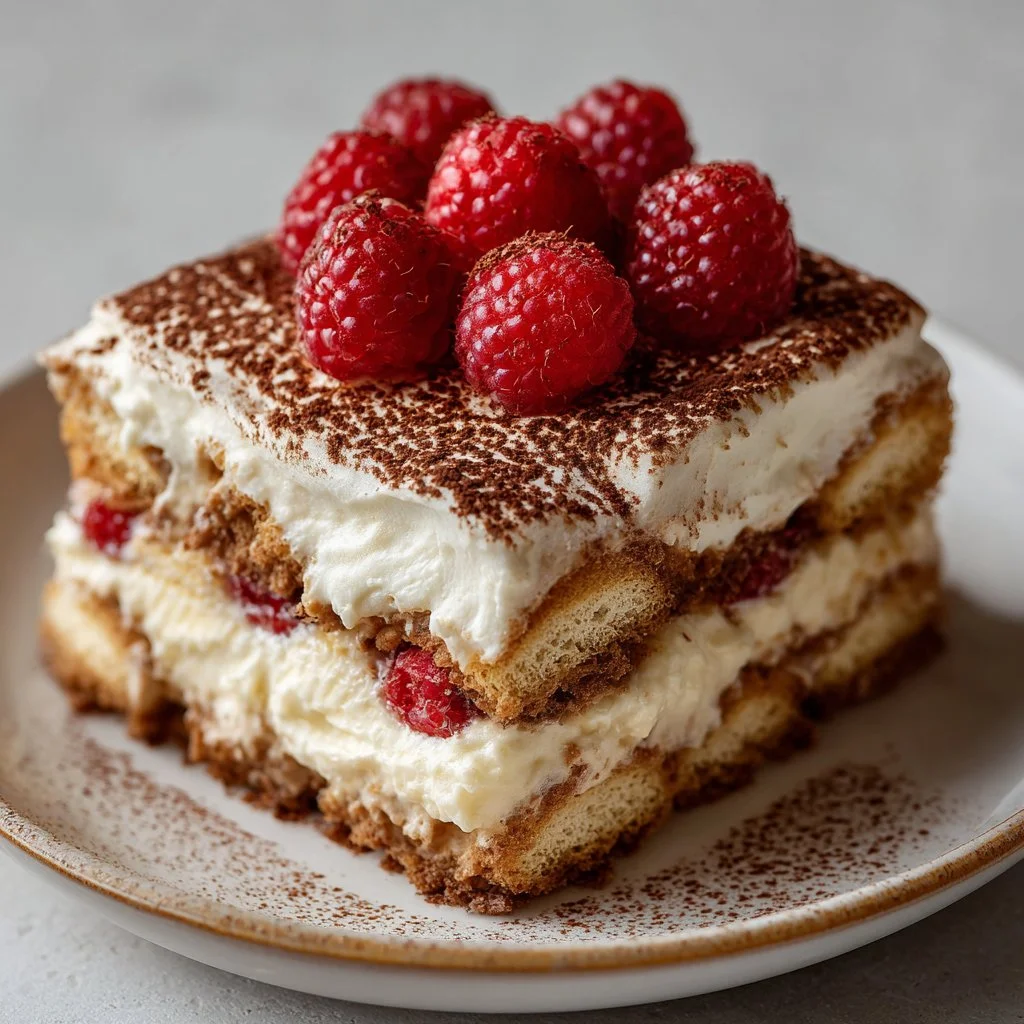
A light, berry-twisted take on a classic Italian dessert, Raspberry Tiramisu balances creamy mascarpone with bright fresh raspberries and espresso-soaked ladyfingers.
It comes together without fuss and feels special enough for dinner parties or a weekday treat.
Read on for the ingredient science, step-by-step visuals, and pro tips that keep this dessert fail-proof.
The recipe below is easy to scale, and if you like bold berry flavors, you can pair it with other recipes like the blue raspberry lemonade recipe for a matching menu color theme.
Why You’ll Love This Raspberry Tiramisu
– Bright, tangy raspberries cut through rich mascarpone.
– Fluffy texture from stabilized whipped cream.
– Classic espresso notes without being overly coffee-forward.
– No baking required—ready after a few hours of chilling.
– Elegant presentation that looks like you spent hours.
– Easy to scale for parties or individual portions.
The taste is a layered contrast: silky, lightly sweet mascarpone offset by tart, juicy raspberries and a whisper of espresso. The texture alternates between tender ladyfingers, airy cream, and the burst of fresh berries, giving each spoonful variety and balance.
"I made this for a dinner party and everyone asked for the recipe — bright, elegant, and the raspberries made it feel fresh instead of heavy. Five stars!" — A happy reader
Key Ingredients for Raspberry Tiramisu
Raspberries matter because their bright acidity cuts richness. Choose firm, fragrant berries at peak ripeness for the best flavor; if using frozen, thaw and drain them well to avoid extra moisture. Substituting with strawberries or cherries will change the acid-sweet balance and texture.
Mascarpone cheese is the backbone of the filling; its high fat content gives a smooth, luxurious mouthfeel that blends with whipped cream. When buying, pick a fresh, refrigerated tub with a clean smell and minimal liquid; swapping mascarpone for cream cheese will introduce tang and a firmer texture, altering the classic mouthfeel.
Heavy cream is used for aeration and lightness. Use cream labeled "heavy" or "whipping cream" with at least 30–36% fat for stable peaks. If you use a lower-fat cream, the mixture will be looser and may collapse during chilling.
Ladyfinger cookies provide structure and a dry sponge that soaks up espresso without becoming mushy immediately. Choose crisp ladyfingers (savoiardi) rather than cakey cookies; if you substitute with sponge cake, reduce dipping time to prevent oversaturation.
Full Ingredient List for Raspberry Tiramisu
– 1 cup raspberries
– 1 cup mascarpone cheese
– 1 cup heavy cream
– 1/2 cup sugar
– 1 teaspoon vanilla extract
– 1 cup brewed espresso (cooled)
– 12 ladyfinger cookies
– Cocoa powder for dusting
Step-by-Step Instructions for Raspberry Tiramisu
Step 1: Whip the heavy cream until stiff peaks form. Chill your mixing bowl and whisk for best volume.
Pro Tip: The cream should hold a pointed peak and look glossy; it should not wobble or separate.
Step 2: Combine mascarpone, sugar, and vanilla until smooth.
Pro Tip: The mascarpone mixture should be silky and lump-free; smell for fresh cream and no sour notes.
Step 3: Fold whipped cream into the mascarpone mixture.
Pro Tip: Use gentle folding motions; the final mixture should be airy and uniform, not streaky.
Step 4: Dip ladyfingers into cooled espresso, then layer them in a dish.
Pro Tip: Dip each ladyfinger for just 1–2 seconds per side; they should look moist but not collapsing.
Step 5: Spread half the mascarpone mixture and add half the raspberries.
Pro Tip: The first mascarpone layer should be even and about 1/2–3/4 inch thick; raspberries should sit on top without sinking.
Step 6: Repeat layers with remaining ingredients.
Pro Tip: The top layer of mascarpone should be smooth and slightly domed; any exposed ladyfingers should be covered.
Step 7: Cover and refrigerate for at least 4 hours or overnight.
Pro Tip: After chilling, edges should be set and the layers slightly melded; overnight will create the best texture.
Step 8: Before serving, dust the top with cocoa powder.
Pro Tip: Cocoa should be a light, even dusting; use a fine sieve for a uniform finish.
Expert Tips for Raspberry Tiramisu
– Temperature tip: Keep mascarpone and cream cold until ready to whip to ensure stable peaks and a smooth finish.
– Texture troubleshooting: If the filling is too loose, chill it for 10–20 minutes then re-whisk gently to firm up before assembling.
– Equipment tip: Use a metal bowl chilled in the freezer for 10 minutes to help cream whip faster and reach stiff peaks.
– Common mistake: Over-dipping ladyfingers causes a soggy base; aim for a quick 1–2 second soak.
– Freshness note: Use fresh raspberries within a day or two of buying; older berries become watery and can dilute the filling.
– Layering visual: Smooth the top layer with an offset spatula for a restaurant-ready look and cleaner cocoa dusting.
– Serving tip: Slice or scoop with a hot knife for clean portions—dip the knife in hot water, wipe dry, and slice.
– Make-ahead benefit: Tiramisu improves after chilling; plan ahead and refrigerate overnight for maximum flavor meld.
Storage & Freezing for Raspberry Tiramisu
Fridge storage: Cover the dish tightly with plastic wrap or an airtight lid and refrigerate for up to 3 days. Use a shallow container to keep layers intact and prevent odors from transferring.
Freezer storage: Freeze assembled tiramisu for up to 1 month in a freezer-safe container with a tight seal. To prevent freezer burn, press plastic wrap directly onto the surface before sealing.
Thawing: Thaw in the refrigerator overnight. Avoid thawing at room temperature to preserve texture and safety. After thawing, dust with fresh cocoa before serving.
Reheating: Do not reheat tiramisu; serve chilled. If you want a warmer element, offer hot espresso or a warmed berry compote on the side.
Variations & Substitutions for Raspberry Tiramisu
– Lemon-Raspberry Tiramisu: Add 1 tablespoon lemon zest to the mascarpone mixture and swap half the vanilla for lemon extract; this brightens the filling and pairs beautifully with raspberries.
– Chocolate-Drizzled Raspberry Tiramisu: Fold 1/3 cup melted, cooled dark chocolate into half the mascarpone for a marbled effect; the dessert becomes richer and more decadent.
– Alcohol-Free Espresso Swap: Replace espresso with strong decaffeinated coffee or a chilled berry syrup for kids and non-drinkers; expect a fruitier top note and milder coffee flavor.
– Berry Medley Tiramisu: Replace half the raspberries with chopped strawberries or blackberries and mash a few into a thin purée to brush over ladyfingers; this increases jammy fruit texture and visual interest.
Frequently Asked Questions About Raspberry Tiramisu
Q: Can I make Raspberry Tiramisu ahead of time?
A: Yes. Assemble and refrigerate for at least 4 hours, but overnight is ideal. For best texture and flavor meld, prepare up to 24 hours in advance; beyond that, the ladyfingers will soften more and raspberries may release juice.
Q: Can I use frozen raspberries?
A: You can, but thaw them completely and drain or pat dry to remove excess liquid. Frozen berries often release additional moisture that can make the filling looser, so fold them in at the last minute and reserve a few for garnish.
Q: How do I prevent the mascarpone from curdling?
A: Keep mascarpone cold and mix gently. Avoid overbeating and never heat mascarpone. If it appears grainy, chill briefly and whisk gently to re-emulsify.
Q: Can I omit espresso for a coffee-free version?
A: Yes—use strong decaffeinated coffee, chilled tea, or a raspberry syrup to soak the ladyfingers. The resulting dessert will be less bitter and more fruit-forward, so reduce sugar slightly if using syrup.
Q: What’s the best dish size for Raspberry Tiramisu?
A: Use an 8×8 inch or similar shallow dish for a classic two-layer tiramisu. Individual serving cups also work well—adjust ladyfinger counts and layer thicknesses accordingly.

Final Thoughts on Raspberry Tiramisu
Raspberry Tiramisu is an elegant, no-bake dessert that balances creamy richness and bright berry acidity, and it rewards patience with deep, melded flavors after chilling. Please leave a star rating in the recipe card below and pin this recipe to Pinterest for later.
For more inspiration and variations, see a similar Raspberry Tiramisu from Wood & Spoon, try an easy Raspberry Tiramisu recipe from Fresh April Flours, or compare techniques with Giada’s Raspberry Tiramisu on Food Network.
Raspberry Tiramisu
Ingredients
Method
- Whip the heavy cream until stiff peaks form. Chill your mixing bowl and whisk for best volume.
- Combine mascarpone, sugar, and vanilla until smooth.
- Fold whipped cream into the mascarpone mixture using gentle folding motions.
- Dip ladyfingers into cooled espresso for 1–2 seconds per side, then layer them in a dish.
- Spread half the mascarpone mixture over the ladyfingers and add half of the raspberries.
- Repeat with remaining ingredients to create layers.
- Cover and refrigerate for at least 4 hours or overnight.
- Before serving, dust the top with cocoa powder.