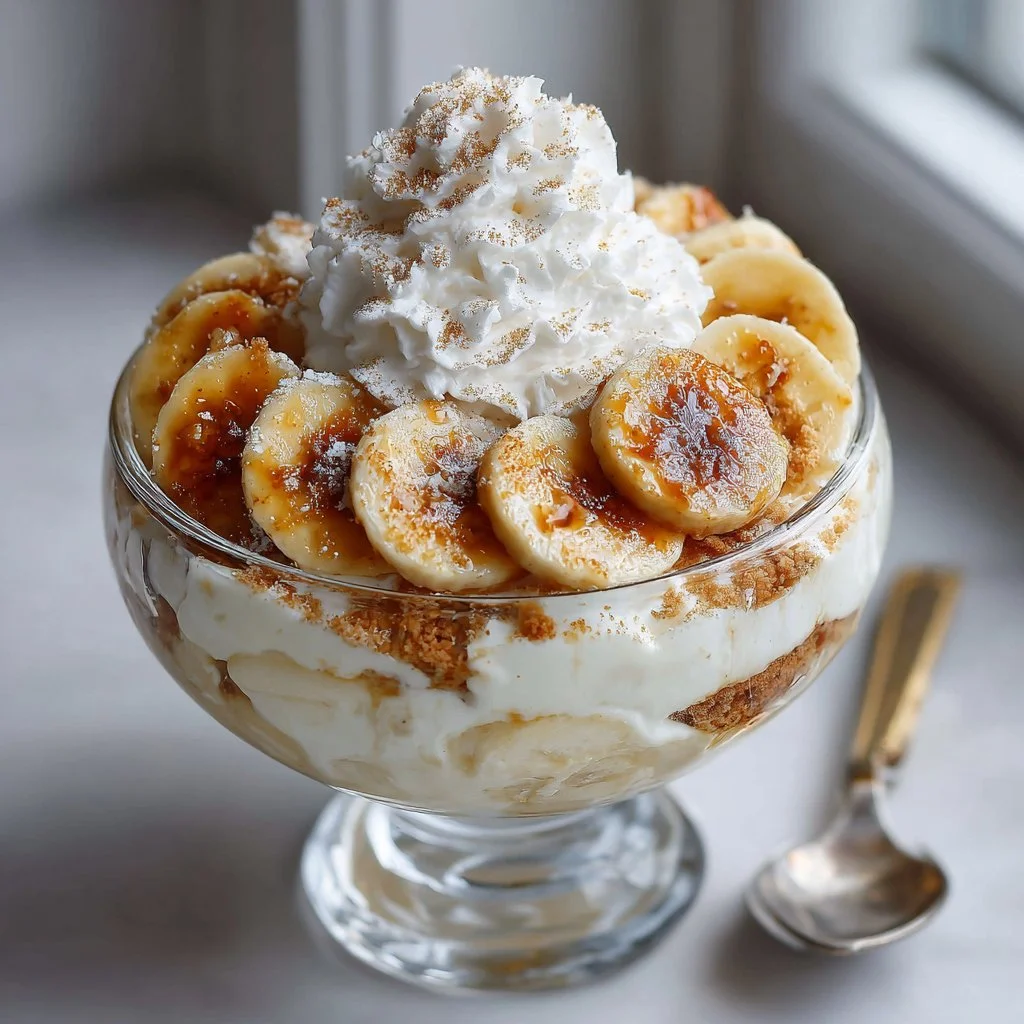
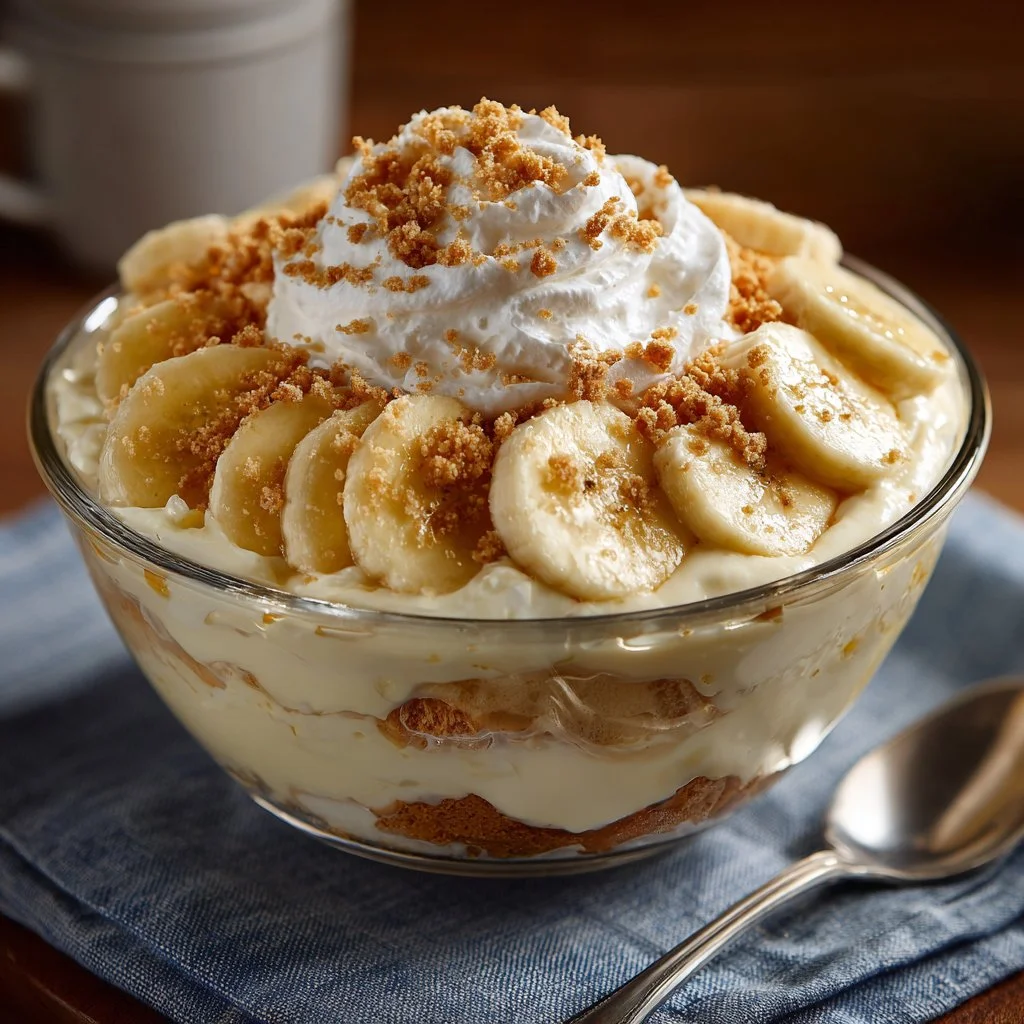
I first made this Magnolia-style gluten-free banana pudding for a family potluck and watched it disappear faster than I could get a spoon back in the dish. It’s a no-bake, layered pudding that captures the silky, nostalgic texture of the classic Magnolia Bakery version but uses gluten-free vanilla wafers so everyone can enjoy it. If you’re serving a brunch, summer cookout, or a weeknight dessert that feels special with minimal fuss, this recipe is a keeper — creamy, not-too-sweet, and studded with ripe-but-still-firm banana slices. For a banana-forward brunch spread, pair it with a refreshing peanut-butter banana oat smoothie to balance the pudding’s richness.
Why you’ll love this dish
This pudding is crowd-pleasing and stress-free. It combines pantry-friendly ingredients with a short chill time, so you can assemble it the same day you serve it. The use of sweetened condensed milk plus instant pudding creates that silk-smooth body Magnolia is known for, while whipped cream keeps the texture light. Swapping in gluten-free wafers makes it safe for guests who avoid gluten without compromising crunch or flavor.
“Absolutely the best gluten-free banana pudding I’ve had — the wafers stayed crisp enough, the pudding was lush, and everyone asked for the recipe.” — a satisfied potluck guest
This dessert is perfect for holidays, summer gatherings, and potlucks. It holds up well in a 9×13 dish, so you can scale up easily, and it’s very kid-approved. If you’re looking to round out a banana-themed menu, try pairing it with a chilled peanut-butter banana oat smoothie for a fun contrast.
The cooking process explained
Before you dive in: this recipe is essentially three parts — make the pudding base, whip the cream, and fold them together. Then it’s a simple assembly of wafers, bananas, and pudding in layers. Expect about 20 minutes active work and at least 2 hours chilling so the wafers soften slightly and the flavors meld.
Quick overview:
- Chill your mixing bowl and beaters to help the cream whip faster.
- Whisk condensed milk and cold water, then add instant pudding and let it thicken.
- Whip the very cold heavy cream to soft peaks.
- Fold the whipped cream into the pudding base gently to maintain volume.
- Layer wafers, banana slices, and pudding in a 9×13 dish. Chill and serve.
If you like make-ahead desserts, this is a great candidate — you can assemble the night before and let it sit in the fridge. For a lighter brunch option, serve smaller portions with a side of fruit and a banana smoothie.
What you’ll need
- 1 (14 oz) can sweetened condensed milk
- 1 ½ cups ice-cold water
- 1 (3.4 oz) box vanilla instant pudding mix (gluten-free) — check the label to confirm gluten-free status
- 3 cups heavy cream, very cold
- 4 cups sliced barely ripe bananas (about 3–4 medium bananas) — use slightly firm bananas so they hold shape
- 2 (6.3 oz) boxes gluten-free vanilla wafers
Notes and substitutions:
- Dairy-free option: Use a heavy coconut cream that whips (chill it well) and a dairy-free pudding mix labeled gluten-free. Texture and flavor will shift.
- Sweetness: If you prefer less sweetness, choose a reduced-sugar vanilla pudding mix and taste the base before folding in all the cream.
- Wafers: If you can’t find gluten-free vanilla wafers, use gluten-free graham-style cookies for a slightly different texture.
For pantry pairing ideas and a banana-forward drink idea, consider serving with a peanut butter banana smoothie.
Step-by-step instructions
- Chill mixing bowl and beaters. Pop them into the freezer for 10 minutes to ensure the cream whips quickly and holds peaks.
- Combine sweetened condensed milk and ice-cold water in the chilled bowl. Whisk until completely smooth. Sprinkle in the vanilla instant pudding mix. Whisk vigorously for 2 minutes until the mixture thickens. Let it sit for 5 minutes to fully set.
- In the same chilled bowl (wipe it dry first if needed), pour in the very cold heavy cream. Whip on medium-high until soft peaks form — you should see billowy folds that hold briefly.
- Fold one-third of the whipped cream into the pudding base to lighten it. Use a rubber spatula and gentle, large folding motions. Add the remaining whipped cream and fold until the mixture is homogeneous and airy. Avoid overmixing.
- Assemble in a 9×13-inch dish: spread a thin layer of pudding, arrange a single layer of gluten-free vanilla wafers, then add a layer of banana slices (don’t crowd them). Spoon more pudding over the bananas and repeat layers until the dish is filled, finishing with a top layer of pudding and a light smear of whipped cream for appearance.
- Cover the dish tightly and chill for at least 2 hours. Chilling lets the wafers soften to a pleasant, cookie-like consistency and melds the flavors. Serve chilled.
For make-ahead tips, you can assemble the pudding up to 24 hours in advance — the texture will mellow and the bananas will darken slightly unless you press plastic wrap directly onto the surface.
Best ways to enjoy it
Serve slices on chilled dessert plates. A few suggestions:
- Garnish with extra cookie crumbs, thin banana slices, or a dusting of cinnamon for a warm aroma.
- Pair with lightly brewed coffee or an iced espresso for a dessert that balances sweetness.
- Offer small scoops with fresh berries on the side for acidity and color contrast.
- For a picnic, keep the dish chilled in a cooler and serve straight from the container.
A shallow 9×13 pan makes it easy to spoon out even portions for guests. If plating individually, add a wafer half on the side for crunch.
Storage and reheating tips
- Refrigerate: Cover tightly and store in the fridge for up to 3 days. The bananas will brown somewhat; pressing plastic wrap onto the pudding surface helps reduce oxidation.
- Freezing: This pudding is not ideal for freezing because the texture of the cream and bananas changes. If necessary, freeze only the pudding base (without whipped cream) in an airtight container for up to 1 month; thaw overnight and re-whip the cream before folding in.
- Food safety: Keep the pudding refrigerated when not serving. Discard any leftovers left at room temperature for more than 2 hours.
If you want to refresh slightly weepy whipped cream after overnight storage, stir gently to reincorporate any separated liquid, or top with freshly whipped cream before serving.
Pro chef tips
- Use very cold ingredients and a chilled bowl for best whipped volume. Room-temperature cream won’t whip to soft peaks easily.
- Slice bananas just before assembly to minimize browning. If prepping ahead, toss slices briefly in a teaspoon of lemon juice diluted with a splash of water to slow oxidation.
- When folding, cut through the center and sweep the spatula across the bottom to preserve air; this keeps the pudding light.
- If your wafers go very soft too quickly, layer fewer wafers and add them just before serving so some bite remains.
- Taste as you go: instant pudding mixes vary in sweetness. Adjust by using slightly less condensed milk if you prefer a subtler sweetness.
For a time-saving shortcut, whip the cream while the pudding rests to streamline the process.
Creative twists
- Chocolate ripple: add a layer of thin chocolate ganache or swap half the vanilla wafers for gluten-free chocolate wafers.
- Boozy adult version: macerate banana slices briefly in a tablespoon of dark rum or bourbon, then drain before layering.
- Citrus lift: fold in a teaspoon of fresh lemon zest to the pudding base for brightness.
- Tropical: stir in a handful of diced toasted coconut and use coconut cream in place of some heavy cream for a different profile.
- Mini parfaits: layer in individual jars for portable desserts or single-serve gifts.
These variations keep the core technique intact while offering new flavor directions.
Common questions
Q: How long does it take to make this pudding from start to finish?
A: Active prep is about 20–25 minutes. Plan on at least 2 hours chilling before serving — longer chill (up to overnight) improves texture.
Q: Can I use instant banana pudding mix instead of vanilla?
A: You can, but use a gluten-free labeled banana pudding mix. The sweetened condensed milk + vanilla combo gives a signature Magnolia-like richness; switching to banana mix will intensify banana flavor and sweetness, so taste and adjust as needed.
Q: Are gluten-free vanilla wafers necessary?
A: If you or guests need to avoid gluten, yes — use certified gluten-free wafers. If gluten isn’t a concern, traditional Nilla wafers replicate Magnolia Bakery’s original profile.
Q: How do I keep banana slices from turning brown?
A: Slice them right before assembling. If prepping in advance, toss slices briefly in a little lemon juice diluted with water (1 tsp lemon juice + 1 tbsp water) to slow oxidation without tasting too tart.
Q: Can I make smaller or individual servings?
A: Yes — scale down into smaller dishes or mason jars and layer the same way. Adjust chilling time if jars are shallower.
Conclusion
If you want the classic Magnolia-style experience with a gluten-free twist, this banana pudding delivers creamy texture and nostalgic flavor with accessible ingredients. For recipe inspiration and variations, see the thoughtful adaptation from Meaningful Eats’ gluten-free banana pudding, a step-through version at Cupcakes & Kale Chips’ Magnolia-style gluten-free banana pudding, and the original Magnolia Bakery banana pudding page for context on the dessert’s roots.
Gluten-Free Banana Pudding
Ingredients
Method
- Chill mixing bowl and beaters for 10 minutes to ensure the cream whips quickly.
- Combine sweetened condensed milk and ice-cold water in the chilled bowl. Whisk until smooth.
- Sprinkle in the vanilla instant pudding mix and whisk vigorously for 2 minutes until the mixture thickens. Let it sit for 5 minutes.
- In the same chilled bowl, pour in the very cold heavy cream. Whip on medium-high until soft peaks form.
- Fold one-third of the whipped cream into the pudding base gently. Add the remaining whipped cream and fold until homogeneous and airy.
- Spread a thin layer of pudding in a 9×13 inch dish.
- Arrange a single layer of gluten-free vanilla wafers, then add a layer of banana slices.
- Spoon more pudding over the bananas and repeat layers until the dish is filled, finishing with a top layer of pudding and a light smear of whipped cream.
- Cover the dish tightly and chill for at least 2 hours.
- Serve chilled.