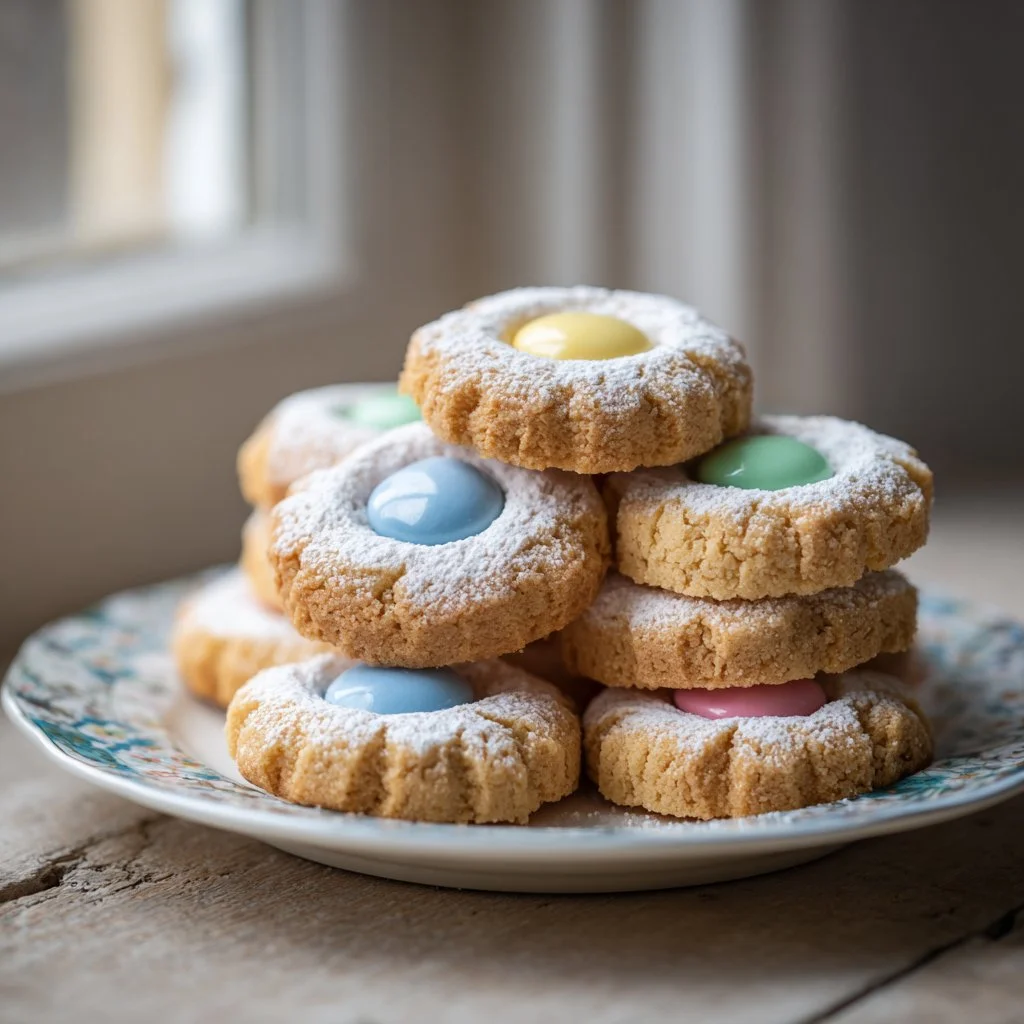
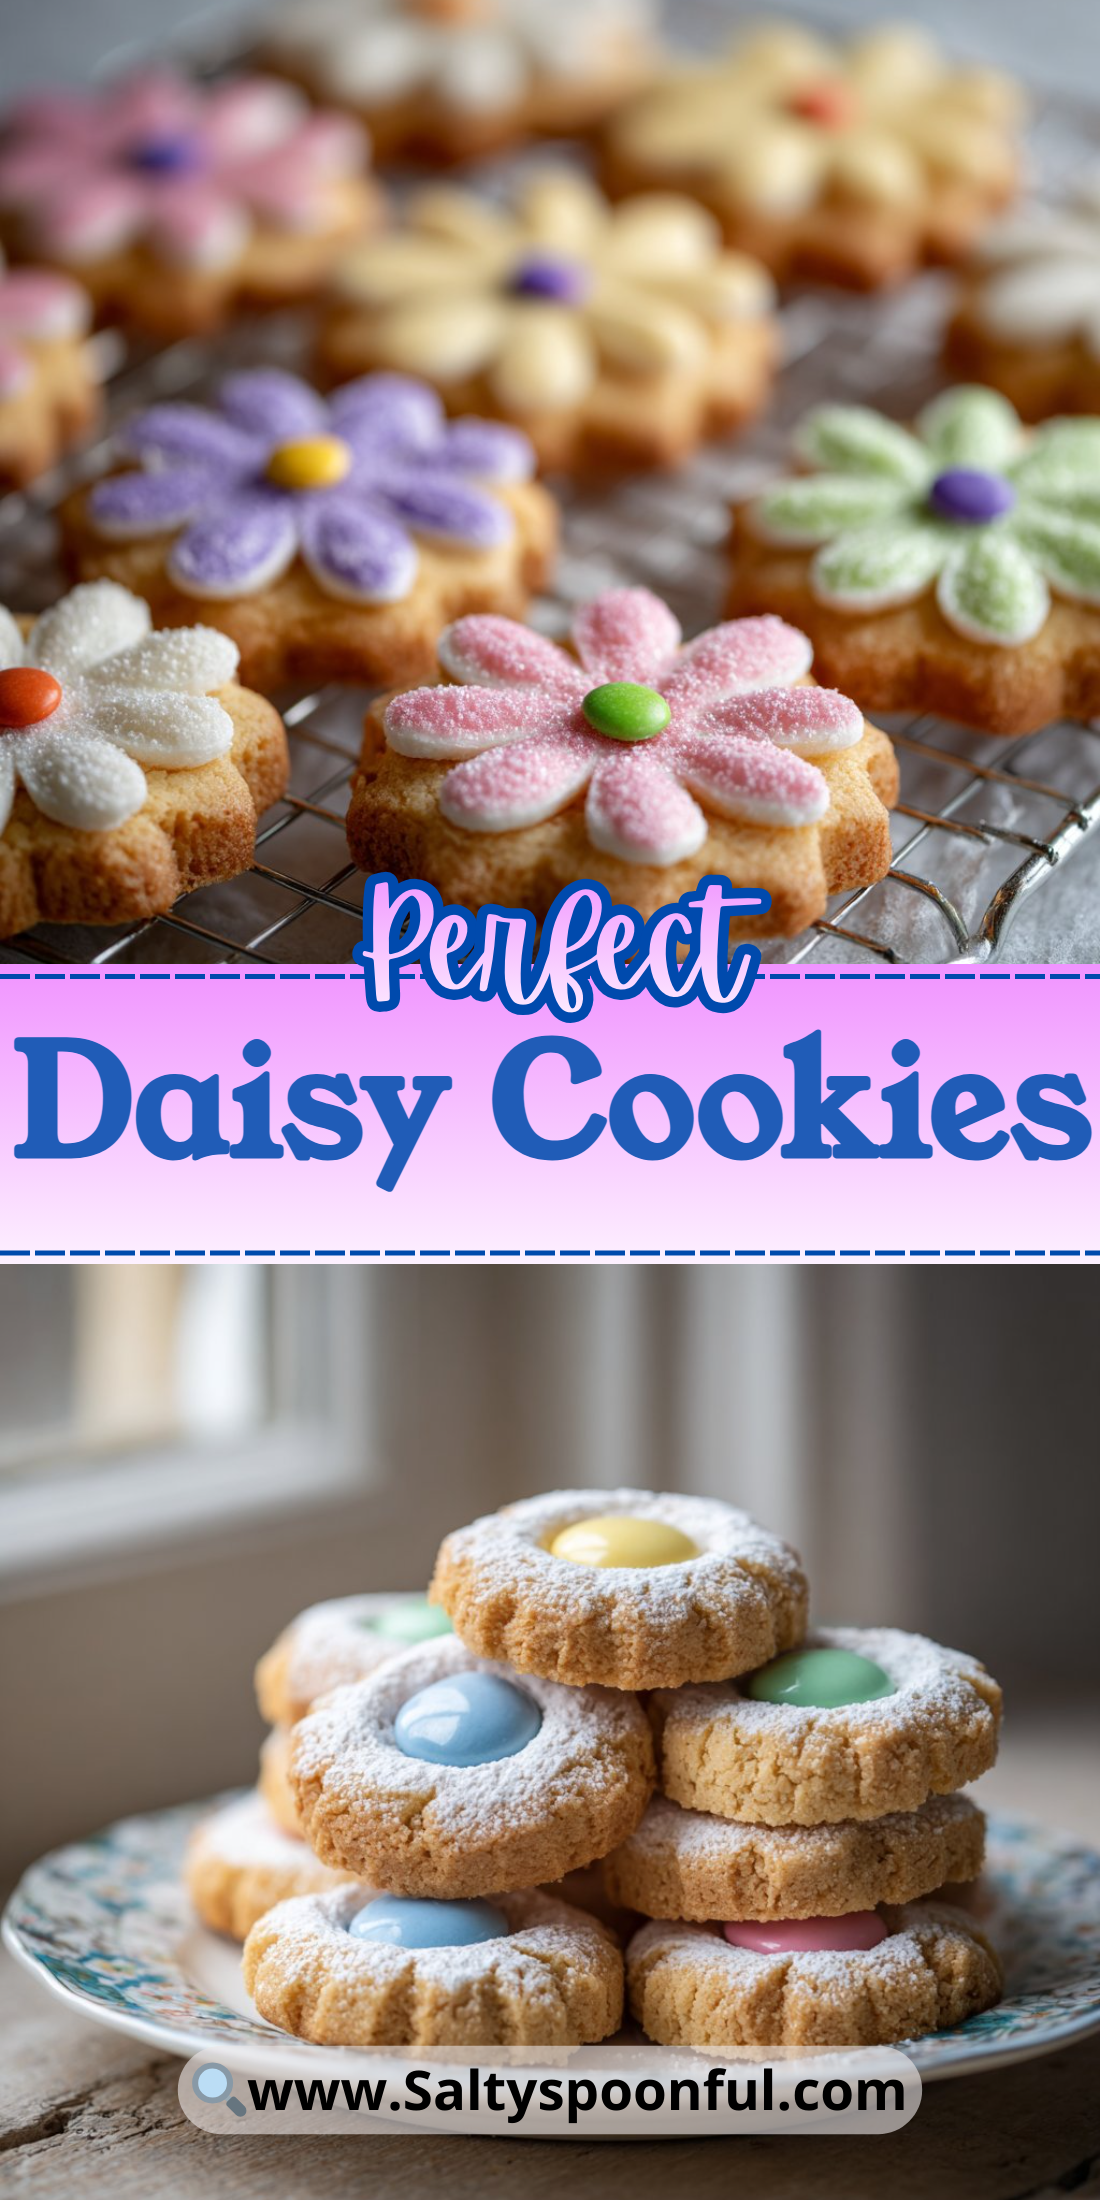
A batch of tiny, cheerful cookies shaped like flowers and topped with a single Smartie can brighten any afternoon tea or kids’ party. These daisy-shaped butter cookies are simple, quick to make, and travel well in a lunchbox.
They need just a few pantry staples and a little patience while the dough chills. The result is a delicate, slightly crumbly cookie with a playful candy center.
If you love recipes that are easy to scale and kid-friendly, these will become a go-to. Try pairing them with a cup of tea or use them as edible party favors.
If you adore hybrid cookie ideas, you’ll appreciate how small changes to dough yield different textures.
Why You’ll Love This Daisy Cookies
- Quick to make with minimal ingredients.
- Perfect for kids to help shape and decorate.
- Light, buttery texture that isn’t overly sweet.
- Eye-catching presentation for parties and gifts.
- Easy to freeze and make ahead for events.
- Customizable centers for different occasions.
The taste is a classic buttery sugar cookie base with a tender, melt-in-your-mouth crumb and a crisp edge when baked briefly.
The Smartie center adds a hit of color, a slight snap, and a touch of familiar chocolate that kids love.
“Absolutely adorable and so easy — my kids helped shape the petals and declared them the best cookies ever! ⭐⭐⭐⭐⭐”
Key Ingredients for Daisy Cookies
Understanding the role of each main ingredient makes the difference between a dry biscuit and a perfect tender cookie.
Plain flour (225g)
Plain flour provides structure through gluten development while keeping the cookie tender when mixed minimally.
Buy fresh all-purpose flour from a trusted brand and sift if it’s lumpy; measuring by weight gives the most consistent result.
Substituting with cake flour will make cookies softer and flatter; using bread flour will give a tougher texture due to higher gluten.
Unsalted butter, cold to cool room temperature (150g)
Butter is the main flavor and creates the flaky, slightly crumbly texture when rubbed into the dry ingredients.
Choose high-quality unsalted butter for a clean flavor and to control salt levels; if salted butter is used, reduce any added salt elsewhere.
Using room-temperature butter instead of cold will change the dough handling—cold butter keeps the dough slightly firmer and yields a crisper edge.
Icing sugar (75g)
Icing (confectioners’) sugar dissolves quickly and gives a smooth, melt-in-your-mouth sweetness that granulated sugar cannot match in this short-bake cookie.
Buy a fine, lump-free icing sugar or sift it before use to avoid grainy areas in the dough; it also helps with even mixing when rubbing in butter.
Swapping in caster or granulated sugar will produce a slightly coarser texture and may change spread during baking.
Smarties (for center)
Smarties provide color, a bit of chocolate flavor, and a crisp candy shell that makes each cookie feel festive.
Pick small-colored chocolates or candy-coated chocolate drops; ensure they’re a size that fits neatly into the cookie center without sinking.
Substitute with mini chocolate chips or colored sprinkles for different textures; non-chocolate candies will alter flavor and melt behavior.
Full Ingredient List for Daisy Cookies
- 225g plain flour
- 150g unsalted butter (cold to cool room temperature), cubed
- 75g icing sugar
- Smarties (for center)
Step-by-Step Instructions for Daisy Cookies
Step 1: Preheat and prepare for Daisy Cookies
Preheat the oven to 190°C (375°F) and line a baking tray with baking paper so the cookies bake evenly and release easily.
Having the oven fully hot before baking ensures a quick set at the edges while the centers stay tender.
Pro Tip: The oven should smell neutral and the tray should be completely flat with no grease residue; the baking paper should lie smooth.
Step 2: Mix dry ingredients and rub in butter for Daisy Cookies
In a bowl, whisk the plain flour and icing sugar to combine and aerate the mixture so it mixes evenly with butter.
Add the cold, cubed butter and use your fingertips to rub it into the dry mix until it resembles coarse breadcrumbs—small pea-sized bits of butter should remain visible.
Pro Tip: The mixture should look like rough sand with tiny butter flecks; it should feel cool and slightly gritty, not sticky.
Step 3: Bring the Dough Together for Daisy Cookies
Bring the mixture together using a spatula or light pressing with your hands until a smooth dough forms, then divide it into small balls about 18–22g each.
Work quickly and avoid warming the dough too much; chilling between steps helps preserve shape when you form petals.
Pro Tip: The dough balls should be smooth on the surface with no visible dry flour and feel slightly firm, not soft or greasy.
Step 4: Shape petals and add centers for Daisy Cookies
Take each dough ball and gently press to form flower petals—use a small butter knife or the back of a spoon to carve petal indentations or pinch the edges with fingers.
Press a Smartie into the center of each flower, then place the tray in the fridge and chill the shaped cookies for 30 minutes to firm up.
Pro Tip: The petals should hold their shape and not slump; the Smartie sits flush in the center and doesn’t sink when gently pressed.
Step 5: Bake and Cool Daisy Cookies
Bake the chilled cookies for 8–10 minutes until the edges are just pale golden; avoid overbaking to keep centers tender.
Transfer to a wire rack to cool completely so the bottoms don’t steam and soften while cooling.
Pro Tip: The cookies should be pale with a faint golden rim and feel set to the touch; they firm up as they cool on the rack.
For a similar rolling and shaping approach, you might enjoy this easy decorated cookie idea that uses chilled dough for clean edges.
Expert Tips for Daisy Cookies
- Temperature tip: Use cold butter and chill shaped cookies—this prevents excess spread so petals stay defined.
- Oven calibration tip: If your oven runs hot, reduce heat by 10–15°C or check with an oven thermometer to avoid browned, hard edges.
- Texture troubleshooting: If cookies are crumbly and fall apart, add a teaspoon of milk to the dough and gently rebind; if too soft, chill longer.
- Equipment tip: A small cookie scoop (18–22g) gives uniform cookie size; a thin spatula helps transfer delicate petals to the tray.
- Common mistake: Overworking the dough develops gluten—mix just until it comes together to keep a tender crumb.
- Decoration tip: Press Smarties gently so the candy doesn’t crack; for glossy centers, warm them slightly in your hand before pressing.
- Baking time tip: Cookies continue to set as they cool—remove them when edges are pale golden to keep centers soft.
- Scaling tip: To double the batch, chill the combined dough for an extra 10 minutes before shaping to make handling easier.
Try pairing this recipe technique with a sturdier cookie that uses chilling, such as these cake-mix cookie variations, to understand how chilling affects spread.
Storage & Freezing for Daisy Cookies
Fridge storage: Store baked cookies in an airtight container in the fridge for up to 5 days to keep them fresh and maintain the chocolate centers.
Freezer storage: Freeze unbaked shaped cookies on a tray until firm, then transfer to a labeled, airtight freezer bag or container for up to 3 months.
Thawing: Thaw frozen baked cookies at room temperature for 30–60 minutes in their container to avoid condensation forming on the candy center.
Reheating: Warm individual cookies for 8–10 seconds in a microwave to brighten the chocolate center or crisp slightly in a 160°C (320°F) oven for 3–4 minutes.
For a richer, chocolate-ganache twist to serve later, check techniques like this hazelnut cookie with ganache to learn proper storage for chocolate-centered treats.
Variations & Substitutions for Daisy Cookies
Variation 1 — Lemon Daisy: Add 1 teaspoon finely grated lemon zest to the dry ingredients and replace Smarties with a lemon candy drop; the cookies will have a bright citrus lift and a slightly tangy center.
Variation 2 — Almond Blossom: Replace 25g of flour with almond flour and add 1/4 teaspoon almond extract; expect a nuttier, softer cookie with a delicate almond aroma.
Variation 3 — Chocolate Center Swap: Use mini chocolate chips or M&M Minis instead of Smarties; the results are similar visually but slightly richer and less crunchy.
Variation 4 — Cinnamon Sugar Edge: Lightly brush cookies with melted butter before baking and sprinkle a pinch of cinnamon sugar on the petals; this adds a warm spice note and a crisp sweet edge.
Frequently Asked Questions About Daisy Cookies
Q1: How do I stop my Daisy Cookies from spreading too much in the oven?
A1: Use cold butter and chill the shaped cookies for at least 30 minutes to firm the fat. Also, avoid overworking the dough—over-mixing develops gluten, which increases spread. Bake on a well-chilled tray and space cookies apart on the sheet.
Q2: Can I make the dough ahead and freeze it?
A2: Yes. Shape the dough into flowers, freeze on a tray until solid, then transfer to an airtight container for up to 3 months. Bake from frozen—add 1–2 minutes to the bake time and watch carefully for pale golden edges.
Q3: What if my cookies are too dry or too crumbly?
A3: Dry, crumbly cookies often indicate too much flour or over-baking. Try adding 1 teaspoon of milk or an extra 5g of butter to the dough to improve cohesion, and shorten the bake time by a minute.
Q4: Can I substitute the icing sugar with granulated sugar?
A4: You can, but the texture will change; icing sugar melts into the dough creating a smoother, more delicate crumb. If you use granulated sugar, consider pulsing it briefly in a food processor to reduce grain size and expect a slightly crisper result.
Q5: How can I get perfectly even petals on each Daisy Cookie?
A5: Use a small cookie cutter or the back of a teaspoon to press uniform petal shapes. Chill the dough balls first so they are firmer, then use consistent pressure and a guide—like lightly marking the dough with a toothpick—to ensure symmetry.
Final Thoughts on Daisy Cookies
These Daisy Cookies are a cheerful, frugal treat that’s as fun to make as it is to eat.
Please leave a star rating in the recipe card below and pin this to Pinterest for later.
For inspiration and decorated daisy ideas, see this delightful Daisy Cookies Recipe | Kids Eat by Shanai.
If you want variations and tutorials from other bakers, check this roundup of Daisy sugar cookies ideas and the detailed decorating approach in Gerbera Daisy Cookies – The Sweet Adventures of Sugar Belle.