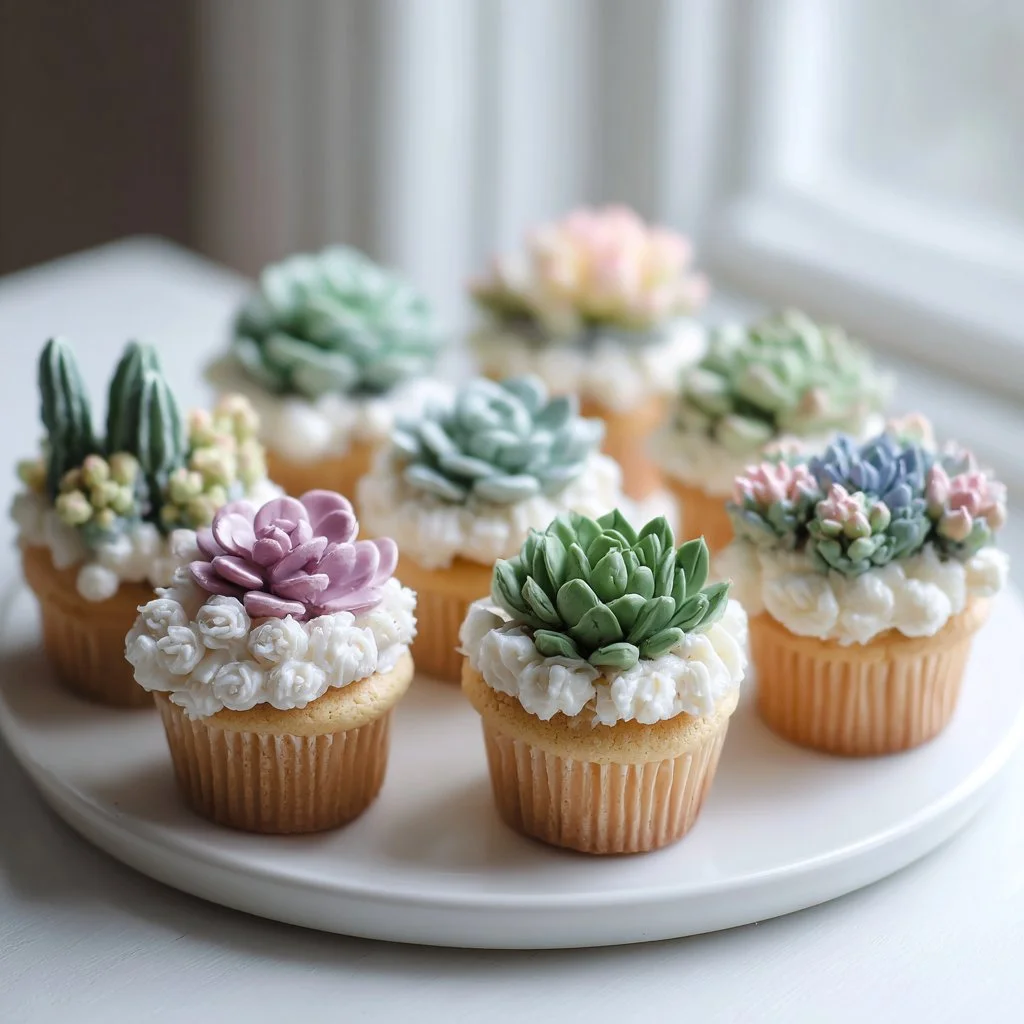
Bright, tiny gardens of buttercream succulents are one of the most joyful ways to make cupcakes feel celebratory and modern.
They look impossibly intricate but start from a simple, reliable vanilla cupcake base.
If you like hands-on decorating, these are perfect for parties, gifts, or a slow afternoon project.
Read on for ingredient science, step-by-step piping cues, and troubleshooting so your Buttercream Succulent Gardens turn out picture-perfect.
Why You’ll Love This Buttercream Succulent Gardens
- Show-stopping dessert that looks professional with little effort.
- Soft, tender cupcakes that stay moist for days.
- Buttercream piping creates sculptural, Instagram-ready toppers.
- Easy to color and customize to any palette.
- Kid-friendly decorating activity with big visual payoff.
- Works well for tiered displays or single-serve favors.
The cupcakes are light, tender, and buttery, with a vanilla backbone that lets the buttery, silky frosting shine. The buttercream holds peaks for piping succulent shapes while still melting on the tongue, so you get a soft crumb and sculpted frosting in every bite.
★★★★★ “I brought these to a baby shower and people thought I’d hired a bakery. The cupcakes were moist and the succulents held their shape all evening.” — Reader K.
Key Ingredients for Buttercream Succulent Gardens
All-Purpose Flour
All-purpose flour provides structure while keeping the crumb tender. Choose a bleached or unbleached AP flour from a reliable brand for consistent protein content; unbleached gives a slightly fuller flavor. Substituting cake flour will yield a lighter crumb but require reduced flour weight; whole-wheat will make the cupcakes denser and nuttier.
Unsalted Butter (softened)
Butter is the flavor powerhouse and the texture driver for both the cupcakes and the buttercream. Buy high-quality unsalted butter with a high butterfat content for creamier texture; adjust salt if using salted butter. Replacing with margarine or oil changes the mouthfeel: oil keeps cupcakes moist but eliminates the butter-rich flavor and creates a less stable buttercream.
Granulated Sugar
Sugar not only sweetens but aerates when creamed with butter, creating a light crumb. Use regular granulated sugar for structure; superfine sugar speeds dissolving and gives a slightly finer crumb. Swapping brown sugar adds moisture and caramel notes but will darken the cake and slightly alter rise.
Large Eggs
Eggs act as emulsifiers and stabilizers, helping the batter trap air and the cupcakes rise evenly. Use room-temperature eggs so they blend smoothly with the creamed butter and sugar; cold eggs can cause curdling. Vegan egg substitutes often require recipe recalibration and can reduce lift and richness.
Full Ingredient List for Buttercream Succulent Gardens
– 1 1/2 cups all-purpose flour
– 1 1/2 teaspoons baking powder
– 1/4 teaspoon salt
– 1/2 cup unsalted butter, softened
– 1 cup granulated sugar
– 2 large eggs
– 2 teaspoons vanilla extract
– 1/2 cup milk
– Buttercream frosting (for decoration)
– Food coloring (green, pink, purple, etc.)
Step-by-Step Instructions for Buttercream Succulent Gardens
Step 1: Preheat your oven to 350°F (175°C) and line a cupcake pan with liners.
Set racks to the middle of the oven so heat circulates evenly. Use standard cupcake liners and a good-quality pan to prevent hotspots.
Pro Tip: The oven should smell warm and neutral; pans should sit evenly without wobble.
Step 2: In a bowl, whisk together the flour, baking powder, and salt until evenly distributed.
Sifting or whisking removes lumps and ensures the leavening is evenly spread for uniform rise. This small step prevents pockets of baking powder that can create uneven texture.
Pro Tip: The dry mix should look pale and airy, with no visible baking powder clumps.
Step 3: In a separate bowl, cream the softened butter and granulated sugar until light and fluffy.
Creaming traps air for lift; beat for 2–4 minutes depending on your mixer. Stop to scrape the bowl so the mixture is uniform.
Pro Tip: The mixture should look paler and feel light when you lift the beater; it should not be greasy.
Step 4: Beat in the eggs one at a time, mixing well after each addition, and then stir in the vanilla extract.
Adding eggs slowly maintains emulsion and keeps the batter smooth. Add vanilla for aroma and to round out flavors. Overbeating after eggs can deflate air, so mix just until combined.
Pro Tip: The batter should look glossy and homogenous, with no streaks of egg white.
Step 5: Gradually add the dry ingredients to the wet mixture, alternating with the milk, beginning and ending with dry, mixing until just combined.
Alternating helps maintain a tender crumb and prevents overmixing gluten. Scrape the bowl and fold gently; a few small streaks of flour are better than a tough cupcake.
Pro Tip: The batter should be thick but pourable, not runny or clumpy.
Step 6: Fill each cupcake liner about 2/3 full with batter.
Use an ice cream scoop for uniform sizes so baking times are consistent. Do not overfill; cupcakes will dome and spill if too full.
Pro Tip: The filled liners should show a smooth batter surface about two-thirds full with a slight glossy sheen.
Step 7: Bake for 18–20 minutes or until a toothpick inserted into the center comes out clean. Rotate the pan halfway if necessary.
Check at the earlier time to avoid overbaking; ovens vary. A clean toothpick or a few moist crumbs means done. Rotate only if your oven has known hot spots.
Pro Tip: Tops should be pale golden and spring back lightly when touched.
Step 8: Allow the cupcakes to cool completely on a wire rack before decorating.
Frosting warm cupcakes will melt the buttercream and ruin your succulents. Cooling prevents condensation and helps frosting adhere properly.
Pro Tip: The cupcake should feel cool to the touch and slightly firm at the top before piping.
Step 9: Prepare the buttercream frosting and tint it with food coloring.
Make a classic buttercream of butter and powdered sugar, adjusting consistency with milk or powdered sugar. Use gel food colors for vibrant hues without thinning the frosting. Mix colors in small batches to produce gradient shades for natural succulents.
Pro Tip: The frosting should hold stiff peaks for piping; it should not drip off a spoon.
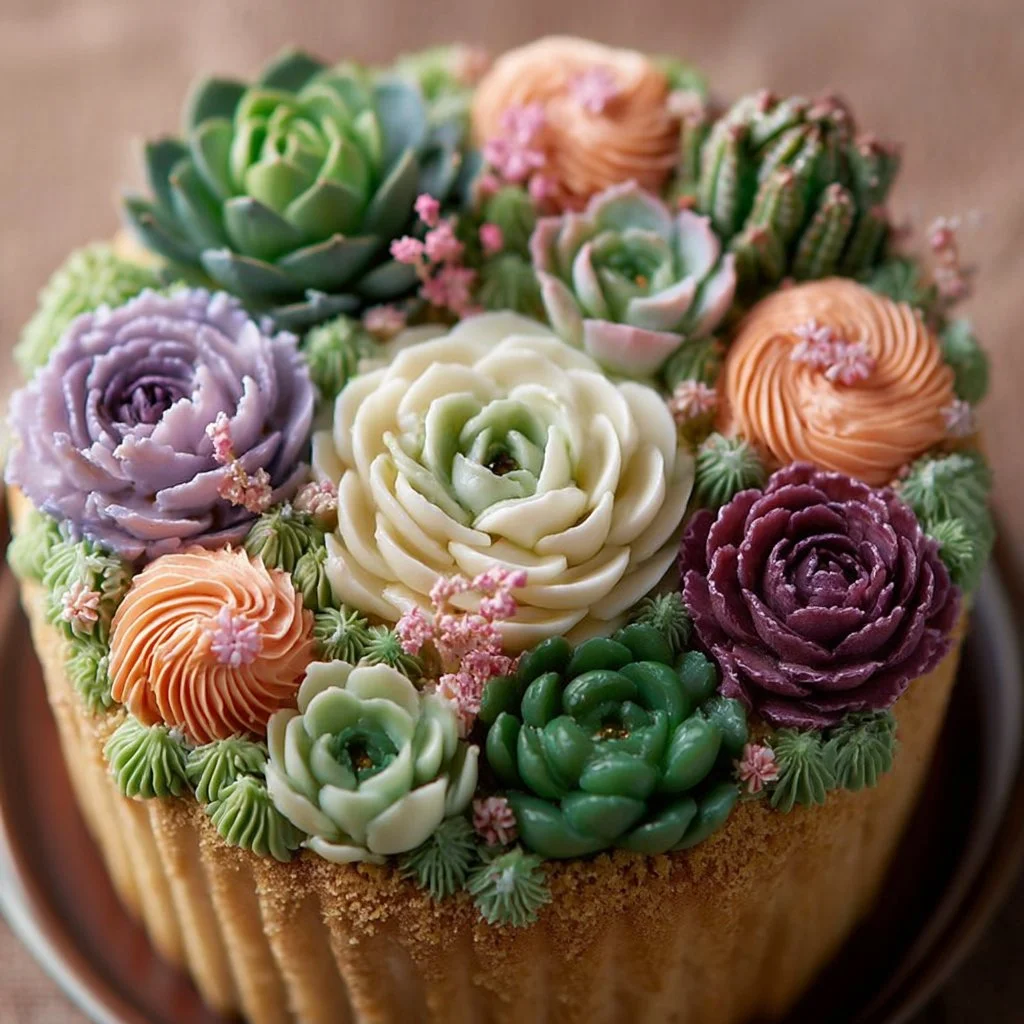
Step 10: Pipe succulent designs on each cooled cupcake using various piping tips.
Use star tips, petal tips, and round tips to create rosettes, leaves, and spikes. Work from the center outward for rosette succulents and use short bursts for textured plants. Rotate the cupcake as you pipe for even layers.
Pro Tip: The piped succulents should have defined ridges or petals and hold their shape without sagging.
Step 11: Arrange your Buttercream Succulent Gardens on a tiered stand or platter for display.
Group different colors and shapes to mimic a real succulent bed. Keep cupcakes covered in a cool place until serving to protect the piped shapes.
Pro Tip: The display should look like a mixed garden with varied heights and colors for visual depth.
Expert Tips for Buttercream Succulent Gardens
- Chill bowls and beaters briefly for whipped buttercream that holds peaks longer.
- Use room-temperature ingredients for a smooth, emulsified batter and buttercream.
- If buttercream looks curdled, keep beating—emulsion will form; if it separates, add a teaspoon of milk and beat on medium.
- For stiffer piping, increase powdered sugar a tablespoon at a time; for softer, add a few drops of milk.
- Invest in a small set of piping tips (star, closed star, leaf, and round) for varied succulent textures.
- Work in short sessions under cool lighting; heat softens buttercream and ruins sharp edges.
- Common mistake: overmixing batter after adding flour; stop when streaks disappear to avoid toughness.
- Use a turntable for steady rotation while piping and a pastry bag with couplers for quick tip swaps.
Storage & Freezing for Buttercream Succulent Gardens
Refrigerator storage: Store decorated cupcakes in an airtight container in the fridge for up to 3 days. Place a single layer in the container to avoid smushing piped succulents. Remove from fridge 30–60 minutes before serving so flavors bloom.
Freezer storage: Freeze undecorated cupcakes for up to 3 months in a freezer-safe container with layers separated by parchment. For decorated cupcakes, flash-freeze on a tray until solid, then transfer to a container; they will keep for 1–2 months.
Thawing: Thaw frozen cupcakes in the fridge overnight, then bring to room temperature for 30–60 minutes before serving to restore texture. Avoid thawing on the counter for long periods to prevent condensation on the frosting.
Reheating: Do not microwave decorated cupcakes. If you must warm an undecorated cupcake, 5–10 seconds in the microwave can refresh softness—only use for plain cupcakes.
Variations & Substitutions for Buttercream Succulent Gardens
- Lavender-vanilla cupcakes: Add 1–2 teaspoons culinary lavender steeped in warmed milk, then strain. This imparts a floral note and pairs beautifully with pale purple succulents.
- Chocolate base: Substitute 1/3 cup flour with 1/3 cup unsweetened cocoa powder and reduce sugar by 1–2 tablespoons for a rich, earthy contrast to green buttercream.
- Vegan version: Use a plant-based butter and aquafaba meringue buttercream; expect a slightly different mouthfeel and adjust sugar for stability.
- Citrus-scented succulents: Add 1 tablespoon grated lemon or orange zest to the batter and 1 teaspoon citrus extract to the buttercream for a bright, zesty profile that cuts through the sweet frosting.
Frequently Asked Questions About Buttercream Succulent Gardens
Q: How do I prevent buttercream from melting in warm weather?
A: Work in a cool room and chill piped cupcakes briefly on a tray in the fridge to set the frosting. Use stabilized buttercream (add a small amount of meringue powder or corn syrup) to increase holding power. Transport cupcakes in a cooler with ice packs under the container, never directly touching the frosting.
Q: What piping tips create the most realistic succulents?
A: Closed star tips (like Wilton 2D), petal tips (like #104) for rosettes, and small leaf tips (like #352) for pointed leaves create realistic textures. Combine tips in a single cupcake—start with a rosette center and add leaves around it for layered realism.
Q: Can I make the cupcakes and frost them the day before an event?
A: Yes. Bake the cupcakes and store them in an airtight container at room temperature for 24 hours. Pipe buttercream the morning of the event for best appearance, or pipe the night before and refrigerate in a single layer, bringing them back to room temperature before serving.
Q: Why did my cupcakes dome and crack on top?
A: Overmixing, too high oven temperature, or overfilling liners can cause doming. Ensure the oven is calibrated, fill liners only two-thirds full, and mix just until combined to prevent excess air pockets.
Q: How do I get smooth color gradations in my succulents?
A: Make multiple small bowls of buttercream with incremental color differences (e.g., pale to dark green). Use an angled spatula to combine stripes in a single bag or pipe separate tones in concentric rings to create natural gradients.
Final Thoughts on Buttercream Succulent Gardens
Ready to impress? Try the piping techniques and plating ideas from resources like a buttercream cacti piping tutorial from The Hutch Oven and cactus garden inspiration from Sprinkle Bakes to refine your look. For layered buttercream design ideas and seasonal takes, consult the buttercream succulent flower cake with gold stencil, a buttercream garden tutorial for gingerbread houses, and shamrock cookie piping examples to expand your skill set.
Please leave a star rating in the recipe card below and pin these Buttercream Succulent Gardens to Pinterest for later inspiration: buttercream cacti piping tutorial from The Hutch Oven, cactus garden inspiration from Sprinkle Bakes, buttercream succulent flower cake with gold stencil, buttercream garden tutorial for gingerbread houses, and buttercream shamrock piping techniques from Orson Gygi Blog.
Buttercream Succulent Gardens
Ingredients
Method
- Preheat your oven to 350°F (175°C) and line a cupcake pan with liners.
- In a bowl, whisk together the flour, baking powder, and salt until evenly distributed.
- In a separate bowl, cream the softened butter and granulated sugar until light and fluffy.
- Beat in the eggs one at a time, mixing well after each addition, and then stir in the vanilla extract.
- Gradually add the dry ingredients to the wet mixture, alternating with the milk, beginning and ending with dry, mixing until just combined.
- Fill each cupcake liner about 2/3 full with batter.
- Bake for 18–20 minutes or until a toothpick inserted into the center comes out clean.
- Allow the cupcakes to cool completely on a wire rack before decorating.
- Prepare the buttercream frosting and tint it with food coloring.
- Pipe succulent designs on each cooled cupcake using various piping tips.
- Arrange your Buttercream Succulent Gardens on a tiered stand or platter for display.