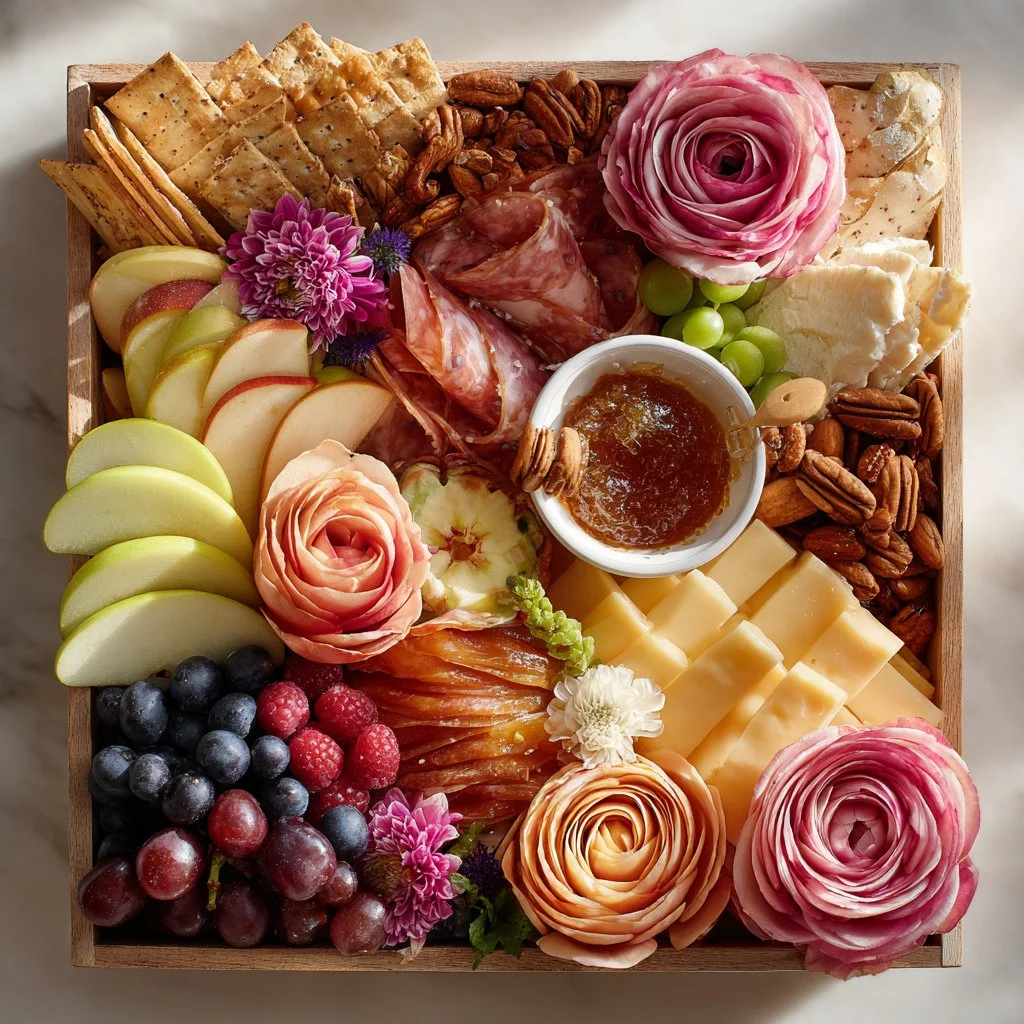
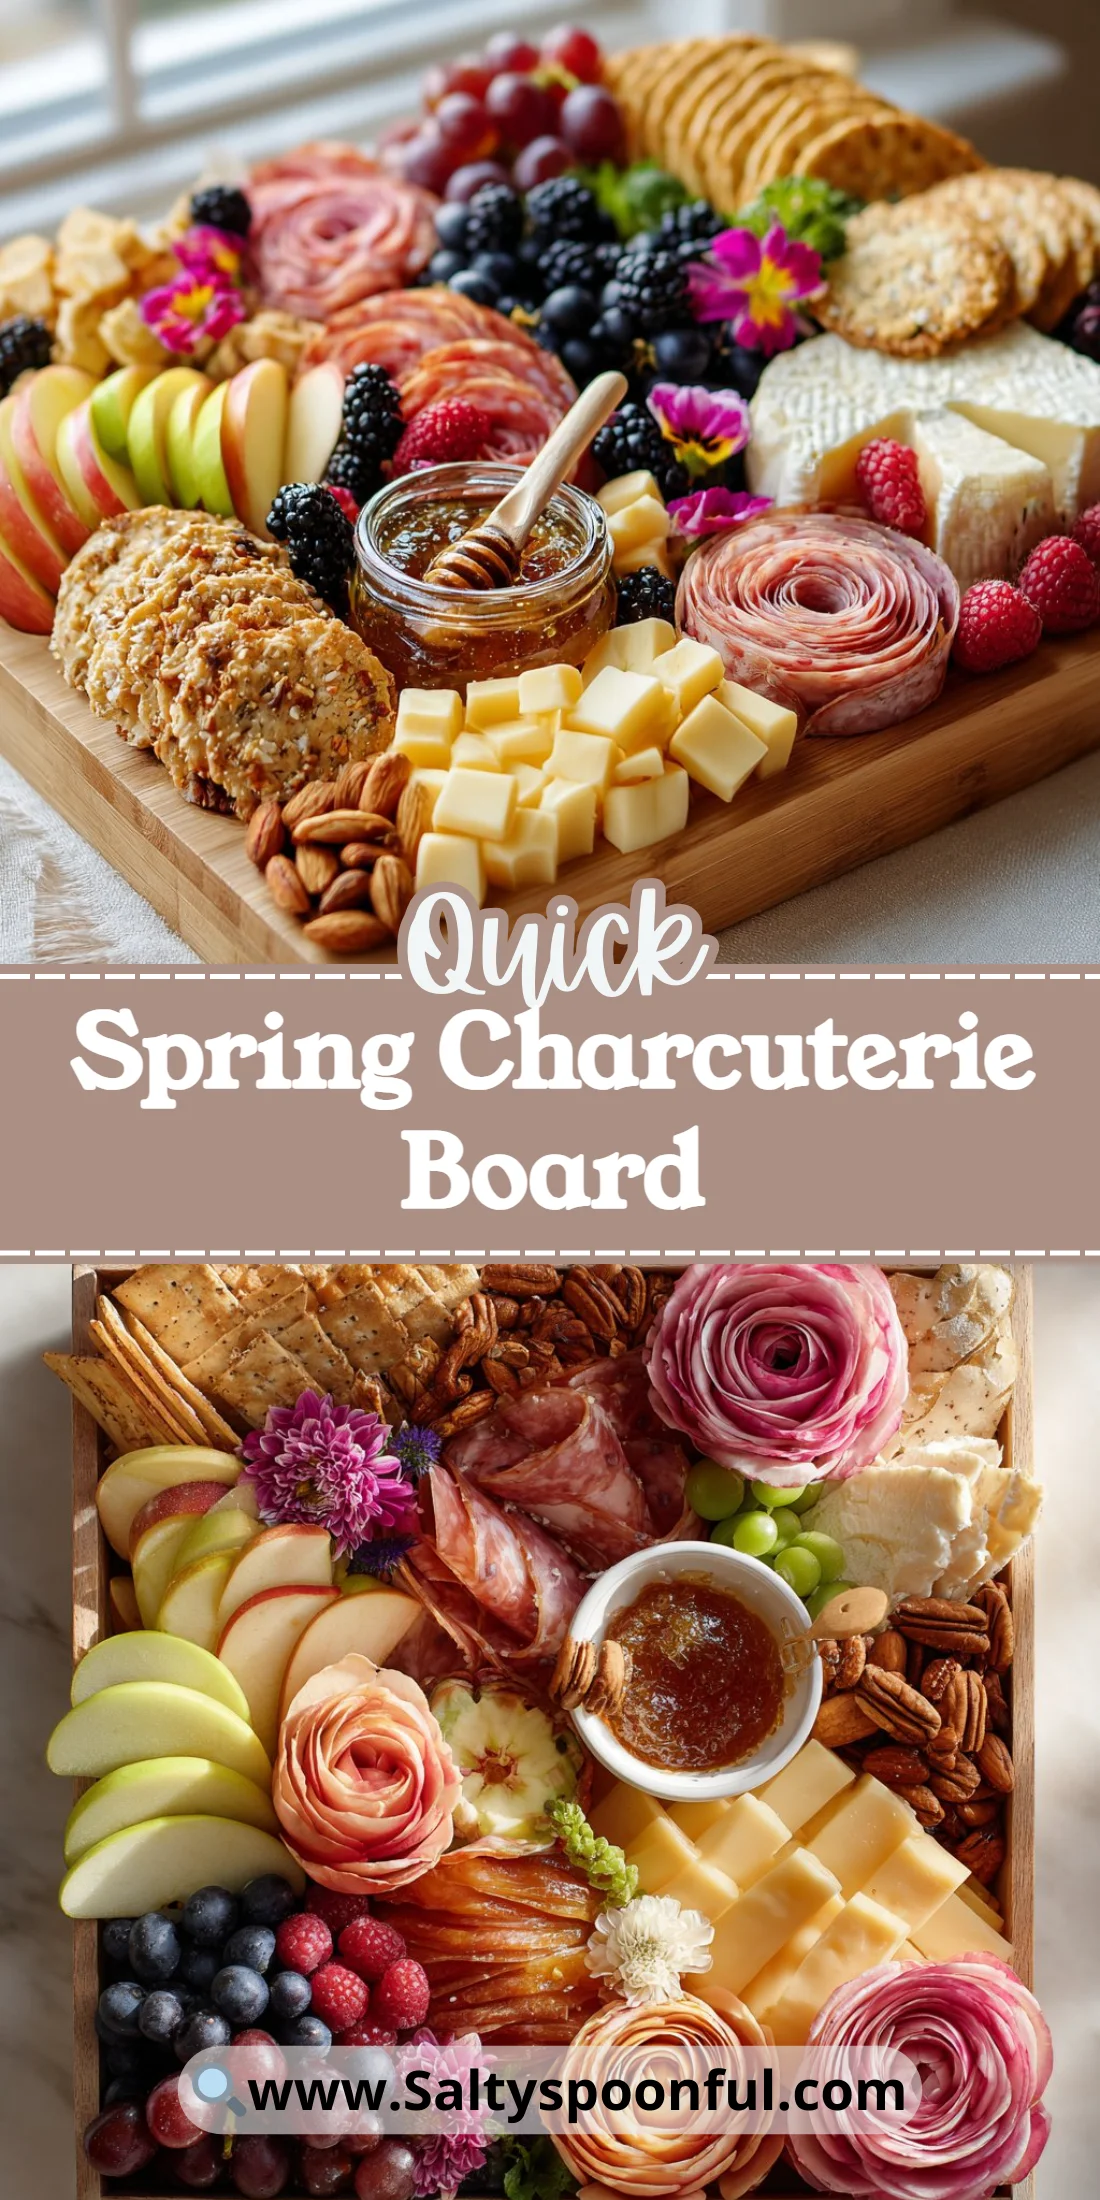
Fresh, floral, and endlessly shareable — this Spring Charcuterie Board is the kind of platter that turns a Saturday brunch into an event.
It’s built for quick assembly and big visual impact.
You can scale it up or pare it down to match your guest list or table.
Think of this as a guide and a visual checklist.
Tuck in small composed bites and encourage grazing.
For inspiration on playful snack boards, see a quick layout idea I like at a themed snack board example.
This recipe balances sweet, salty, creamy, crunchy, and floral notes.
Follow the steps and the troubleshooting tips to get an effortless springtime spread.
Why You’ll Love This Spring Charcuterie Board
– Perfect for last-minute entertaining.
– Vibrant spring colors that photograph beautifully.
– A mix of textures for layered mouthfeel.
– Minimal cooking required.
– Customizable for dietary needs.
– Great for pairing with wine or light cocktails.
– Makes an ordinary gathering feel special.
A bite from this Spring Charcuterie Board combines soft, creamy cheese with silky prosciutto, bright pop from berries, and a crunchy nut or cracker element. The edible flowers add a fresh, herbaceous aroma and light floral notes that tie fruit and cheese together. Combining these distinct textures and temperatures creates a satisfying contrast that keeps guests reaching back for more.
“Five stars — I put this together for a garden brunch and everyone asked for the recipe. The flowers made it feel so special and the combination of brie and honey was irresistible.” — A happy reader
Key Ingredients for Spring Charcuterie Board
For a standout Spring Charcuterie Board pick the best fruit, meats, cheese, and edible flowers.
-
Assorted fresh fruits (berries, grapes, apple slices): Choose ripe but firm berries and seedless grapes for easy eating. Bright, slightly tart berries cut the richness of the cheeses and meats; if you must substitute, use stone fruits like peaches in season, but they change the texture and make the board juicier.
A photo-forward board layout can help you visualize spacing when using extra-juicy fruit. -
Variety of meats (salami, prosciutto, ham): Thinly sliced cured meats add savory fat and a silky mouthfeel. Buy meats from the deli counter and ask for paper-thin slices for shaping; thicker slices are harder to flower and can feel chewy. If you need a substitute, choose thin turkey or smoked salmon for a lighter or pescatarian option; these change the salt level and texture.
-
Cheese selection (brie, cheddar, goat cheese): Contrast textures by pairing a soft, triple-cream brie with a young cheddar and a tangy goat cheese. Aim for at least one spreadable cheese and one firmer sliceable cheese. Substituting with plant-based cheeses works if you pick varieties that mirror soft and firm profiles, though melt and aroma will differ.
-
Edible flowers: Flowers create instant seasonal drama and a subtle floral aroma. Use non-toxic, pesticide-free flowers like nasturtiums, violets, and pansies. If you can’t source edible blooms, microgreens provide color and a peppery note, though you’ll lose the delicate petals’ visual softness.
Full Ingredient List for Spring Charcuterie Board
- Assorted fresh fruits: strawberries, blueberries, raspberries, grapes, apple slices
- Variety of meats: salami, prosciutto, ham
- Cheese selection: brie, cheddar, goat cheese
- Edible flowers (nasturtiums, pansies, violets)
- Crackers or sliced bread
- Nuts: almonds, walnuts, or pecans
- Honey or jam (optional, in a small bowl)
Step-by-Step Instructions for Spring Charcuterie Board
Step 1: Arrange fresh fruits attractively on a large board.
Start by placing clusters of berries and grapes in loose piles across the board to create color anchors. Fan thin apple slices and brush them lightly with lemon juice to prevent browning and preserve shine. Space these fruit clusters so you’ll have room to tuck in meat and cheese without crowding.
Pro Tip: Aim for three to five visual anchor points; the board should look full but not overcrowded, with berries popping like jewels.
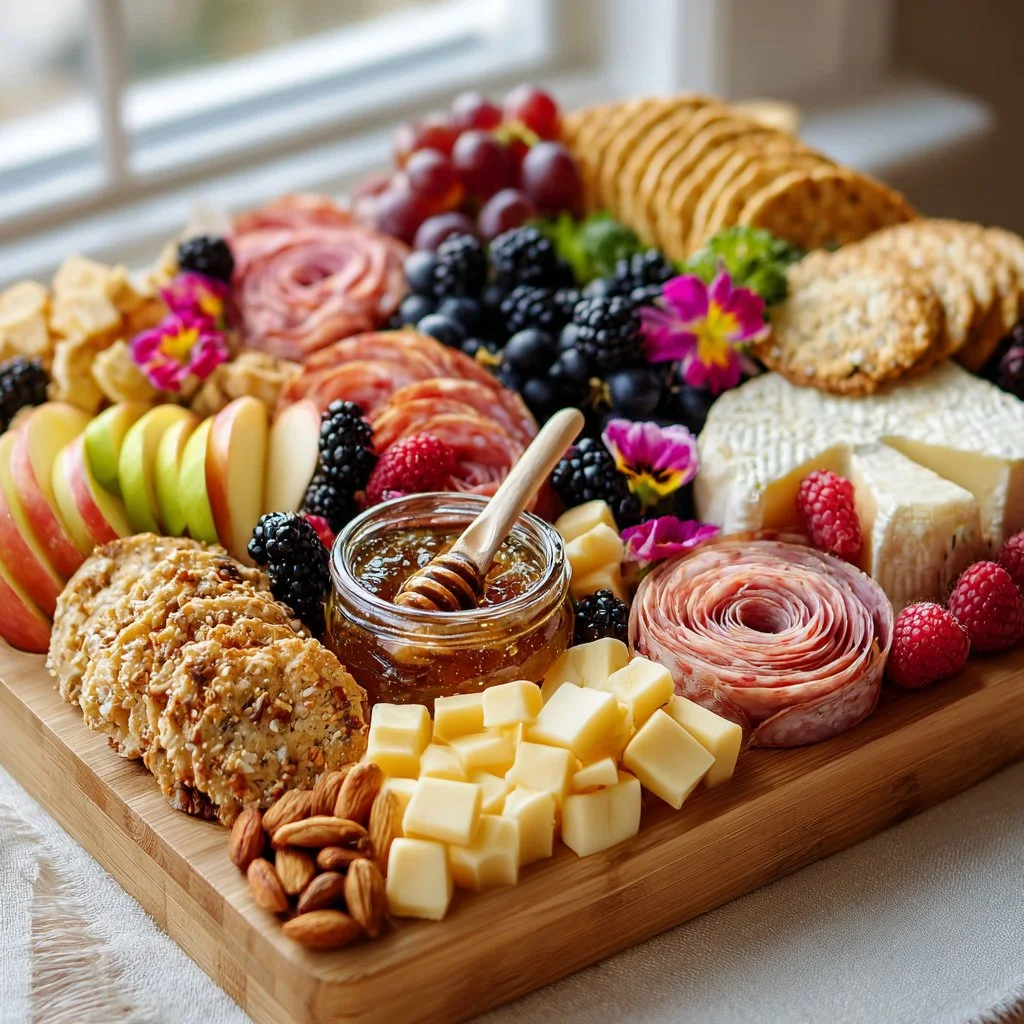
Step 2: Create flower shapes using thinly sliced meat and arrange them among the fruits.
Fold prosciutto or salami into loose roses by stacking and twisting slices, then nestle them near fruit clusters to balance sweet and savory. Use varying sizes of meat flowers to keep the arrangement organic and layered. Avoid compressing slices flat — gentle volume makes the board feel abundant.
Pro Tip: Meat “roses” should sit lightly on the board and cast small shadows; if they’re flat, re-shape with more open loops.
Step 3: Shape the cheese into rose-like forms and position them near fruit and crackers.
Spoon or slice spreadable cheeses into rosettes or small quenelles and place firmer cheese slices on a separate area with a small serving knife. Position brie rounds near honey or jam so guests can drizzle—this pairing highlights the brie’s creaminess. Keep cheeses spaced so knives don’t cross; that keeps flavors clean.
Pro Tip: Cheese should look inviting — soft cheeses slightly domed and firm cheeses with clean edges. If your brie looks tight, let it rest at room temperature for 10–15 minutes.
Step 4: Fill gaps with edible flowers, crackers, nuts, and honey or jam.
Use edible flowers to soften edges and fill small gaps; scatter nuts in small clusters to add crunch. Place crackers or sliced bread near cheese but not directly under moist fruits. Put honey or jam in a small bowl with a spoon to prevent stickiness on the board.
Pro Tip: Visually, the board should have a repeating rhythm of color and texture; if there’s a large empty space, add a small cluster of nuts or a few petals.
Step 5: Serve and enjoy with guests, encouraging small composed bites.
Invite guests to build small bites: a slice of apple with goat cheese and honey, or a cracker with cheddar and a grape. Keep napkins and small plates nearby to make grazing effortless. Replace items as they dwindle to keep the display fresh throughout the gathering.
Pro Tip: The board should smell faintly floral and savory; if any aroma is off, remove that item and replace it — freshness is key.
Expert Tips for Spring Charcuterie Board
– Temperature tips: Remove cheeses and meats from the fridge 20–30 minutes before serving to enhance aroma and texture.
A quick layout guide helps plan spacing based on board size.
-
Texture troubleshooting: If fruits are wet, pat them dry; excess moisture will sog crackers and make the board look sloppy. Use a paper towel to dry berries gently.
-
Equipment tips: Use a large wooden or marble board with raised edges to contain small items. Have small bowls for jams and honey to stop liquids from running into crackers.
-
Platter balance: Aim for sweet-salty pairings every few inches so guests always find complementary flavors nearby. Place salty items opposite sweet ones to avoid clumps of similar flavors.
-
Visual cues: Work in triangles — cluster three small items together to create a visual triangle that repeats across the board. This creates rhythm and balance.
-
Common mistakes: Avoid overloading one corner with one type of item; also don’t overcrowd soft cheeses where they can be trampled by forks. Keep knives readily accessible to prevent cross-contamination.
-
Serving flow: Arrange the board so people can approach from multiple sides or create duplicate small boards to reduce crowding at parties. This keeps traffic moving and preserves aesthetics.
-
Refresh mid-party: Keep extra crackers and cut fruit in reserve so you can quickly refresh the board. Replace limp items with fresh ones rather than topping the old ones.
See a visual example if you want alternative spacing ideas.
Storage & Freezing for Spring Charcuterie Board
Fridge storage: Wrap leftover cheeses separately in parchment and place meats in airtight containers. Store fruits in coldest part of fridge in vented containers for up to 2–3 days. Nuts store best in airtight jars and will keep for weeks in the fridge.
Freezer storage: Freeze firmer, sliceable cheeses (like cheddar) wrapped tightly in plastic then foil for up to 2 months. Do not freeze soft cheeses like brie or goat — texture will degrade. Meats like prosciutto can be frozen for up to one month but thaw texture will be slightly softer.
Thawing: Thaw frozen cheeses in the refrigerator overnight. Bring thawed cheddar back to room temperature before serving to regain flavor. If you freeze meats, thaw in the fridge and use within 24 hours.
Reheating: This board is meant to be served cold or at room temp; reheating isn’t recommended. For any warmed components (like a baked brie), reheat separately in an oven at 350°F until just soft, about 8–12 minutes.
Pro tip on containers: Use shallow airtight containers for fruits to avoid squashing. Glass or BPA-free plastic works well for fridge storage. Label any frozen items with dates.
Storing small extras will keep your board looking fresh between refills.
Variations & Substitutions for Spring Charcuterie Board
– Vegetarian Spring Charcuterie Board: Omit meats and add marinated artichoke hearts, roasted beets, and extra nuts. The result is equally savory with added earthy flavors and more robust textures.
-
Mediterranean Spring Charcuterie Board: Swap crackers for pita, add hummus, olives, and feta. This version leans briny and herbaceous, pairing well with rosé or light red wine.
-
Sweet-Focused Spring Charcuterie Board: Increase fruits and add chocolate-dipped strawberries, fruit curds, and shortbread cookies. Expect a dessert-like spread that pairs well with dessert wine or sparkling tea.
-
Kid-Friendly Spring Charcuterie Board: Use milder cheeses, add apple slices shaped with cookie cutters, and include fun dips like yogurt or fruit compote. This keeps things approachable for younger palates and reduces sharp or salty items.
Each variation adjusts the balance of sweet, salty, and creamy elements to match dietary preferences and event tone. Consider swapping a hard cheese for an aged gouda for deeper caramel notes in any variation.
A playful variation idea can spark new layouts.
Frequently Asked Questions About Spring Charcuterie Board
Q: How far in advance can I assemble a Spring Charcuterie Board?
A: Assemble most of the board 30–60 minutes before guests arrive. Wash and dry fruit ahead of time, but wait to do finishing touches like apple fanning and adding delicate edible flowers until just before serving to maintain freshness.
Q: What cheeses work best for a Spring Charcuterie Board?
A: Aim for a trio: one soft (brie), one firm (cheddar), and one tangy (goat cheese). This ensures variety in mouthfeel and flavor. If you only choose two, pick one spreadable and one sliceable option.
Q: Can I make a Spring Charcuterie Board for dietary restrictions?
A: Yes. For gluten-free guests, provide gluten-free crackers and bread. For vegetarians, replace meats with roasted veggies, olives, and marinated legumes. Always label items that may contain allergens like nuts.
Q: How do I prevent crackers from going soggy on a charcuterie board?
A: Keep crackers on a separate section or in a small basket. Avoid placing them directly under juicy fruits or near open bowls of jam. Replace crackers if they absorb moisture during the event.
Q: What’s the best way to transport a Spring Charcuterie Board?
A: Transport components separately in shallow containers and assemble on-site. Use a board with non-slip feet or a secure lid for short-distance travel. If you must move a pre-assembled board, cover loosely with plastic wrap and drive flat.
Final Thoughts on Spring Charcuterie Board
This Spring Charcuterie Board is a quick route to an elegant, shareable centerpiece that highlights seasonal flavors.
Try the layout and scale it for small gatherings or large parties.
If you’d like more inspiration, check out this detailed spring board from Modern Honey’s Spring Charcuterie Board.
For a Mother’s Day–focused take, see the springtime approach at Wild Thistle Kitchen’s Springtime Charcuterie Board.
And for another colorful layout and pairing ideas, I recommend Sweet Tea + Thyme’s Ultimate Spring Charcuterie Board.
Please leave a star rating in the recipe card below and pin this Spring Charcuterie Board to Pinterest if you enjoyed it.
Spring Charcuterie Board
Ingredients
Method
- Step 1: Arrange fresh fruits attractively on a large board.
- Step 2: Create flower shapes using thinly sliced meat and arrange them among the fruits.
- Step 3: Shape the cheese into rose-like forms and position them near fruit and crackers.
- Step 4: Fill gaps with edible flowers, crackers, nuts, and honey or jam.
- Step 5: Serve and enjoy with guests, encouraging small composed bites.