Bright, green, and quietly nourishing—this Spring Green Minestrone is exactly what you want on a cool evening or a busy weeknight. It’s fresh without being fussy, and it comes together from pantry staples plus a handful of spring vegetables.
You’ll find it’s forgiving, quick to make, and endlessly adaptable to what’s in your crisper drawer. Read on for ingredient science, exact step-by-step visuals, and trouble-shooting from a pro.
This recipe keeps colors bright and textures varied so every spoonful feels intentional and wholesome. Now let’s dive into the details.
Why You’ll Love This Spring Green Minestrone
– Bright, seasonal vegetables that keep the soup light and fresh.
– Fast to make on weeknights with a short simmer time.
– High in fiber and micronutrients from leafy greens and peas.
– Flexible: vegetarian or easily adapted with chicken broth.
– Low-waste: uses odds-and-ends vegetables you already have.
– Crowd-pleasing texture contrast between tender veggies and vibrant greens.
This soup tastes like spring: vegetal, slightly sweet from peas and carrots, and aromatic from garlic and thyme. The texture is layered—soft carrots and celery, al dente green beans and zucchini, and silky wilted greens—so every spoonful is balanced.
“Five stars! Light yet satisfying, and the greens stayed vibrant. I doubled the recipe for meal prep and it reheated beautifully.” — A satisfied reader
Key Ingredients for Spring Green Minestrone
Olive oil: Olive oil is your flavor carrier; it softens aromatics and creates a glossy mouthfeel. Buy extra-virgin for cold use and a fruity finish, but for higher-heat sautéing choose a milder olive oil or a blended oil with a higher smoke point. If you substitute butter, expect a rounder flavor but reduced heat tolerance and slightly less sheen.
Broth (vegetable or chicken): Broth creates the soup’s base flavor and carries the herbs. Use low-sodium broth so you control seasoning, and homemade or high-quality boxed broth will give cleaner, layered flavors. Substituting water will thin the depth—add a splash of soy sauce or miso for umami if broth is unavailable.
Spinach or kale (fresh): Greens add color, iron, and texture contrast. Baby spinach wilts quickly and keeps a tender mouthfeel; curly kale holds shape longer and adds chew. If you replace with chard or arugula, expect slightly different bitterness; adjust cooking time so greens don’t overcook.
Peas (fresh or frozen): Peas bring bright sweetness and a pop of color. Frozen peas are picked and flash-frozen at peak flavor—no compromise there. If substituting with canned peas, rinse and add later to avoid mushiness; frozen is preferred for texture.
Full Ingredient List for Spring Green Minestrone
– 2 tablespoons olive oil
– 1 onion, chopped
– 2 garlic cloves, minced
– 2 carrots, diced
– 2 celery stalks, diced
– 1 zucchini, diced
– 4 cups vegetable or chicken broth
– 2 cups fresh spinach or kale, chopped
– 1 cup green beans, trimmed and cut into pieces
– 1 cup peas (fresh or frozen)
– 1 teaspoon dried thyme
– Salt and pepper to taste
– Fresh herbs (basil, parsley) for garnish
– Grated Parmesan cheese (optional)
Step-by-Step Instructions for Spring Green Minestrone
Step 1: Heat the olive oil over medium heat in a large pot until it shimmers without smoking.
Pro Tip: Look for a thin sheen across the oil and a faint wavy shimmer; if it smokes, lower the heat immediately.
Step 2: Add the chopped onion and minced garlic, sauté until softened, about 3-4 minutes.
Pro Tip: The onions should become translucent and lose their raw edge; garlic should smell fragrant but not browned or bitter.
Step 3: Stir in the diced carrots and celery; cook for an additional 5 minutes until they begin to soften.
Pro Tip: The carrots should develop a slight gloss and the celery should still have a tiny snap—if they darken, your heat is too high.
Step 4: Add the diced zucchini and green beans, stirring frequently.
Pro Tip: After a minute or two, the zucchini skin will become shiny and the beans will look brighter green; if the veggies steam instead of sauté, raise the heat briefly.
Step 5: Pour in the broth, bring to a boil, then reduce heat and simmer for about 10 minutes.
Pro Tip: At a gentle boil you’ll see rolling bubbles; reduce to a simmer (small, steady bubbles) so flavors meld without breaking down vegetables.
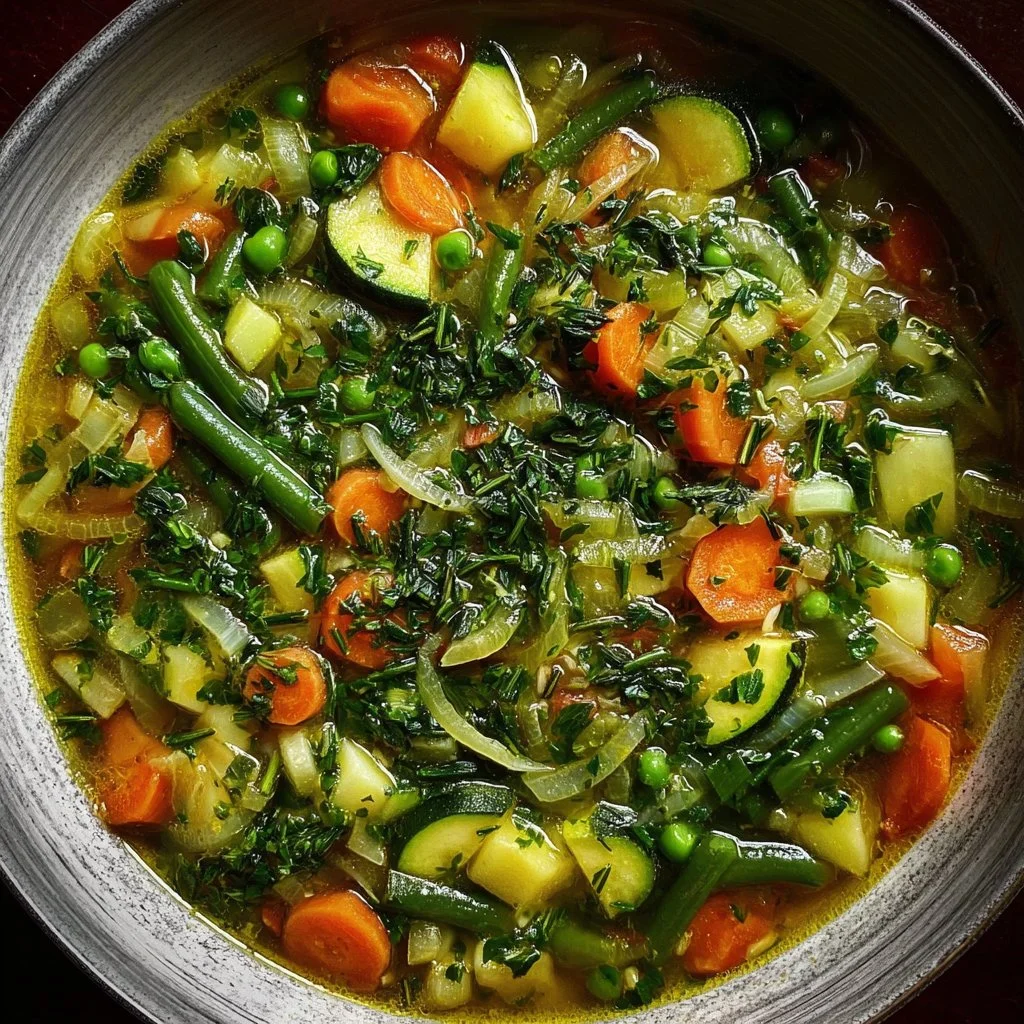
Step 6: Add the chopped spinach or kale, peas, dried thyme, salt, and pepper; stir until well mixed.
Pro Tip: The greens should sit on top briefly before wilting; if you see immediate grayness, stir gently to redistribute heat and prevent overcooking.
Step 7: Cook until greens are wilted and all vegetables are tender, about 5 more minutes.
Pro Tip: Tenderness test: pierce a carrot cube with the tip of a knife—it should offer slight resistance but not be stiff.
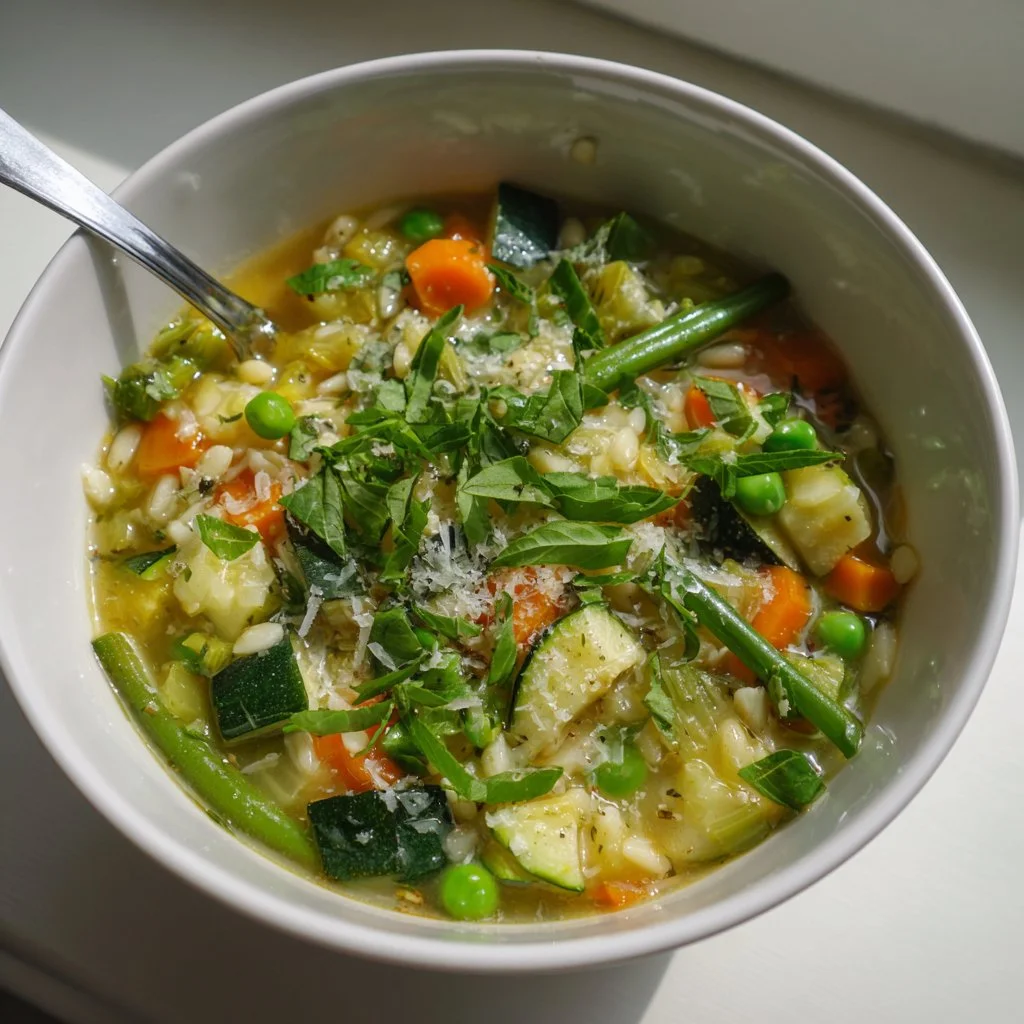
Step 8: Serve hot, garnished with fresh herbs and optional Parmesan cheese.
Pro Tip: Serve immediately while steam rises and herbs smell bright; grated Parmesan should melt into the broth on contact for a silky finish.
Expert Tips for Spring Green Minestrone
– Temperature tip: Start on medium heat and lower to a gentle simmer once the broth goes in; boiling too hard will turn vegetables mushy.
– Texture troubleshooting: If soup turns too soft, shorten simmer time next time and add quick-cooking greens like spinach at the very end.
– Equipment tip: Use a heavy-bottomed stockpot for even heat distribution and to prevent scorching at the base.
– Common mistake: Overcrowding the pot when sautéing—work in batches or give vegroom to caramelize for better flavor.
– Seasoning tip: Always taste and adjust salt at the end, especially if using salted broth or adding cheese garnish.
– Color preservation: Add a pinch of salt to the cooking water or maintain lower simmer to keep green vegetables vibrant.
– Make-ahead tip: Slightly undercook vegetables if you plan to reheat; they’ll finish cooking when warmed.
– Herb handling: Add delicate herbs like basil at service to preserve aroma; sturdier parsley can go in during cooking.
Storage & Freezing for Spring Green Minestrone
Fridge storage: Cool the soup to room temperature no more than two hours after cooking. Store in airtight containers for 3–4 days in the refrigerator. Use shallow containers to speed cooling and prevent bacterial growth.
Freezer storage: For longer storage, freeze in heavy-duty freezer bags or rigid containers for up to 3 months. Leave about an inch of headspace for expansion if using containers. Consider portioning into single-serving portions for quick lunches.
Thawing: Thaw overnight in the refrigerator for best texture. For faster thawing, place the sealed container in cold water, changing the water every 30 minutes until pliable.
Reheating: Warm over low-medium heat on the stovetop, stirring occasionally until steaming. Avoid boiling; a rolling boil will break down textures and dull flavors. If the soup thickens during storage, thin with a splash of water or broth while reheating.
Variations & Substitutions for Spring Green Minestrone
Vegetarian to heartier: Keep it vegetarian by using vegetable broth and add a cup of cooked cannellini beans for extra protein and creaminess. This will make the soup more filling and add a silky body.
Pasta addition: Stir in small pasta like ditalini or orzo during the simmer and cook until al dente. Pasta absorbs broth—cook the pasta separately and add before serving for leftovers to avoid soggy texture.
Protein boost: Add shredded rotisserie chicken or chopped cooked sausage at the end of cooking for a protein-rich version. The meat will add savory depth and make the soup a complete one-pot dinner.
Lemon-herb brightener: Finish with a tablespoon of lemon juice and extra basil for a brighter, fresher flavor. This transforms the soup into a lighter spring-forward dish and enhances the greens’ vibrancy.
Frequently Asked Questions About Spring Green Minestrone
Q: Can I make Spring Green Minestrone ahead of time for meal prep?
A: Yes. Cook the soup as directed but slightly undercook the greens and vegetables if you plan to reheat during the week. Store in airtight containers in the fridge for up to 4 days and reheat gently on the stovetop. If you add pasta, store it separately and combine when reheating to avoid mushiness.
Q: Is Spring Green Minestrone gluten-free?
A: The base recipe is gluten-free as written—just ensure your broth is gluten-free and avoid adding pasta or use a certified gluten-free pasta. Check labels on broth and any packaged seasonings to confirm.
Q: Can I use frozen greens instead of fresh spinach or kale?
A: Frozen greens can be used but will release more water and have a softer texture. Thaw and drain frozen greens well, and add them toward the end of cooking to prevent overcooking. Adjust salt because frozen greens can mute flavors.
Q: How do I keep green vegetables bright when making the soup?
A: Cook at a controlled simmer, add quick-cooking greens last, and avoid overcooking. A final splash of lemon or a short blanch in salted water before adding to the soup can also preserve color.
Q: Can I pressure-cook Spring Green Minestrone?
A: Yes, but only for part of the process. Sauté aromatics and root vegetables first, then pressure-cook with the broth for 3–5 minutes. Add quick-cooking vegetables, peas, and greens after depressurizing to maintain texture and color.

Final Thoughts on Spring Green Minestrone
This Spring Green Minestrone is bright, adaptable, and built to be forgiving while delivering layered flavor. Please leave a star rating in the recipe card below and pin this to your favorite Pinterest board so you can make it again.
In addition, if you’re curious about variations and other takes on spring minestrone, check out Occasionally Eggs’ Spring Green Minestrone for a slightly different veggie mix. For a beautiful herb-forward version, see The Defined Dish’s Spring Green Minestrone. For a vegan-friendly adaptation and notes on texture, review Plantifully Based’s Spring Green Minestrone Soup. Pamela Salzman offers a bright, healthy approach at Pamela Salzman’s Spring Green Minestrone. For a classic pantry-friendly spring minestrone, take a look at Simply Recipes’ Spring Minestrone Soup.
Spring Green Minestrone
Ingredients
Method
- Heat the olive oil over medium heat in a large pot until it shimmers without smoking.
- Add the chopped onion and minced garlic, sauté until softened, about 3-4 minutes.
- Stir in the diced carrots and celery; cook for an additional 5 minutes until they begin to soften.
- Add the diced zucchini and green beans, stirring frequently.
- Pour in the broth, bring to a boil, then reduce heat and simmer for about 10 minutes.
- Add the chopped spinach or kale, peas, dried thyme, salt, and pepper; stir until well mixed.
- Cook until greens are wilted and all vegetables are tender, about 5 more minutes.
- Serve hot, garnished with fresh herbs and optional Parmesan cheese.